Hike the Vermont 5 4,000 Footers Challenge
New England hikers love a good list. Check out Vermont’s 5 highest peaks:
New England hikers love a good list. There’s the 48 in New Hampshire, the 14 in Maine, and the 5 in Vermont. If you’re extra adventurous, there’s the 46 in the Adirondacks in New York to complete for the Northeast list.
After finishing my 48 in the White Mountains in New Hampshire in 2020, I focused my efforts on smaller mountains in Lake Placid with the Lake Placid 9. In 2022, I reset my focus on 4,000 footers.
I decided to tackle the Vermont 5.
I actually hiked one of the Vermont 4,000 footers back in 2016 and then never hiked in Vermont again, despite several visits to the state’s charming towns. I ran races around hilly Stowe and set my eyes on Mt. Mansfield, but hadn’t hiked it yet.
At the start of 2022, I realized I could easily hike the four remaining 4,000 footers. Here’s how I took on the Vermont 5 in winter:
1. Camel’s Hump (4,083 ft)
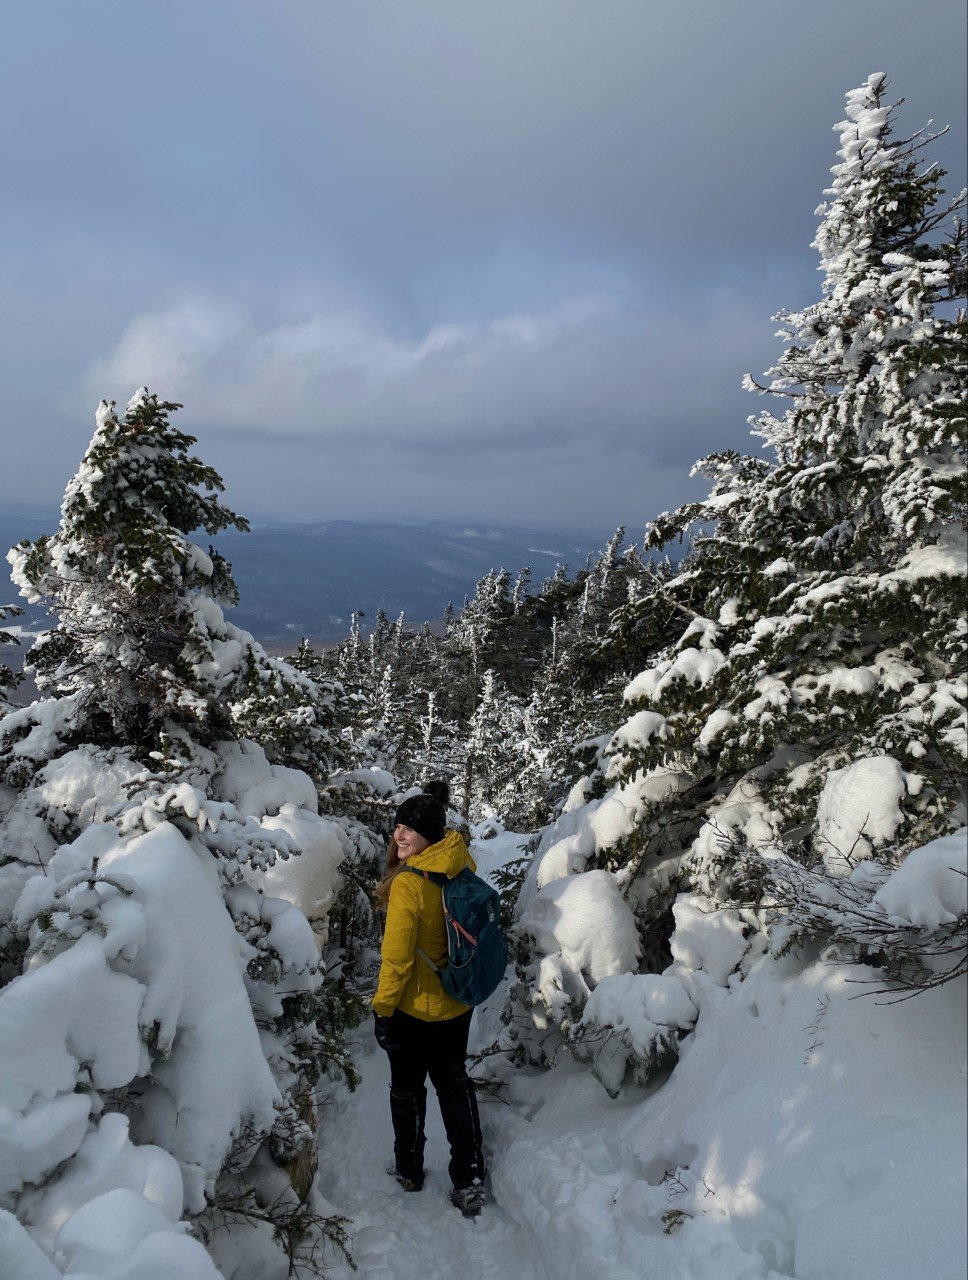
I technically hiked this one in November before the official winter season, but let me tell you it sure felt like winter! My first year in New England, my friend invited me to Burlington, VT for the weekend and told me to pack hiking gear. This looked like my thickest cotton and basic hiking boots. I’m serious. Check out the pictures in this post if you don’t believe me.
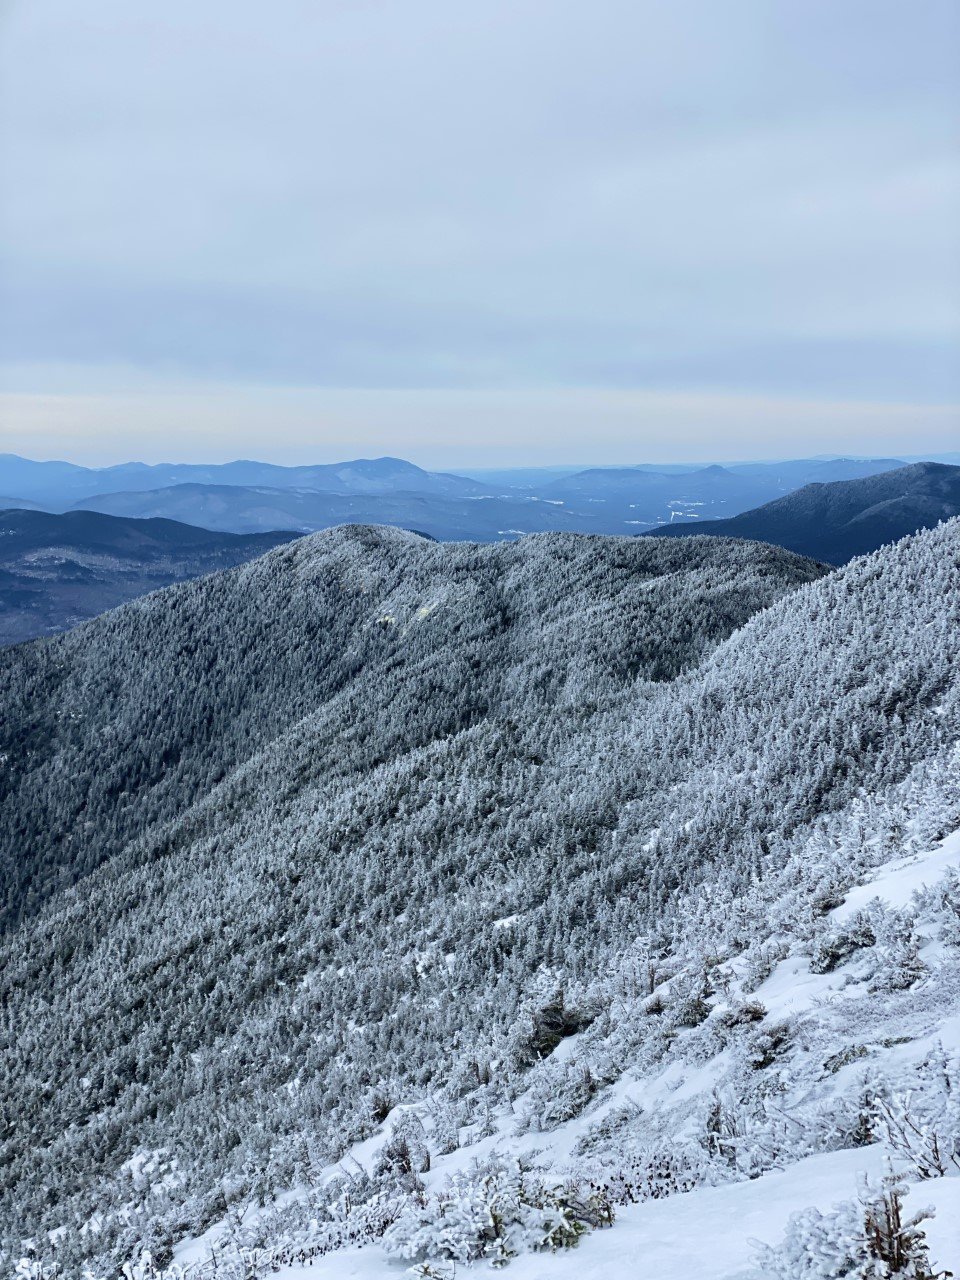
We took the Monroe Trail out-and-back for six miles and around 2,500 ft gain. The views were absolutely breathtaking (could’ve also been the wild winds that took my breath away). I was hooked on winter hiking after this one. 360-degree views of the Green Mountains with a nice decent.
2. Killington Peak (4,235 ft)
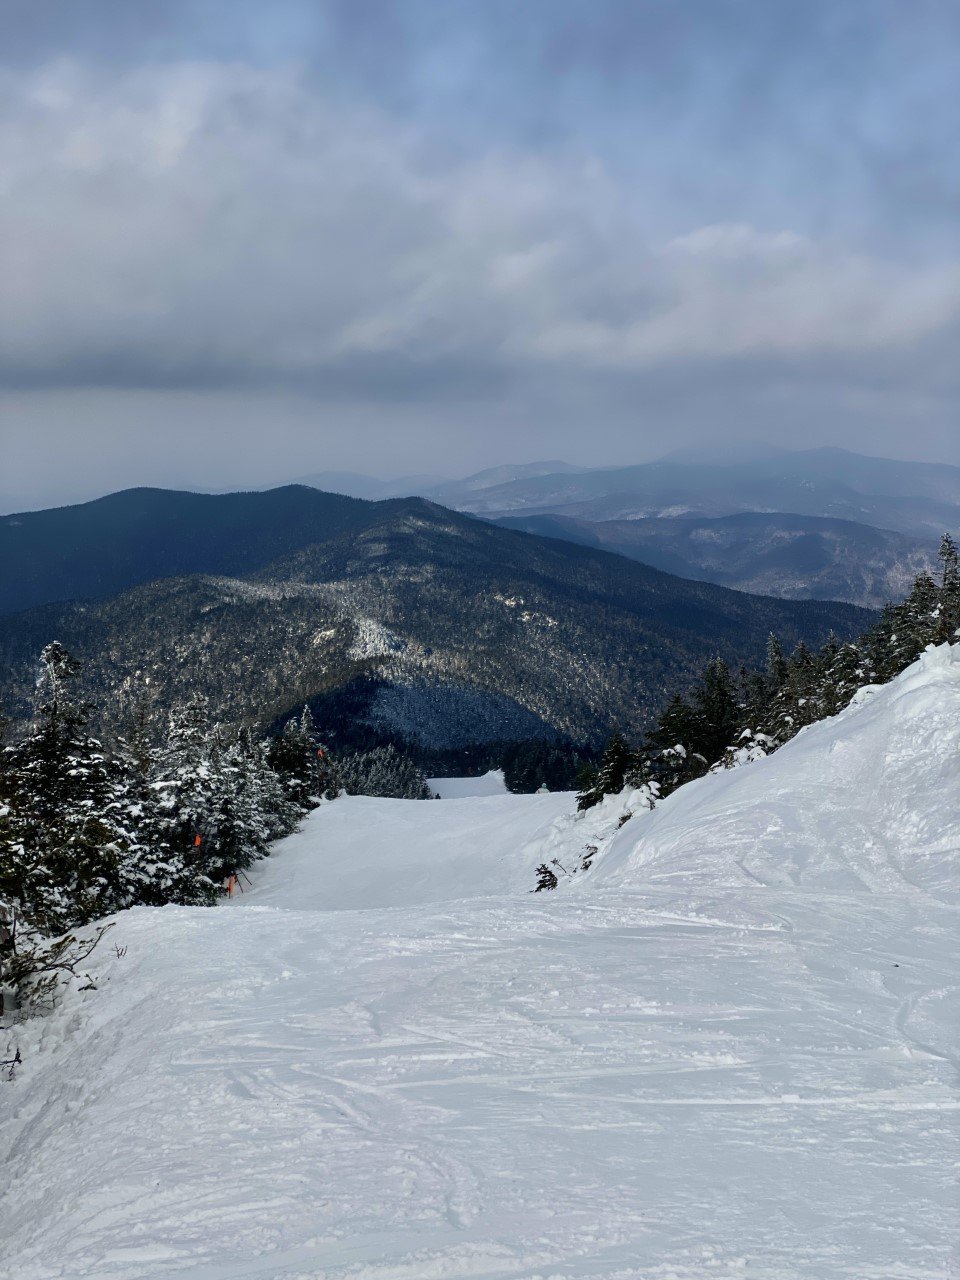
This peak may have a reputation for incredible skiing and stunning views, but I couldn’t tell you if either are true after my hike. I was the only hiker on New Year’s Day at the parking lot. Excited to spend the start of the year outside, but nervous about the conditions.
As I embarked on the Bucklin trail, my worries dissipated. The trail was a moderate climb. Slowly and steadily, I ascended. Surprised by the sweat dripping down in the crevices of my arm as I gripped my backpack straps on my way up. Equally surprising? The hail that began to hit me like Monday morning’s alarm. I reminded myself that this was what winter was in the mountains of New England: a three-course meal ensuring your tongue had a little taste of everything. And I sure was hungry for it.
I spent very little time at the summit considering the hail, along with the incoming text informing me of the weather advisory in the area. It was also a complete wash, so that didn’t quite entice me to stay for the view. The way down was a speedy one. I ended with 6.85 miles logged and 2,559 ft of elevation gain on the out-and-back trail.
3. Mt. Abraham (4,006 ft)
I spent this winter eyeing the forecast like it was another one of my part-time jobs. With full-time teaching and marathon training on my schedule, there were only a handful of days that even allowed for a Vermont day trip. Let alone a day where the winds weren’t treacherous. Pro tip: I use Mountain Forecast to plan out my hikes. On the website, type the mountain you’re hoping to climb, and it gives you everything you need to know to make a smart decision: temperature, wind chill, wind miles per hour. All of it for the summit. I can’t tell you the number of times I went hiking when I was a beginner that I’d rely on my iPhone’s weather app and solely look up the small New Hampshire mountain town my hike started in.
I learned pretty quickly that the weather in town isn’t necessarily on the same communication channel. While it’s sunny and warm in town, it can easily be the complete opposite atop the summit.
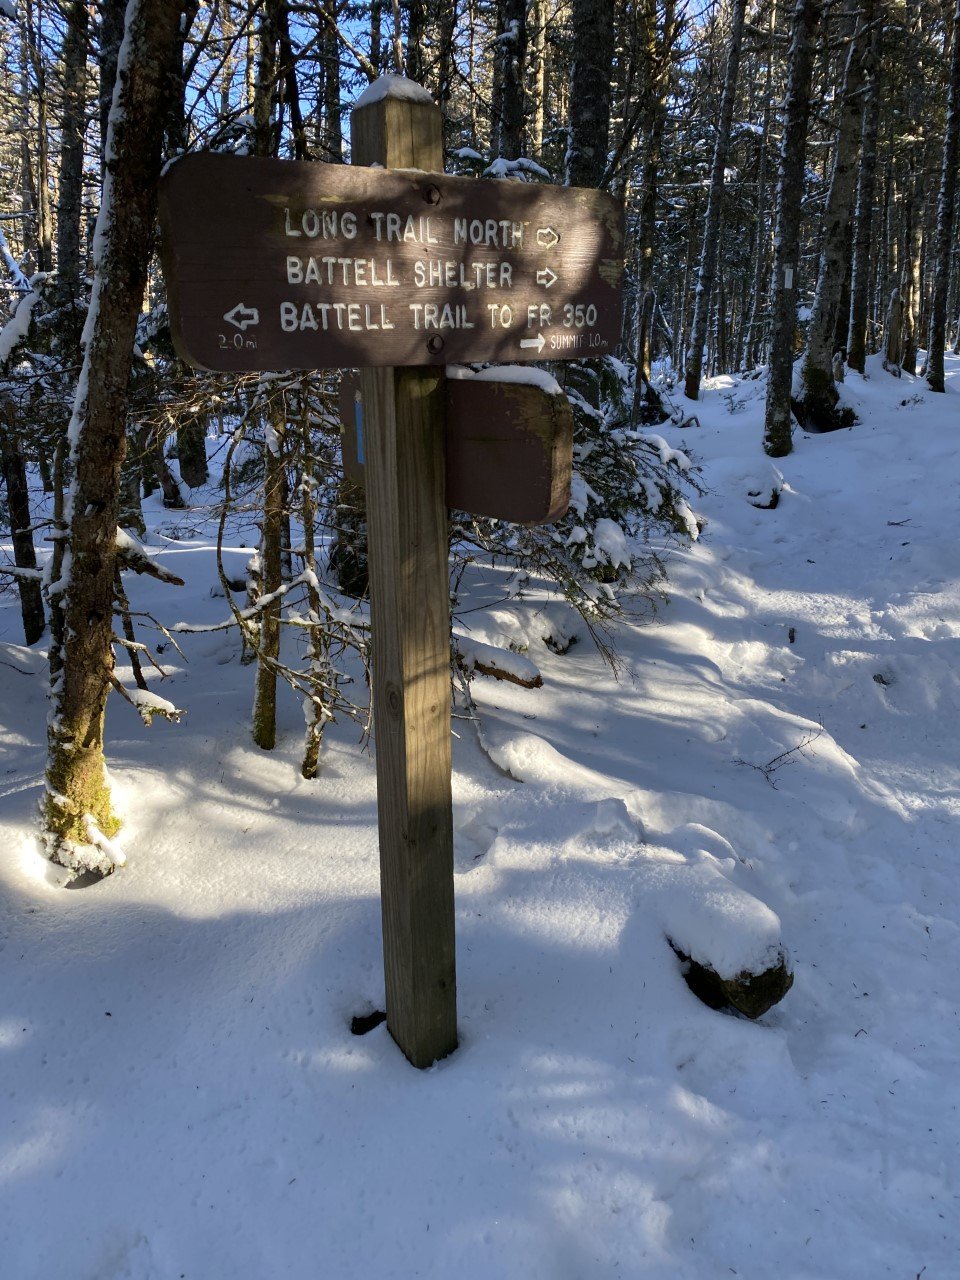
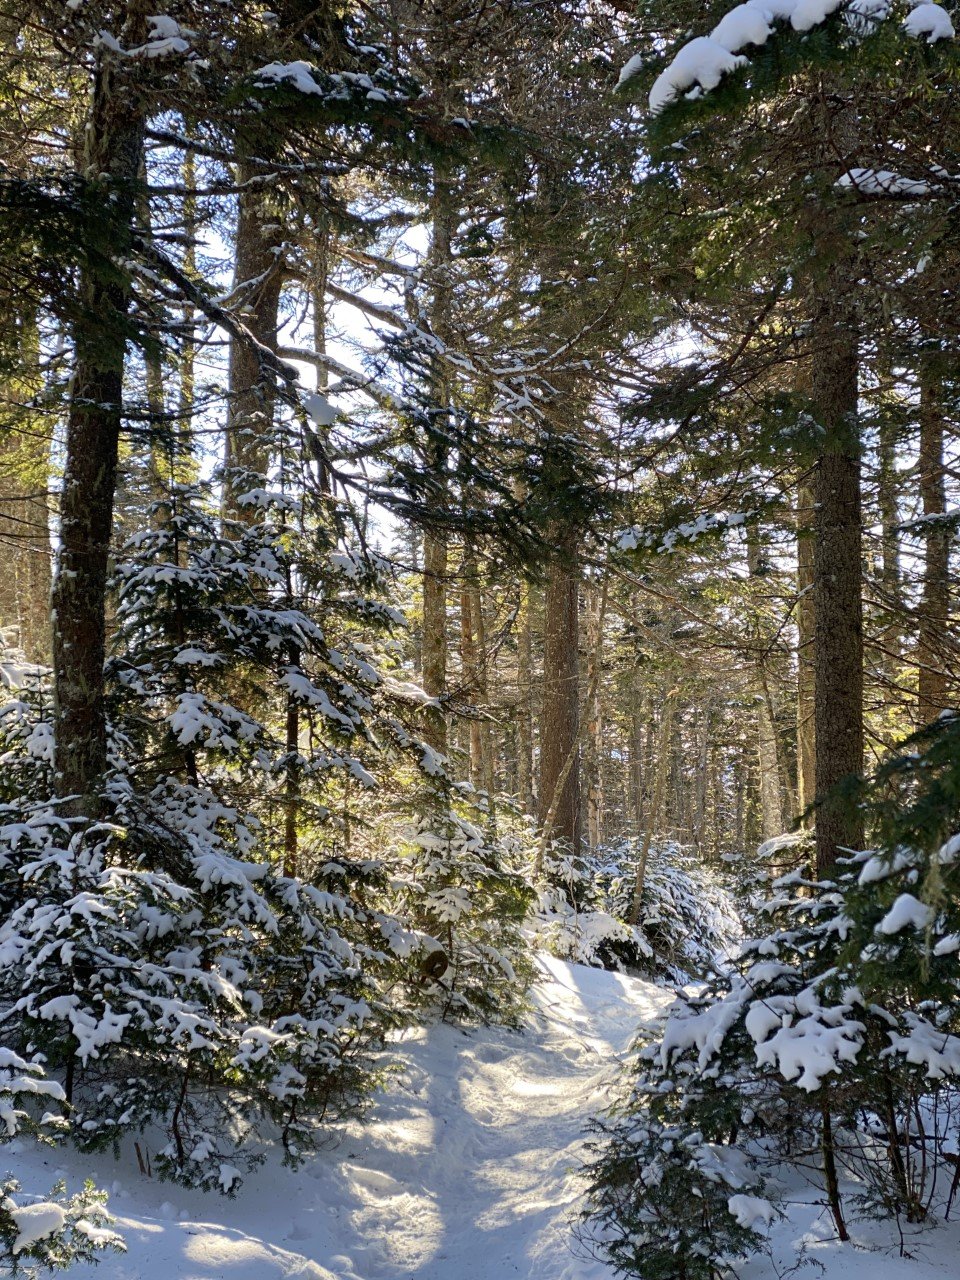
I found easy parking along Elder Hill Road, but I assume it was due to winter dissuading the average hiker from weekend adventuring. From Elder Hill Road, the Battell trail is quick to spot. Another speedy one thanks to packed down snow, I took Battell to the end when it formed into the Long Trail.
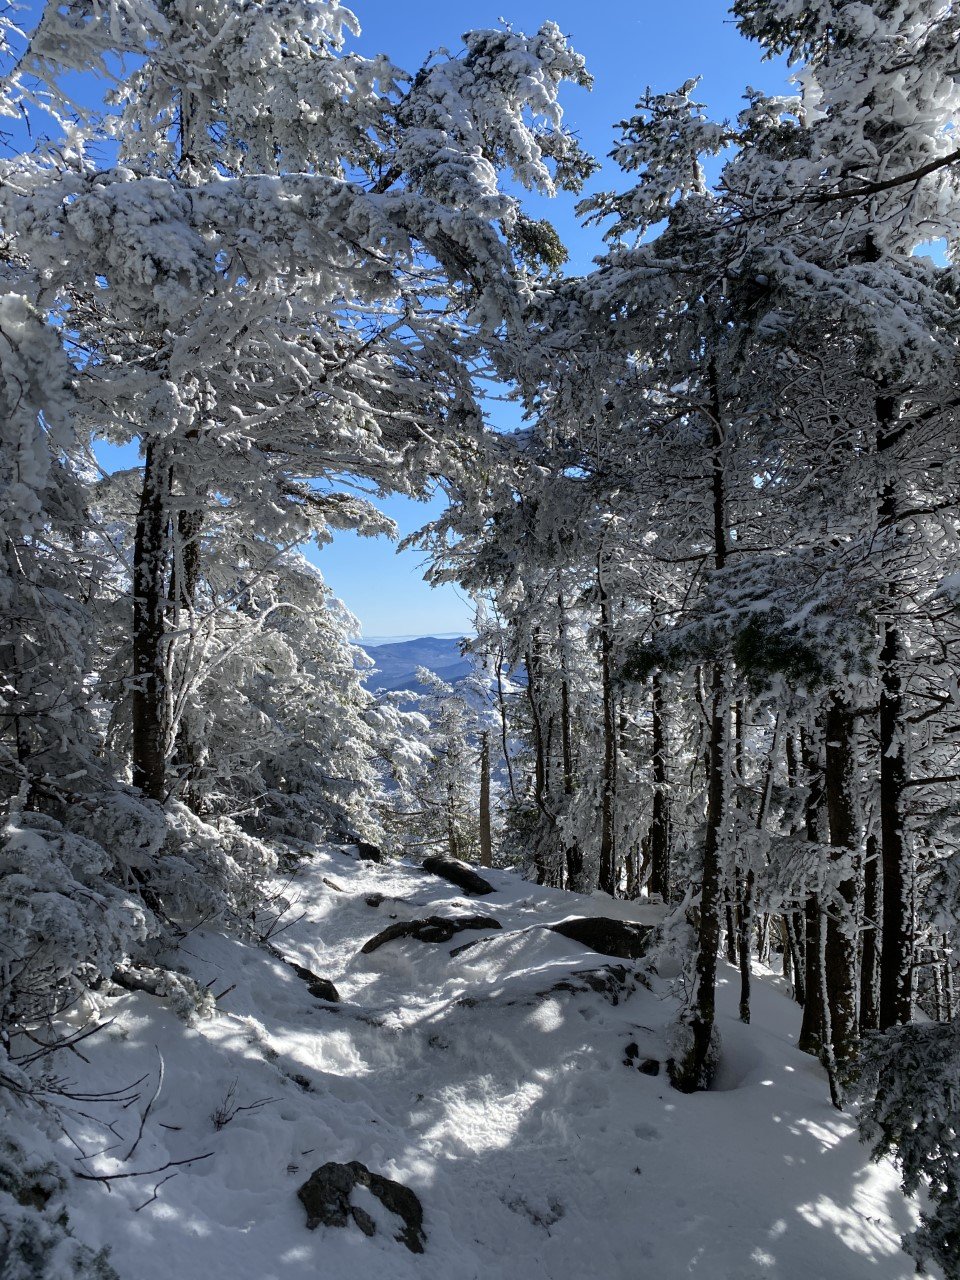
Lincoln Gap Road has a shorter distance hike to the summit, but in winter this road is closed. Regardless, Battell is roughly a six mile out-and-back. The summit offers scaping views of the Green Mountains. There is an old airplane (remnants of a crash) along the summit ridgeline, but with all the snow at the time, I didn’t come across it. Always need to leave a reason to revisit though, right?
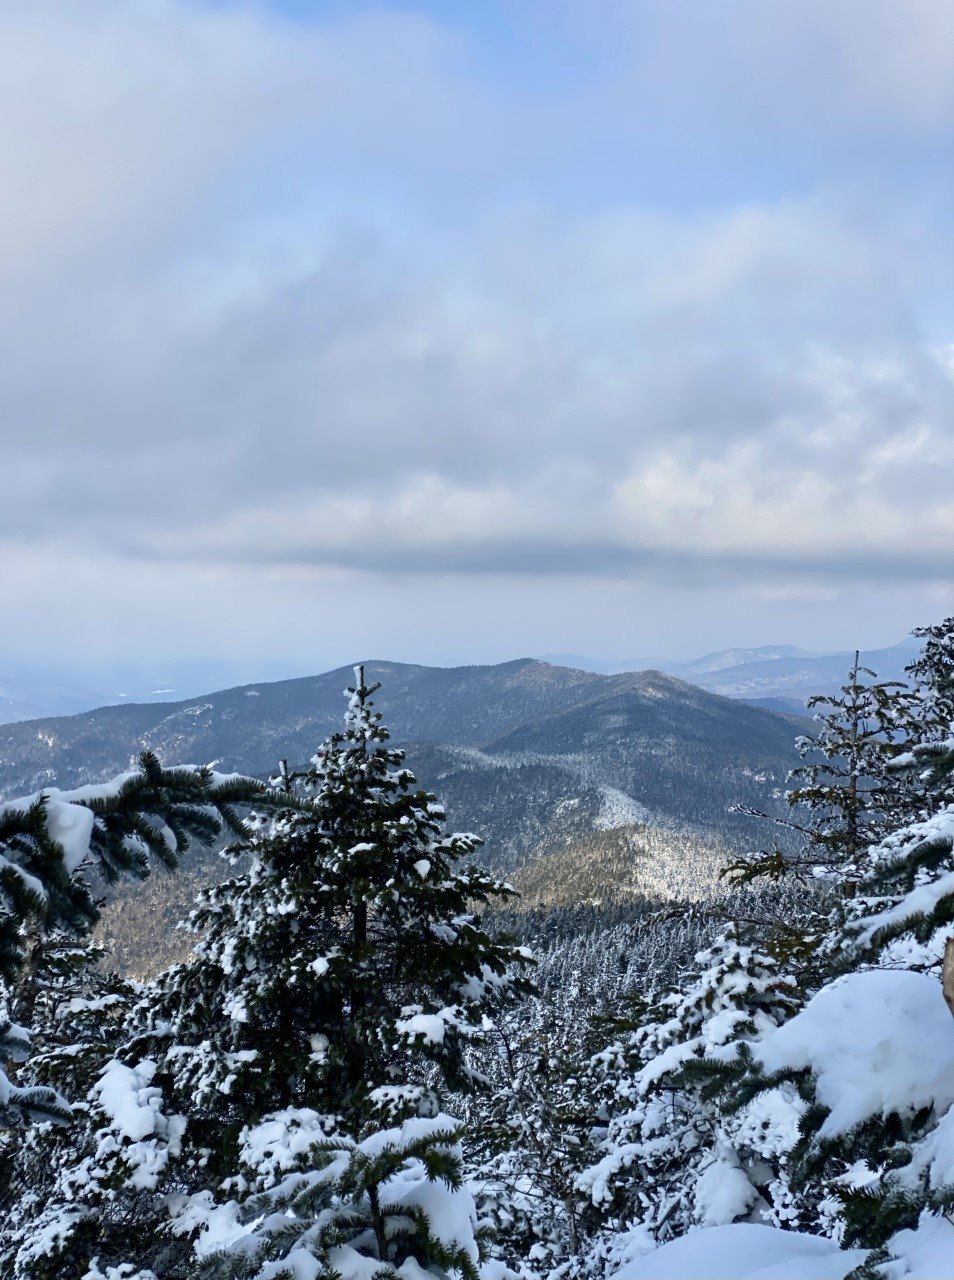
Summit views from Abraham.
With the parking lot in sight, I logged 5.84 miles and 2,700 ft of climbing total.
4. Mt. Ellen (4,083 ft)
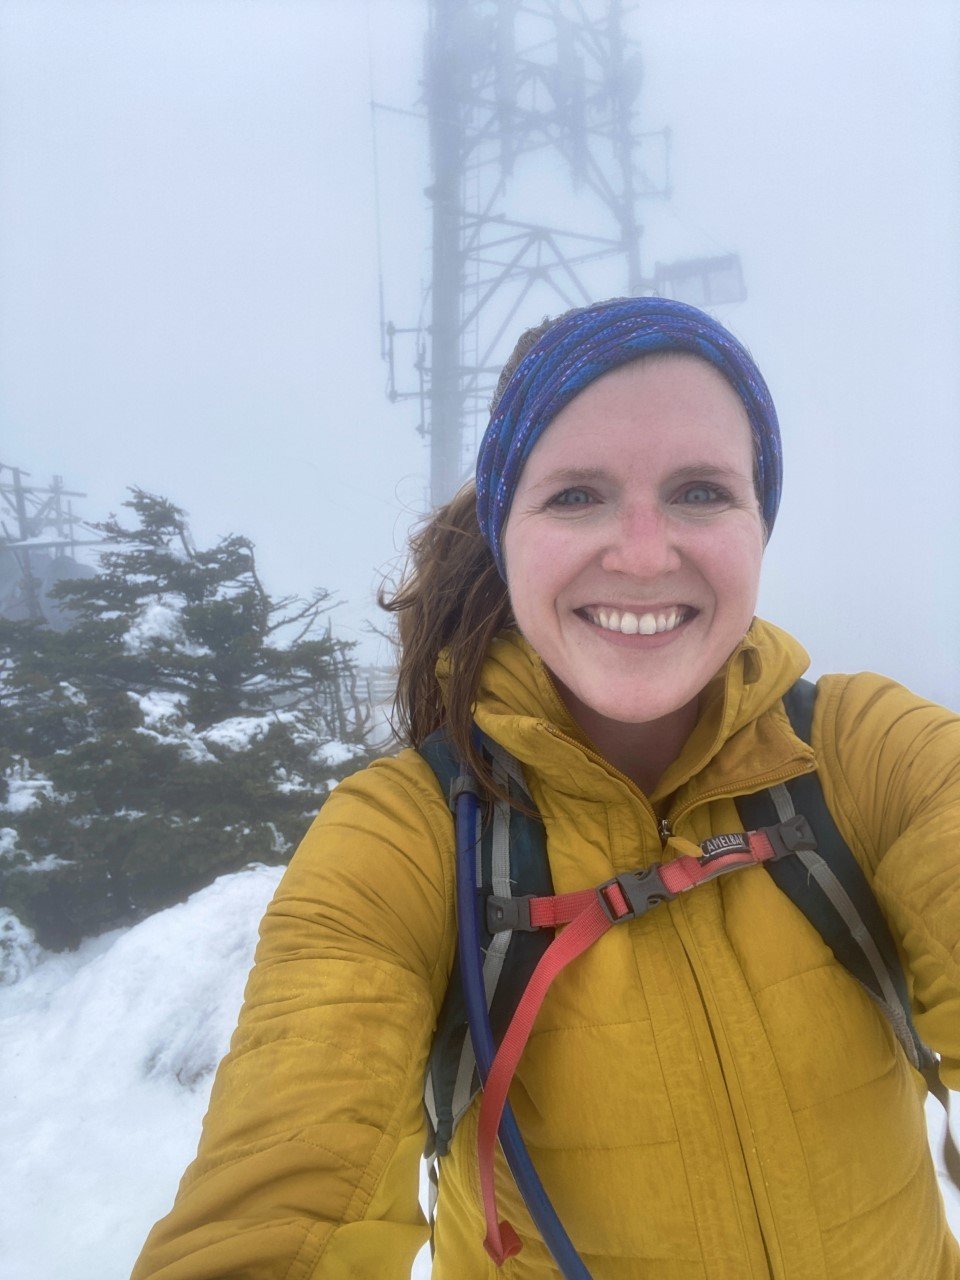
When I parked on Jim Dwire Road, I thought I would be the only one out on the trail today. I almost missed the trail sign because it blended in so well. There were a few cars parked on the side of the road that indicated I was indeed, in the right place. A small dirt road on a residential street, why would I find anything strange with that?
As I made my way to the tiny sliver of trail from the trail sign, I thought about the week before when I was on the opposite side of these mountains. After such a great day meeting Abraham, I could hardly wait to meet Ellen. However, Abraham didn’t relay the memo to Ellen to pack down the fresh, fluffy powder for me.
It took me quite some time to make my way to the summit as I didn’t have snowshoes. I called Ellen just about every name other than her own as I struggled to the summit. The sun was setting soon and the temperature was dropping. I made it to the summit, only to be met with skiers swiftly speeding past me.
After a moment to enjoy the view, I raced against the daylight (usually a losing battle in winter) to return to my car before the sun called it a night. At 7.11 miles roundtrip and 2,700 ft ascended, I can confidently say I met Ellen, but she wasn’t my favorite.
5. Mt. Mansfield (4,393 ft)
Mt. Mansfield for the big finale felt fitting. As the tallest peak in the tiny state of Vermont, I wanted a clear day at the summit. I watched the forecasts and my training plan schedule, and finally found an opening in March that let me head up Mansfield.
I parked on Mountain Road in Underhill State Park and began my steady climb along another road that isn’t maintained in winter. The road was a decent climb, but quiet. I took the CCC road with a quick shortcut thanks to the Eagles Cut trail to get me onto the trail I set out for: Sunset Ridge.
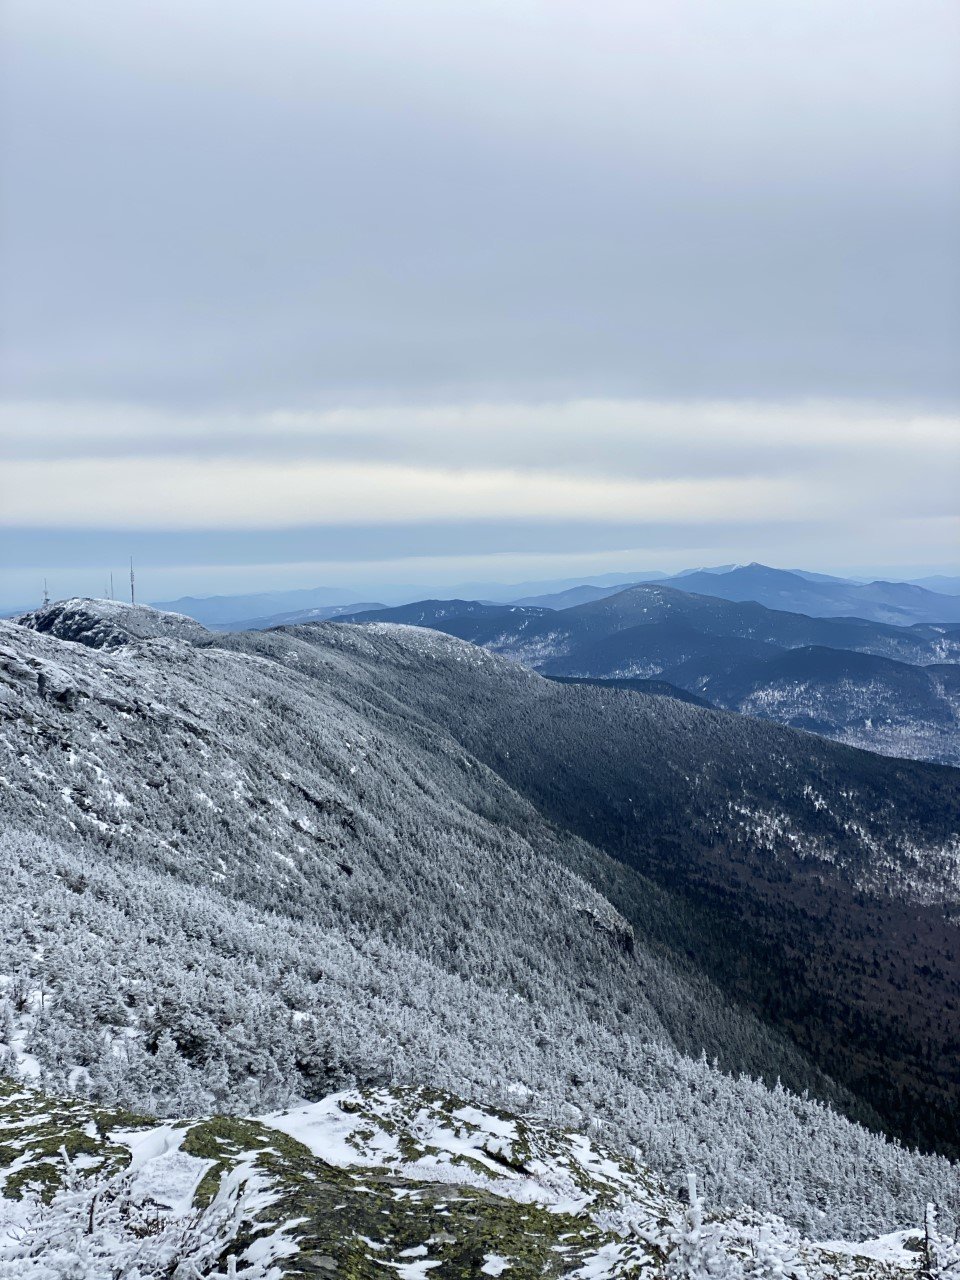
Sunset Ridge is definitely a gem of a trail. There is plenty of exposure on the trail with a little rock scrambling. Normally I love that, but with some wild winds, I was nervous about taking this trail down. Sunset Ridge joins with the Long Trail near the summit for a totally exposed view of the Green Mountains, including a nearby ski lift. I had the trail that day (and the summit) to myself, and it felt like such a great way to finish off hiking the highest peaks in Vermont.
When it came to descending, my heart sank contemplating returning Sunset Ridge with how windy and exposed it was. However out of the two trails (Sunset Ridge and Laura Cowles) from Underhill State Park, Sunset was less steep.
A seasoned hiker told me to take Laura Cowles (the steeper, tougher trail) down and I’m so glad I listened! I was originally worried of exposure descending Laura Cowles, but that trail, from the summit, quickly turns forested. Before I realized, I made my way down to the road and logged 6.6 miles and 3,130 ft of climbing.
Have you hiked any of Vermont’s highest peaks? Would you take on the VT 5?
3 Colorado National Parks to Visit That Aren’t Rocky Mountain
Great Sand Dunes • Black Canyon of the Gunnison • Mesa Verde
This is in Colorado. I know, I was shocked too.
When you think of Colorado, what comes to mind? Almost immediately glimpses of Denver appear or the snow-capped summits of the Rocky Mountains range wander through your head. Denver and the Rockies definitely deserve the hype, but they aren’t all that Colorado has to offer you!
Next time you plan a trip out West, or one to Colorado specifically, add these lesser-known destinations to your must-see list. My biggest piece of advice is to purchase the Annual Parks Pass ($80). If you do a Southern Colorado trek, each of these parks have entrance fees of $15-$30, so it may be more beneficial to pay the one-time $80 cost. I’m all about saving money where I can! I happened to also be trekking to Moab, Utah, so I knew I’d save since I was also entering three parks there that each have an entrance fee.
Last summer on a cross-country road trip, the ultimate destination was Idaho. How to get there, however, was up for discussion. After some great Kansas City barbeque, Colorado seemed like it was just minutes away, so I planned for that state next on the itinerary.
Colorado is home to four national parks— one of which is way more popular than the others. Rocky Mountain National Park is well-known for good reason! It’s easily accessible from Denver and it’s breathtaking. I visited the park a few years ago, so I opted out of revisiting this time around.
Instead, I traversed southern Colorado exploring the other national parks this gorgeous state has to offer. And what I discovered is that they are each true gems that not many people know about!
While you need a permit now to enter Rocky Mountain National Park due to its extreme popularity and congestion (4.4 million visitors in 2021!), the remaining three national parks have so few visitors it’ll feel like you have the park to yourself at some times.
Though I love a good tourist moment like when you first lay eyes on the Rockies, or when you witness the exact point when Ol’ Faithful erupts, I also take great pleasure in those quieter moments. The ones that not many are able to experience.
Here are the national parks that you should definitely visit in Colorado:
1. Great Sand Dunes National Park
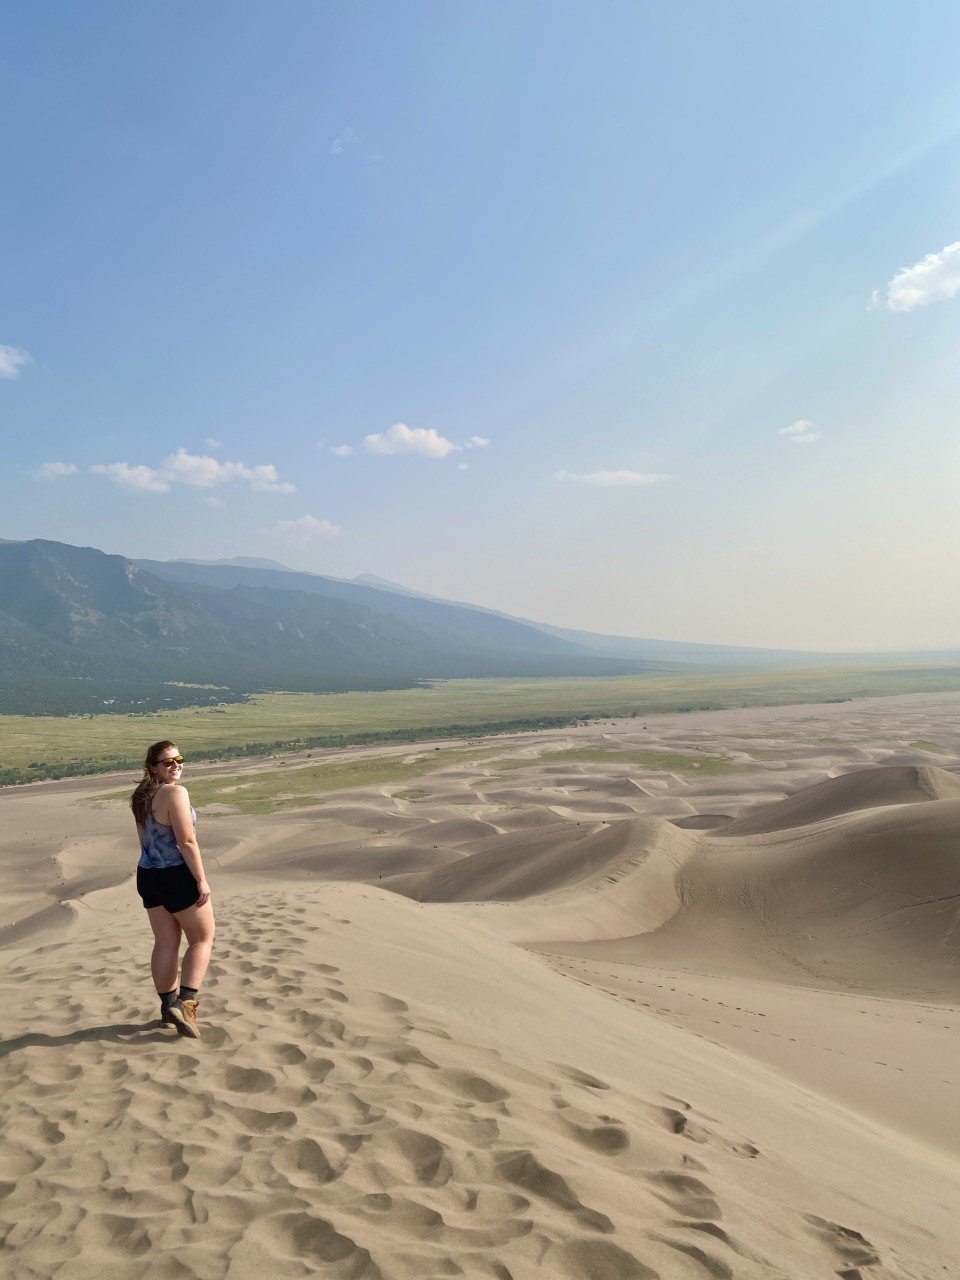
We all know Colorado has the mountains, but sand dunes? And North America’s tallest ones at that?
In the southwest pocket of Colorado, in the town of Mosca, that’s exactly what you’ll find. A striking mountain range that serves as a backdrop to the sheer beauty of sand several hundred feet in the sky, seemingly out of nowhere.
There are three dunes that top all the others: High Dune, Star Dune, and Hidden Dune. For all three, park at Dune Parking just past the Visitor Center.
High Dune isn’t the tallest dune, but it is the quickest to get up. If you are only passing through the park, this is the perfect one to tackle. From the parking lot, head straight up the dunes. It’s a little under 700 feet and about three miles total.
Star Dune and Hidden Dune are the tallest – Hidden is slightly taller than Star. These two are longer treks (around 6-7 miles).
This park is one of the least visited (as are the other two on this list). In 2019, Great Sand Dunes had 527, 546 visitors. Obviously that number has risen with the increase of road trips and stateside travel, but it’s still nowhere near the looks of visitor numbers in popular parks.
Tips: Start early or go later in the afternoon. Sand can really heat up. If you’re into it, rent a sandboard from town to save yourself time once you hike up. There is a water station at the parking lot to rid yourself of sand. Though it might stick around for longer than you’d like!
Best time of year to visit: Fall or winter to see the contrast of the mountainscape behind the dunes. Summer brought welcomed warmth on a windy day at the dunes. You can’t go wrong!
Where to stay: The dunes can be a day trip, but if you want to take advantage of seeing the stars at night, I would camp within the park at the designated campground, Piñon Flats.
2. Black Canyon of the Gunnison National Park
The Black Canyon is one of the few places I’ve visited that left me in utter awe. This park truly is phenomenal. Located right by the charming, small town of Montrose, this park is a hidden gem. Considering it is one of the deepest canyons, it makes sense it isn’t visible to most people.
The drive in isn’t too captivating, but as soon as you stop at the first overlook, the jagged rock structures and sheer darkness along the canyon edges will surely give you a reason to not look away.
The Gunnison River in all its glory.
This park only had 432, 818 visitors in 2019. That blows my mind. There is truly something for every explorer at this park. World-renown fishing, incredible hikes, and stunning vistas.
I recommend driving down South Rim Road and stopping at each view along the way. Each trek is short and provides new angles of the canyon. I couldn’t get enough of its depth!
Tips:
Spend two days in this park. One day can be spent exploring all the overlooks and going on short hikes to see the true depths of this canyon. The next day can be spent with an obtained permit to go down into the canyon on the Gunnison route. This route is an incredible 2.7 mile hike with 1,700 ft elevation gain. The trail is minimally marked and a very limited number of hikers are allowed each day, fueling the intensity of this hike.
The first viewpoint from the entrance of the park opens up to this scaping view of the Black Canyon.
Best time of year to visit: Summer. This park is so infrequently visited that parking wasn’t an issue, neither was overcrowding at any lookout point. The roads are also closed in winter, so that’s something to keep in mind.
Where to stay: KOA in Montrose, CO. This KOA is very affordable and conveniently close to both the main street and the park. As with most KOAs, you can camp in a tent or stay in a cabin!
3. Mesa Verde National Park
These cave dwellings were built around the end of the 12th century. How wild is it that we can view (and walk among them) today?
I have had this park on my list from the beginning of my park journey. Famous for the cliff dwellings, this park was designated a UNESCO World Heritage Site in 1978. One of the first in the United States!
Despite how incredible this park is, only a little over half a million people visited in 2019 (556,203).
I did a self-guided exploration of this park for half a day, soaking in the cliff dwellings from every angle I could and from every lookout point possible. I suggest driving along the Mesa Top Loop. This road will give you access to neat stops like the Sun Point View and views of the cliff dwellings. If you’re short on time, definitely take a ride along this loop road to absorb as much as you can.
I love imagining what it would’ve been like to discover places like this (and Machu Picchu) for the first time. Here is a cave dwelling from an overlook point.
Tips: For guided tours, book in advance! There’s nothing worse than arriving at a new park, hopeful to see something, only to find out it’s booked. You can book your guided tour here.
Best time of year to visit: Almost every season. Seriously! I visited in August and never struggled for a parking spot. It’s very unvisited, which makes it quite the hidden gem. However, if you really want to take a guided tour, you need to visit May-October as they are not offered in the winter and spring months.
Where to stay: Cortez/Mesa Verde KOA Journey in Cortez, CO.
Have you visited any of these Colorado national parks? Which one is on your list?
Loved this post? Then you’ll love these:
Visit America's Newest National Park: The New River Gorge, WV
Experience the Best of Hawaii’s Haleakalā National Park
How to Spend 24 Hours in Ithaca, New York
Here’s what to do with 24 hours in Ithaca, New York:
1. Hike in…
One part about teaching in New England I love is having an additional winter break. A week off in February right when the days are short, and the weather is cold is perfect. A close friend of mine from Texas decided to visit for the weekend with only one request: to experience winter.
After a few warmer days, I knew we needed to head north. One spot that’s always been on my list is Ithaca. Known mostly for two colleges in town, Cornell and Ithaca College, Ithaca has way more to offer than an incredible education.
A quaint, charming town way north of the common New York city experience proved to be the perfect winter getaway.
Here’s how we spent a day in Ithaca, New York:
1. Hike in Taughannock Falls State Park.
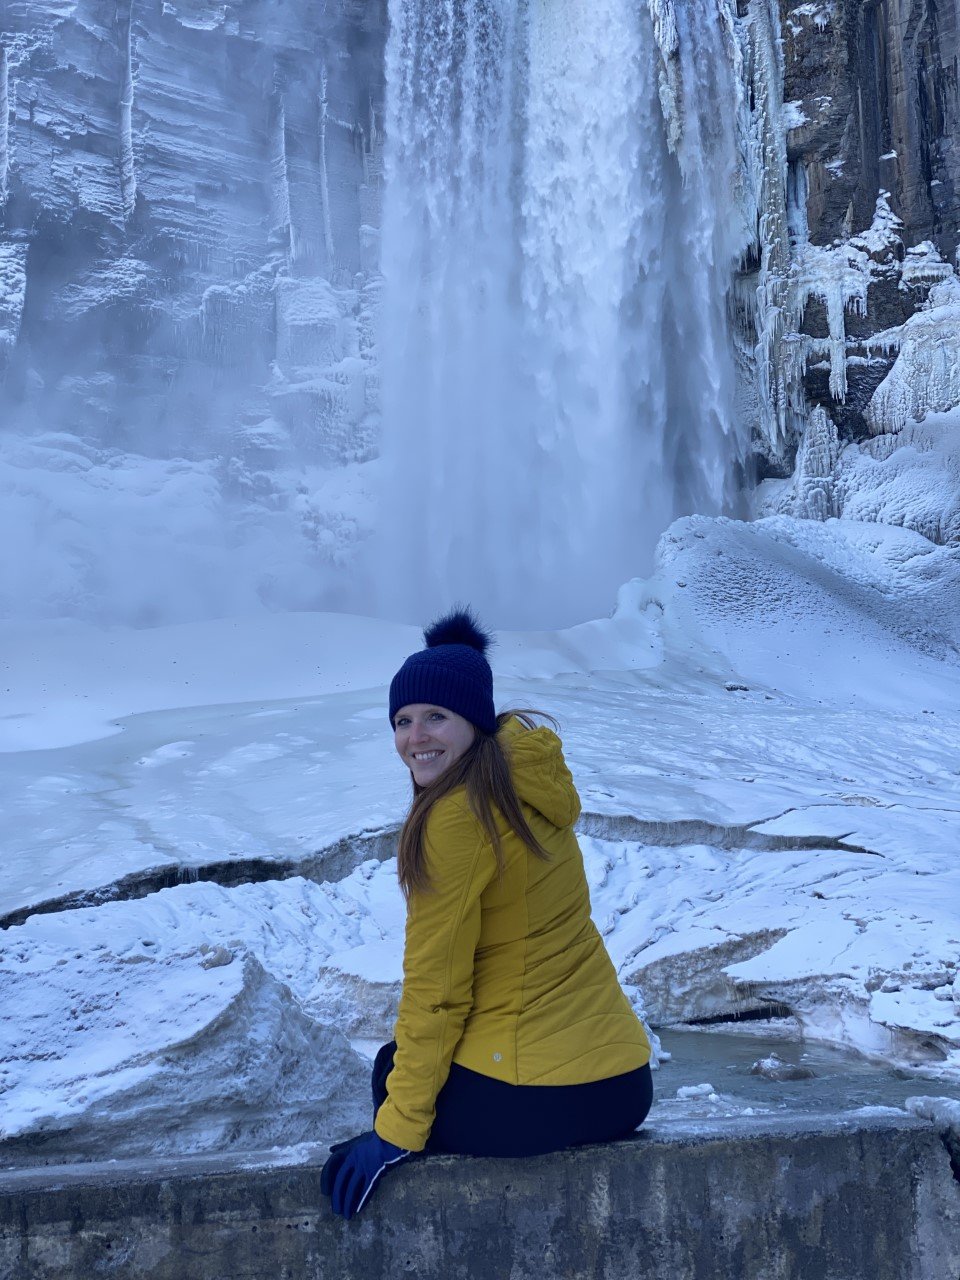
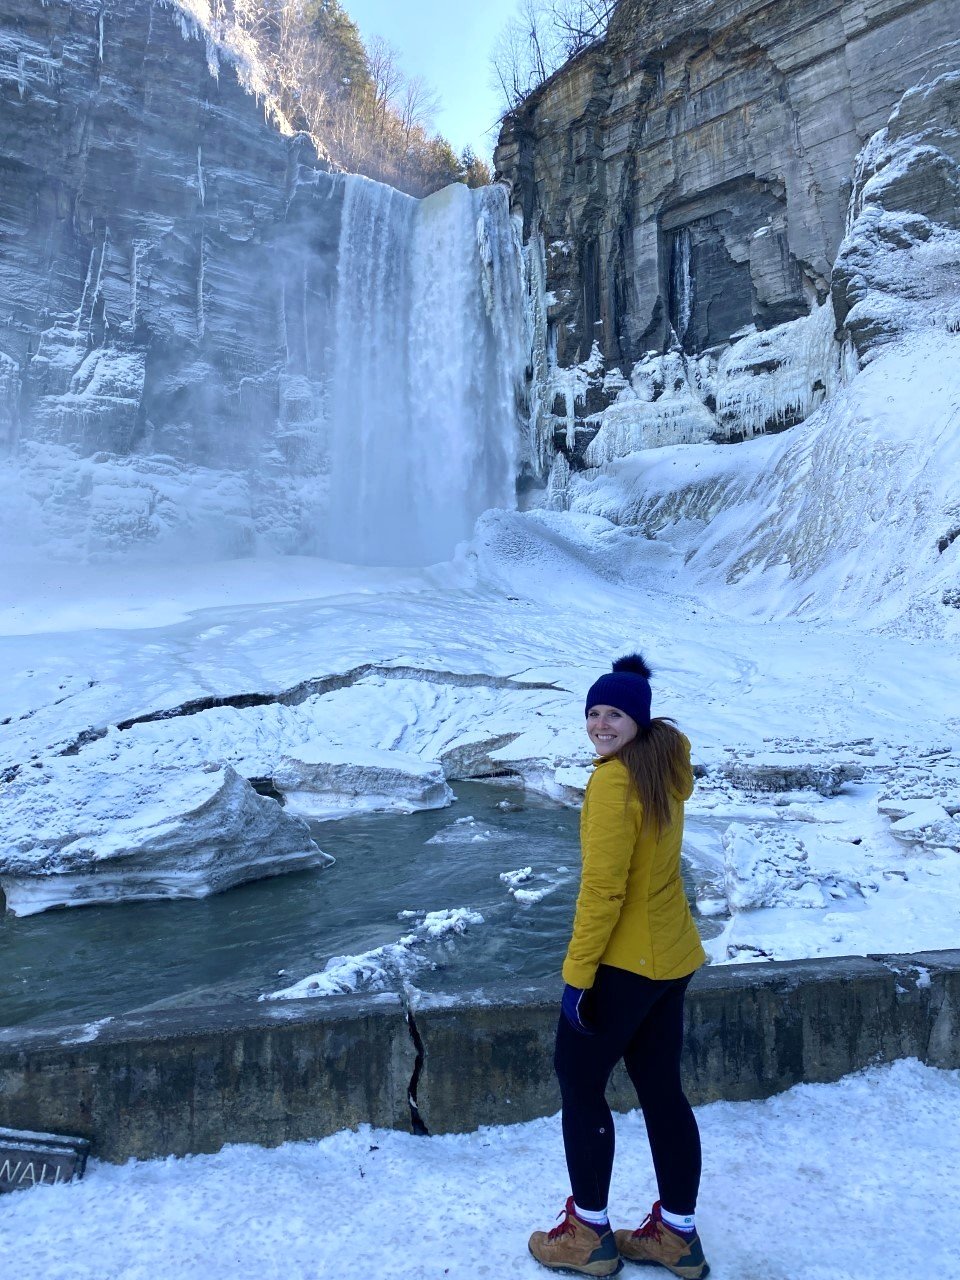
Taughannock Falls in all its wintry glory.
Hike is a loose term given the usual hikes I find myself chasing after. This time, we were chasing waterfalls instead. Taughannock Falls features a massive, 215-foot waterfall. And in winter, you can bet there’s incredible icy formations all around.
The park is popular, but we arrived in the afternoon and managed to snag a parking spot right away. Though the lot is small, the hike itself is a quick walk, so there likely wouldn’t be a long wait for another car to exit shortly.
From the parking lot, we walked on a mostly paved path. The path is extremely scenic – you easily forget you’re relatively close to civilization and it’s a wonder this isn’t a more popular destination.
High cliffs, a rushing river, and the winter magic made this trek feel like we were hiking in a national park.
We reached a short bridge about ¾ of a mile into our walk. The falls are visible from this bridge, but we walked a bit further on the path to get a close-up view.
Surprisingly, Taughannock Falls is actually three stories taller than Niagara Falls (not too far away from Ithaca). I’m not a big waterfall gal, but winter changes the game for me. This view was stunning and I couldn’t get enough!
Once you get your dose, drive up the road a couple minutes for a birds-eye-view of the falls from the overlook.
Things to note:
Both the trails mentioned above are open year-round, while the rim ones are not.
There is a $7 park entrance fee. The overlook is free though!
Dogs are allowed on a leash!
2. Peek into Cornell University’s Uris library.
I love a good library, and Cornell’s Uris Library is quite the gem. Think Belle from Beauty and Beast’s library meets J.K.’s Rowling’s rendition in her novels. The best part? It’s open twenty-four hours with incredible sunset views over nearby Cayuga Lake.
It was peacefully quiet when we entered and remained so as we explored. If you’re a book lover, it’s worth a quick stop here.
We did feel odd being back on a college campus after graduating several years ago. I definitely had flashbacks to all the late nights in the PCL library in Austin. I probably would’ve enjoyed going to the library more with views like these though (or I might’ve studied more…).
3. Grab dinner in Ithaca Commons.
I had major New England vibes in Ithaca Commons – pedestrian-only for a couple blocks of shops and restaurants. Parking was easy to find once we navigated the streets.
One of my favorite finds in a new town is walking along the main street, or in this case, the Commons.
Similar to Burlington, Vermont, Ithaca comes alive in this area. A few restaurants were closed Sunday when we visited (and a few closed permanently, sadly), but there were a handful of delicious options on this last-minute trip.
3. Enjoy a bagel breakfast at Collegetown Bagels.
Since we had a four-and-a-half-hour drive home to Western Mass, we needed to head out early in the morning, but not before finding a coffee and breakfast spot.
We enjoyed a fresh cup of coffee from Gimme! Coffee, followed by bagels from Collegetown Bagels.
Collegetown had every type of breakfast sandwich imaginable and felt like the place you could create something wild and they’d make it happen.
I had the Rise n’ Shine with a couple changes: a bagel with jalapeño cream cheese, roasted red peppers, provolone, and sausage. Anytime there’s jalapeño cream cheese on the menu, you can almost guarantee I’ll be ordering it.
I suggest grabbing the bagels to go and heading to the final stop on the itinerary: Ithaca Falls.
4. Look in awe at Ithaca Falls.
I told my friends I had one more surprise in store. When I parked in an empty parking lot off a street, they were confused. They followed me for a minute and were immediately awestruck by Ithaca Falls.
This waterfall is literally on the side of the road. How is Ithaca so lucky?
Tip: The path down to the falls is paved, but with the wintry weather, it had a lovely layer of ice on top. I used microspikes to get to the bottom of the falls.
We stayed at a charming, pet-friendly, and very affordable AirBnB just moments from Ithaca Commons, which made all the adventuring in under twenty-four hours possible!
Though we only checked out two waterfalls, the Ithaca area is actually home to over one hundred waterfalls. It’s one-liner is “Ithaca is gorges.” So fitting. Have you visited any?
If you enjoyed this post, you may also like:
Everything You Need to See in Acadia National Park, Maine
Lake Placid 9er Hiking Challenge
Over the span of 31.31 miles, I climbed 10,388 ft along these 9 summits. Here’s how I broke down the Lake Placid 9er hiking challenge:
I never grow tired of the beauty of these majestic mountains.
If I’m being honest, the Lake Placid 9 originally didn’t appeal to me. I love the brutal nature of a long day hike. Of miles and hours spent climbing a couple thousand feet for the triumphant feeling at the summit. Even if the view isn’t there.
I first heard about the Lake Placid 9 after hiking a couple of the ADK 46. I thought, why spend my limited time in these gorgeous mountains on very short hikes? Well it turns out, these short hikes sure know how to hold their own.
When mapping out my fall foliage adventures, I usually spend one weekend in the Adirondacks and the rest chasing the colors in New Hampshire. This year, after spending an early September weekend in the Adirondacks showing my parents the beauty New York has to offer, I decided to spend more time in upstate NY. Instead of New Hampshire. I know, I hardly recognized myself too.
My parents were up for a short hike, so I picked the shortest one of the Lake Placid 9: Cobble Hill. After this hike, I had an idea.
What if I combine my fall foliage chasing adventures with this short hiking challenge? It’d motivate me to get out there, and I’d gain more experience up in these rugged mountains. Plus, I’m a sucker for the foliage photos.
And thus began my multiple trips to Keene and Lake Placid, NY in September to October, with one final lap in November.
Over the span of 31.31 miles, I climbed 10,388 ft along these 9 summits. Here’s how I broke down the challenge:
1. Cobble Hill
Distance: 2.89 mi
Elevation Gain: 610 ft
Location: Lake Placid, NY
With my parents visiting for a short weekend, I wanted them to experience an ADK hike without too much exhaustion. Since we were staying in Lake Placid, I figured why not finally check out Cobble Hill.
We hiked the steep, shorter way up, and took the longer, gradual way down. I highly recommend this route because you get a bit of rock climbing with a rope ascending, but descend on a lovely trail walk next to a private pond. It’s a great way to get your feet wet starting out on this challenge!
My route to Cobble Hill is above.
2. Mt. Jo
Third trek up this mountain gave way to a new view!
Distance: 1.94 mi
Elevation Gain: 761 ft
Location: North Elba, NY
Technically this was my third time hiking up this mountain. Every time I hit the trail, my hope to find the iconic view is strong. This hope slowly withers away as I simply couldn’t find the lookout point.
After two failed attempts, I wasn’t leaving the summit this time around without seeing the heart-shaped lake in its entirety. Aptly named, Heart Lake. You’re in luck, because my determined self found it this time so you won’t have to hike up multiple times (unless you choose to!).
Mt. Jo is an extremely popular mountain because of the trails, location, and views. When you arrive at the ADK Mountain Club Loj, you’ll pay $15 as a non-member for a full day or $7 for a half day. Depending on the weekend, you may get lucky with an afternoon. If it’s peak foliage season on a late September or early October weekend, you may way to
After parking, you embark on a short traverse before finding two roads diverged in the woods. You can take the short way, or the long way. I’ve never taken the long way, but be prepared for some stairclimbing if you take the short route.
The trail is a swift one mile up, and I took the same route back. Stay cautious heading down on the rocks, especially if you’re taking this on in the fall where often times rocks are wet due to those rainy autumn forecasts.
Tip: The view at the summit isn’t the best view. The best view is easy to miss. When you’re near the ladders, there’s a trail a few steps away that is sure to give you a reason to love Mt. Jo.
My route is on the left.
3. Mt. Van Hoevenberg
Distance: 4.7 mi
Elevation Gain: 1,047 ft
Location: Lake Placid, NY
Mt. Van Hoevenberg has two trails to the summit: a newly constructed one, and the old one. I was already familiar with the ADK Loj area, so I chose the older path. The parking here is extremely limited – maybe less than ten cars can fit. I went at a less popular time of day, so it worked in my favor.
The distance of this hike is longer than Mt. Jo, but the first mile is a simple walk in the woods. It’s quite lovely! After climbing 1,000 feet in roughly a mile, expansive views of the valley open up. This hike is a true gem!
It’s definitely one I’d love to revisit in winter when the peaks are snow-capped. The trails are an out-and-back, unless you have another car to park on the ski area side where the new trail begins.
Here’s my route:
The trail to Mt. Van Hoevenberg.
4. Big Crow Mountain
A solo summit on a moody evening.
Distance: 1.34 mi
Elevation Gain: 610 ft
Location: Keene, NY
When I entered Keene for this hike, the clouds decided to join me. I knew it was a short distance, so I thought I’d knock it out and if I got a view, I’d be two for two. The parking lot for Big Crow is also the lot for one of the routes up Hurricane. An AWD vehicle would be best as the last mile felt a little sketchy in my RAV4, but still doable. This road isn’t maintained in the winter months, so get this hike in in the summer or fall from this trailhead.
A speedy, consistent climb of 600 feet in under three-quarters of a mile again opened to wide-scaping views of these mountains that are slowly feeling like home to me. I set up my tripod as the clouds rolled in, took a few pictures at the top, and headed back down.
I made a mental note to come back to hike Hurricane from this parking lot since I was now familiar with the drive up.
Here’s my route:
Route map above to Big Crow Mountain.
5. Baxter Mountain
Distance: 3 mi
Elevation Gain: 869 ft
Location: Keene, NY
After the stormy wonder of Big Crow, I knew I had to try out Baxter on this trip up to Lake Placid despite the rainy forecast. I woke up to the steady pitter-patter of raindrops. Contemplating just driving back home, I thought, why not just get out for a three miler?
I made my way over to Keene and parked along the road for this trailhead. The sprinkles fell from the sky and with each step, my disappointment of seeing a view grew. On the way to the summit, there are great viewpoints (arguably better than the summit!). For the fifth time on my Lake Placid 9er journey, I lucked out with the views.
Tip: Always go for it when there’s light rain and you don’t think you’ll get a view. You may just end up with this.
My route is on the right. The photos are where the viewpoints are.
If you’re tackling the challenge, head to the summit to say hello, then stop for the views on the way back.
6. Bear Den Mountain
Distance: 3.82 mi
Elevation Gain: 1,542 ft
Location: Wilmington, NY
The day I embarked up Bear Den was a toasty one. A crisp marshmallow in the campfire on a summer night. Quite the opposite of my previous visit to the mountains with the rainy hike up Baxter. Park at the Whiteface Mountain Ski Center and you’re right at the trailhead. The first mile of this hike doubles as a mountain biking route, so be aware if you have a furry friend with you. The trail’s switchbacks keep things interesting as you make your way up. Just tell yourself you’re almost there, trust me, it helps.
It doesn’t help, but every step is a step closer to the summit! I was in absolute awe atop the summit. The foliage, in unison with the summery weather, lit Whiteface Mountain on fire. It was incredible to gaze my eyes upon.
After awhile of solitude on the summit, I realized the group I passed quite some time ago never summited. As my mind pondered, my eyes wandered. A couple odd colors caught my eye. Those little dots were the other hikers! They had made their way to a rocky surface across the way.
I was curious where they had turned for that added bit of solitude (plus a different angle!). When I headed down, I realized this was another case of the Mt. Jo hidden treasure.
The view of Bear Den’s summit.
As you approach the Bear Den summit, you turn left. Instead, turn right at this sign. There is a very well-trodden trail that leads to that open-rock summit with these views of Bear Den’s summit.
Here’s my route, including the totally-worth-it right turn detour.
7. Pitchoff Mountain
The famous Balanced Rocks!
Distance: 4.15 mi
Elevation Gain: 1,744 ft
Location: Lake Placid, NY
I was saving Pitchoff for a perfect day. The summit itself is hardly impressive, but a steady climb leads you there with views to the right of Cascade and Porter. It’s neat to see where you’ve hiked before.
After the summit, I returned back to finally see Balanced Rocks. It doesn’t look like much on the trail, but it’s another iconic view like Heart Lake from Mt. Jo. I’ve seen it from the road more times than I can count. Two rocks sit on a very open summit looking as if you could just flick them and they’d fall off. Almost like the Glen Boulder trail in the White Mountains.
Truly the perfect sunset hike in the Adirondacks.
You’ll have incredible water views from here, as well as a great shot of the Olympic jumping complex. It’s a phenomenal sunset spot if you decide to take this mountain on later in the day. The trail is easy to follow with a headlamp at night afterwards.
Here’s my route to both Pitchoff Mountain and Balanced Rocks.
8. Catamount Mountain
Distance: 4 mi
Elevation Gain: 1,624 ft
Location: Wilmington, NY
Oh, Catamount. When researching the Lake Placid 9, this hike was advertised as fun with a side of scary. I took this trail on thinking I’d get Catamount done by the early afternoon with enough time to also trek up Hurricane in the same day. This hike didn’t go as planned at all!
The elevation gain was serious and the hike feels very isolated on a weekday. The trail itself is well-marked and easy to follow. The “fun” comes into play when you’re closer to the summit and features all sorts of rocks to climb. Everyone’s favorite is this little sliver to climb up and through in order to continue the hike.
If I was alone, I think it would’ve felt more enjoyable, but when I hike with my dog, she occupies my mind. I worry about her moves and how she’s going to climb up. The drop is a little steep. After this point, the rest of the trail is smooth sailing.
I would advise against hiking this one on a rainy day, which the summit for me ended up being a little rainy. After eight summits out of nine, I was bound to have a clouded summit. It was fitting it was the toughest one for me! I was able to sneak a peek of what some of the summit views might’ve looked like on my descent.
My route to Catamount Mountain.
9. Hurricane Mountain
Incredible views all around atop Hurricane.
Distance: 5.47 mi
Elevation Gain: 1,581 ft
Location: Keene, NY
The final peak for me was Hurricane Mountain, and as I told myself a month earlier, I was going to park where I did for Big Crow. This trailhead is a popular summer one as it’s the shortest ascent to the famous Hurricane Mountain fire tower.
I made it just in time before winter entered the mountains and the road would have to be maintained (which it isn’t). At the end of November, I lucked out with a beautiful day to myself on this summit. I summitted swiftly, to my surprise. This hike turned out to be one of my favorites. Catamount for me came in as one with the most elevation gain, but Hurricane is the longest distance-wise. Though after hiking the NH 48 and a few of the ADK 46, a 5.5 mile hike feels light in my mind.
Maybe it was the solitude, or the fire tower, or even the fact that it was shoulder season, so all the foliage chasers sat this one out that day. Whatever it was, it sure felt good to end in this moment.
The hike up Hurricane Mountain offers incredible views from the summit, as well as from the fire tower.
My very straightforward route is on the left.
Are you ready for a winter challenge? Take on the Lake Placid 9 in the winter months to earn a special patch for the added difficulty of navigating winter.
Would you hike these nine mountains? Let me know!
Tips for Winter Hiking With Your Pup
Once I got a dog, I knew with the right measures, she’d be able to enjoy the outdoors too. Here is what works for us when we hit the trail:
The first thing people tell you when you move to New England is that winter is brutal. Obviously I didn’t grow up here, so I didn’t have the experience of shoveling for hours in the morning or having to walk to school in freezing temperatures. That might be why winter is such a beauty to me.
As someone who grew up without a single snowflake (except that one time Dallas turned into a winter wonderland), the winter season is a novelty to me each year. I keep wondering when I’ll turn bitter toward the season, but it hasn’t happened yet. Here’s why I think it hasn’t: I discovered winter activities.
Hiking is one of my favorite things to do, so I had to try it out in winter. Once I got a dog, I knew with the right measures, she’d be able to enjoy the outdoors too. Here is what works for us when we hit the trail:
Tip 1: Know your dog’s capabilities.
You know your pet best and know what they can handle. I never underestimate a dog’s ability given that most love being in the wild (and I’ve seen a Dachshund hike the same mountains my Aussie does), but obviously there are limits based on breed and size.
From a young age, my pup was conditioned to the trails. At three and four months she was trained on short, local hikes with little to no elevation gain. Slowly, she worked her way up. She can crush any mountain and elevation gain. It didn’t come as a surprise when she started to take on 4,000 footers in New Hampshire and New York. But we definitely didn’t venture off on one before we knew she was ready.
If you don’t have the White Mountains in your backyard, there are still ways for you to mimic an intense hike without the massive peaks. Here’s how:
Find a long trail, ideally with decent elevation gain. You can add difficulty in three ways: (1) do the trail twice (or more), (2) add a backpack to your dog’s back with water bottles inside, and (3) hike in various weather conditions or seasons.
Tip 2: Pick an appropriate hike.
Whether you’re starting off hiking with your dog, or you and your dog are more seasoned out there, the hike you pick is the most important decision you’ll make that day. If you aren’t capable of carrying your dog, or know that with their fur (or lack there of), they’ll be cold, pick a shorter hike where you can stay in control.
Of course you can never be too prepared for the mountains, but you can always aim to expect the unexpected.
Tip 3: Pack these necessities.
Even though dogs are wild animals and thrive out on the trail smelling all the smells, there are still steps to take to ensure your pup’s well-being is taken care of. I pack the following items for my dog and consider them necessities:
Dog first aid kit
You never know what your pup may step on or get into, so it’s best to have a first aid kit handy in case of emergencies, which are more common in the winter.
Backpack for her to carry
I have this backpack for Koah and it’s adjustable to her body. She’s had it from a young age and we conditioned her with an empty backpack, then slowly added weight evenly for her. It’s very easy to put on her and has a piece to attach a leash!
This comes particularly in handy for long, winter hikes when energy is expended and dogs need water and food. The perk of winter hiking is that there is usually a plethora of snow for dogs to eat to keep their bodies hydrated.
Collapsible food and water bowls
These foldable bowls are an absolute must. They are easy to wash and very lightweight. Tip: If your pup is picky, try to help the adjustment to these bowls by using them at home too. They are also great for travel!
Two towels
I don’t know about your dog, but it feels like mine actively seeks every opportunity on a hike to bring back as much dirt and mud as possible into my newly vacuumed car. If that sounds familiar, bring one towel for the post-hike mess. I love that my dog enjoys herself on a hike, but I try to clean
Dog food and treats
My dog rarely eats during a hike, so even though I pack food for her, she usually opts out. I bring treats to maintain training on the trail and provide her fuel in a more efficient way since she doesn’t eat on a hike otherwise.
Waste bags
Part of leaving no trace in the woods is picking up your pup’s waste. Always keep an extra bag or two on you (or in your pup’s pack).
Leash
As much as I love letting Koah run free in the woods, most trails require dogs to be leashed. Keep this in mind when passing other hikers on the trail.
Personalized collar
Like I said before, expect the unexpected. You never know if your dog may get lost, or get loose from your leash. I purchased this collar and personalized it with my dog’s name and my phone number in case she ever gets away from me. Again, it has never happened to me, but it’s best to plan ahead.
Are you ready to take on the trails with your pup this winter? If you don’t have a furry friend, but still want to tackle the mountains in winter, explore my recommendations for gear below!
My Winter Hiking Gear Must-Haves
Here are my gear must-haves if you’re wanting to avoid some of the harsh icy parts that winter comes with…
One of my first hikes toward my NH 48 goal. This was the summit of Mt. Tecumseh. What I loved about it is the view you get when you’re standing atop several feet of snow! I hiked this same mountain the following summer and it’s a noticeable difference without the added snow height boost.
I love the winter. And that’s saying something as a gal born and raised in Texas. It snowed once growing up and my brother and I went all out. We built an igloo (it’s surprisingly warm inside!). Sneak a peek at high school me below loving the couple days at home we had with the famous Texas snowfall in 2010.
The highest recorded snowfall, still to this day in Texas, was that year with 11-12 inches.
Since then, I knew I wanted to live in a place with season. It took me a few years (alright it took six), but I made it to New England. Ironically, I’ve lived here for six years now and can’t see myself anywhere else.
As much as I love hiking in the fall and taking in the views, winter truly warms my heart. The solitude of the trails. The easily accessible parking. The lack of sweating trekking up. Snow-capped mountain peaks for miles. Honestly, even a stroll on a local trail with no views offers the same solace I yearn for because of the trees wearing white sweaters along every step I take.
Over the years, I’ve gotten bolder and more confident in my winter hiking abilities. It started with short hikes and grew into longer, 4000-footers ones. I’ve made my fair share of mistakes (hiking with a friend who wears glasses and having her glasses break halfway up a trail – sorry Victoria!), and definitely froze my butt off one too many times.
The icy summit of Camel’s Hump in Vermont.
Nonetheless, winter is a beauty if you give her a chance. Here are my gear must haves if you’re wanting to avoid some of the harsh icy parts that winter comes with:
1. Layer on the layers.
It is always easier to take layers off, than add them on. I avoid cotton because once you sweat or take a dive or slip into the snow, you’ll be wet. A feeling you’ll grow to despise on longer hikes.
I strongly recommend the following:
Fleece-lined leggings (or pants!)
Tank/short sleeve shirt
Long-sleeve shirt on top (ideally thermal)
Warm jacket with a hood
Thick socks
Another pair of socks when the first gets soaked (trust me)
Winter gloves
Ear warmer headband (or a hat!)
Neck warmer you’d wear skiing (works well for hiking and runny noses too!)
I usually warm up pretty well on a hike once the elevation gain kicks in. I also carry a backpack large enough to fit in the long-sleeve or jacket I have on when I’m overheated and take it off.
2. Get a good grip with microspikes.
Think of these like gnarly spikes for your hiking boots to dig deep into ice and snow to give you a better grip. I bought mine at a small outdoorsy store in Burlington, Vermont over four years ago, but they’re at any outdoors store, and of course, Amazon for convenience.
These microspikes saved me on the summit of Mt. Moosilaukee. Everyone always boasts incredible views from this mountain, but my experience was a tad different. My trooper of a father came to visit and I took him up this mountain in April for his first 4ker. Naturally, we were met with a white-out and wild winds.
3. Get the gaiters.
I remember one of my first hikes in the Whites. A male hiker passed me by with his poles and with it being summer, he was wearing shorts. As I stared at the ground to watch my own steps, I noticed he had these odd-looking socks covering his ankles.
I asked him what was on his ankles. He informed me they were gaiters and help keep dirt and small rocks from getting into his boots. I was stunned – this man was a genius! That night after my hike, I googled “gators,” as a true Southerner would.
Naturally, all my results came up showing the alligators in the wild and in the suburbs of Florida. Something was off. I retyped, “winter gators for hiking” and Google lovingly corrected this English teacher with “gaiters.” These are intended for winter use and I was so pumped to no longer have ice ball clumps on my socks. It’s tiring (and super cold) when you have to constantly bend down and remove these rock hard clusters of ice off your socks. Only to have them rejoin your socks for the ride up the mountain minutes later.
Then, I looked at the price of gaiters. As much as I love hiking, it’s not a cheap hobby if you’re embracing it in all four seasons. Winter hiking isn’t a joke. It took me a few years after learning about gaiters to finally invest in them. These are the ones I purchased from EMS.
Can you tell I’m hiding the coldness of frigid feet behind this smile on a hike to bag Mt. Tom, Field, and Willey? Gaiters would’ve came in handy as the ice clumped on.
4. Heat the hands (and toes!)
Hot Hands are a brilliant invention. I mentioned gloves and warm socks earlier, but that doesn’t always cut it. I buy my Hot Hands in bulk at Costco so I’m never without a pack on those chilly days. You open the pack, shake them up, and that’s it!
Tip: When you place them in your boot to warm your toes, make sure you place it between your sock and shoe. They are very warm and shouldn’t touch your actual skin!
If you’re environmentally conscious (which I’m starting to look at more after staying in a sustainable tiny home last weekend in Vermont), REI came out with a biodegradable version of Hot Hands. Check them out here. Once you’re done embracing their warmth, you can cut the warmers open and compost the minerals on the inside. The packs themselves will still need to be thrown away.
Do you feel ready to walk into the wintery woods? What other gear items do you think are a must? Let me know!
4 Tips for Taking the Best Foliage Photos in New England
In the last five autumns I’ve spent chasing the foliage in New England and upstate New York, I’ve come up with a handful of tips through…
When I moved to New England, I didn’t know what I was getting myself into with seasons. In Texas, we’re either in summer or a chillier version of summer. What I wasn’t ready for is just how stunning fall can be. Contrastly, it can also be very difficult to decipher how to photograph such beautiful scenes.
In the last five autumns I’ve spent chasing the foliage in New England and upstate New York, I’ve come up with a handful of tips through long drives, failed hikes, and hidden gems of how to find the best photos of foliage. My pictures below are from the Adirondacks, which isn’t technically New England as it’s in New York, but given the proximity to the other mountains I frequent, the foliage timing and tips are very similar.
Here are my tips for how to take the best fall foliage photos in the Northeast:
1. If the weather is gloomy, it’s still worth making the trip.
The rain stopped when I reached the summit of Baxter Mountain and the clouds were sweeping through the layers and layers of mountains.
I used to only hike in what I considered ideal weather conditions. It had to be a sunny or clear sky, or absolutely no chance of rain. You wouldn’t catch me hiking in the rain. Wet socks, potentially wet camera gear – not my idea of a good time.
Last weekend, I was eager to get back to the Adirondacks. The only setback was a 100% chance of showers from when I arrived late Friday night to when I was leaving Sunday afternoon. I could’ve canceled. I could’ve stayed in western Massachusetts and shifted gears.
Instead, north I drove. Rainy weather has a unique way of bringing out foliage. It’s the weather of autumn and I’m embracing it this year, instead of turning away from it. Rain brings moodiness to the mountains with low moving clouds. I’m gravitating more toward this moodiness over bluebird days because you can’t plan for this scenery. It just happens because you went out and took a chance.
A cloudy day when the clouds break to let the sunlight in makes for one of my favorite views.
2. Hike lower elevations.
You don’t need to pick a 16-mile, 2,000 foot elevation gain hike to see the foliage. A drive through Lake Placid will easily give you the fall vibes! I highly recommend finding short hikes in the area you want to explore. Often times, they may not be as popular as most people are chasing a hiking list of the high peaks.
If you’re looking at the White Mountains, find a hike in the Lakes region or a less popular hike like Welch and Dickey. Shorter hikes often have parking more available as hikers head in and out at a faster pace. If you’re looking at the Adirondacks, the Lake Placid 9 (9 peaks around Lake Placid) are definitely worthwhile.
When I say hike low, I mean you don’t need to aim for 4,000 footers. Unless you want to! I decided to chase the foliage this year, and not the high peaks for autumn views.
Aerial views provided by reaching the summit of Baxter Mountain.
Don’t be fooled at these lower elevation hikes. The gain is still sweat-breaking! On some of the Lake Placid 9 hikes, you’re gaining 700-800 feet in a mile. Impressive for a 2-3 mile roundtrip hike.
Incredible views after a short hike up Mt. Van Hoevenberg.
3. Pull over when you see a worthwhile view.
There are so many incredible spots around the mountains to pull over safely and snap a photo. Think: rivers, trees, and small towns. Two weekends ago, as I was driving from Lake Placid to Wilmington, I saw a fishing spot that looked scenic.
A beautiful view of Whiteface Mountain from a parking spot at a fishing spot.
I pulled over next to a few fishermen, headed down the bank, and snapped a few shots of falls with foliage galore.
Lake Placid added a new lookout point along Mirror Lake. I stopped when I saw this view while driving by.
4. Don’t expect the perfect shot.
Most photographers edit their photos with fancy programs, so don’t go in thinking you’ll have an incredible aerial view of a mountain lake from a summit. Professional photographers are very good at their jobs – and editing is part of that!
The weather during fall is also very unpredictable. Even if the forecast calls for clouds, you may end up with constant downpour. If it calls for rain, you might get sunburnt because the sun will come out. You never know what you’re going to get – so get out there and be prepared!
Autumn is the perfect season for those moody mountain pictures. In these last couple trips, I’m more and more welcoming of clouds and rainy weather!
A rainy day led to an opening of the skies at the summit of Big Crow mountain.
Last weekend, I planned to call it quits early because of the nonstop rain. Instead, I tied my laces and headed up one of the Lake Placid 9 in Keene, New York. The rain had miraculously ceased and from the skies the clouds parted. I was enamored with foliage views for miles. And mountains immersed in the clouds. Had I just headed home early, I would’ve missed this view.
It wasn’t planned. It wasn’t the view I had seen when researching this hike. To me, it’s the perfect shot to remember the awesome feeling of a new experience hiking solo in new places.
Do you go leaf peeping? What tips would you offer someone trying to see all that foliage has to offer?
Have You Visited This Off-the-Beaten-Path Gem in Massachusetts?
When you think of outdoors adventures in Massachusetts, your mind may wander to the Cape, or hikes in the Berkshires. But have you ever heard of the…
When you think of outdoors adventures in Massachusetts, your mind may wander to the Cape, or hikes in the Berkshires. But have you ever heard of the Quabbin Reservoir?
Although the boats are intended for fishing, they also serve the purpose of pure relaxation.
I visited this reservoir my first year in Massachusetts and wasn’t too impressed. I drove about an hour northeast from Springfield, Massachusetts, to find the Quabbin Reservoir. I parked in the Visitor Center parking lot and got out of my car, eager to hike. Clearly, I didn’t do my research.
As I walked, I realized there wasn’t much hiking at the reservoir. I gazed out at the reservoir, took a few pictures, and left. It wasn’t until last weekend that I realized that the Quabbin Reservoir has way more to offer than I ever thought. And it’s an affordable adventure!
The Quabbin is actually manmade and serves as drinking water for over 3 million people. Boston friends - here’s where your water comes from!
The disheartening part of this park is that in the 1920s, Boston looked westward for a water source, and dis-established four towns in these valleys to create their water source. 2,500 residents in this part of Massachusetts lost their homes as a result.
Since millions utilize the Quabbin Reservoir as their drinking water, there are several restrictions on activity: Dogs, grilling, and swimming aren’t allowed. You might wonder what there is to do at the Quabbin then. What I didn’t know about the Quabbin Reservoir is that the Department of Conservation and Recreation (DCR) provides boat rentals (and kayaks!) for fishing. Now I’m not an avid fisherman, but after trying out my hand at flyfishing in Idaho, I thought I’d give it a try.
I headed out to the Fishing Area 1 parking. If you visit the Quabbin after 12:30 PM, boat rentals are $36 (including a $6 parking fee).
A view of the Quabbin Reservoir once you jet off in your motorboat.
You need a flotation device, but they provide one if you forget yours or don’t have one.
The beauty of the Quabbin is that it’s untouched since you can’t swim in it and there aren’t many hiking opportunities. There is a walking path around the Visitor Center, as well as two viewpoints at the Enfield Look Out and the Quabbin Tower. Otherwise, the Quabbin is really known amongst fishermen.
The motorboat fits three adults or two adults and two children. I hopped into one and set off deep into the Quabbin on a gorgeous, bluebird day. The only other boat I encountered was the DCR reminding me to return the boat an hour and a half before close.
Where else will you find pristine, clear blue water like this without a soul in sight? It felt like I was back in the alpine lakes of Idaho or Montana. The best part was I was only a half hour drive from home and spent $36 for a new afternoon adventure.
Clear water and views for miles with no boat in sight.
Boats are available to rent during the Quabbin Fishing Season, which this year is from Saturday, April 17th to Saturday, October 16th. Can you just imagine the foliage colors in a couple weeks contrasting with this water? I may need to go back sooner than I planned.
Have you ever considered visiting a reservoir for a day trip? Is the Quabbin Reservoir on your list of places to visit in Massachusetts now?
How I Traveled Across the U.S. for Less Than $1,000
Almost anyone can rent a cargo van, throw a mattress in the back, and travel the U.S. with a little planning…
A few days into van life and still smiling!
When planning our summer road trip, we set our eyes on what we believe to be a hidden gem in this country: the Sawtooths mountain range. One glance at these peaks will leave you mesmerized. And so began our planning phase. The trip was originally going to start with a flight from Boston to Boise and back. Below is how we brainstormed from there, while remaining budget-conscious.
Our final trip took us from Western Massachusetts to Idaho and back home. Here are all the places we explored or stayed in:
Columbus, Ohio > St. Louis & Kansas City, MO > Southern Colorado > Southeastern Utah > Twin Falls, Boise, and Sawtooth Mountains, ID
How to Start Planning Your Trip
We initially wanted to fly out to Boise and try out the RV or van life via renting. Flights from Boston to Boise hovered around $500. We were going to bite the bullet: purchase the flights to Boise and rent a renovated van or small RV for around $140-$200 a day. As I started to get to the final page of payment for the van, the numbers added up. Big time.
Not only is there a charge each day of renting, there is an additional required insurance (understandable of course), as well as a hefty fee for driving more than 100 miles per day. Crunching those numbers led to a few thousands of dollars spent on housing, transportation, and flight for a two-week trip. One website we researched was Wander Vans, which for a two-person van for 14 days totaled to $2,200. Additional mileage over 125 (for this specific company) was 35 cents per mile. That total doesn’t include insurance, which was an extra requirement. These vans were sold out for the dates we wanted, but was one of the cheapest options we found. Others grew exponentially from there.
Not a bad spot to enjoy the sunset in Capitol Reef National Park, Utah.
We loved the idea of having a car and housing in one, and of course insurance and cleaning fees are part of that when renting. We tried to justify the expenses by pointing out the van is both the mode of transportation and place to crash each night, but ultimately decided there had to be a cheaper way.
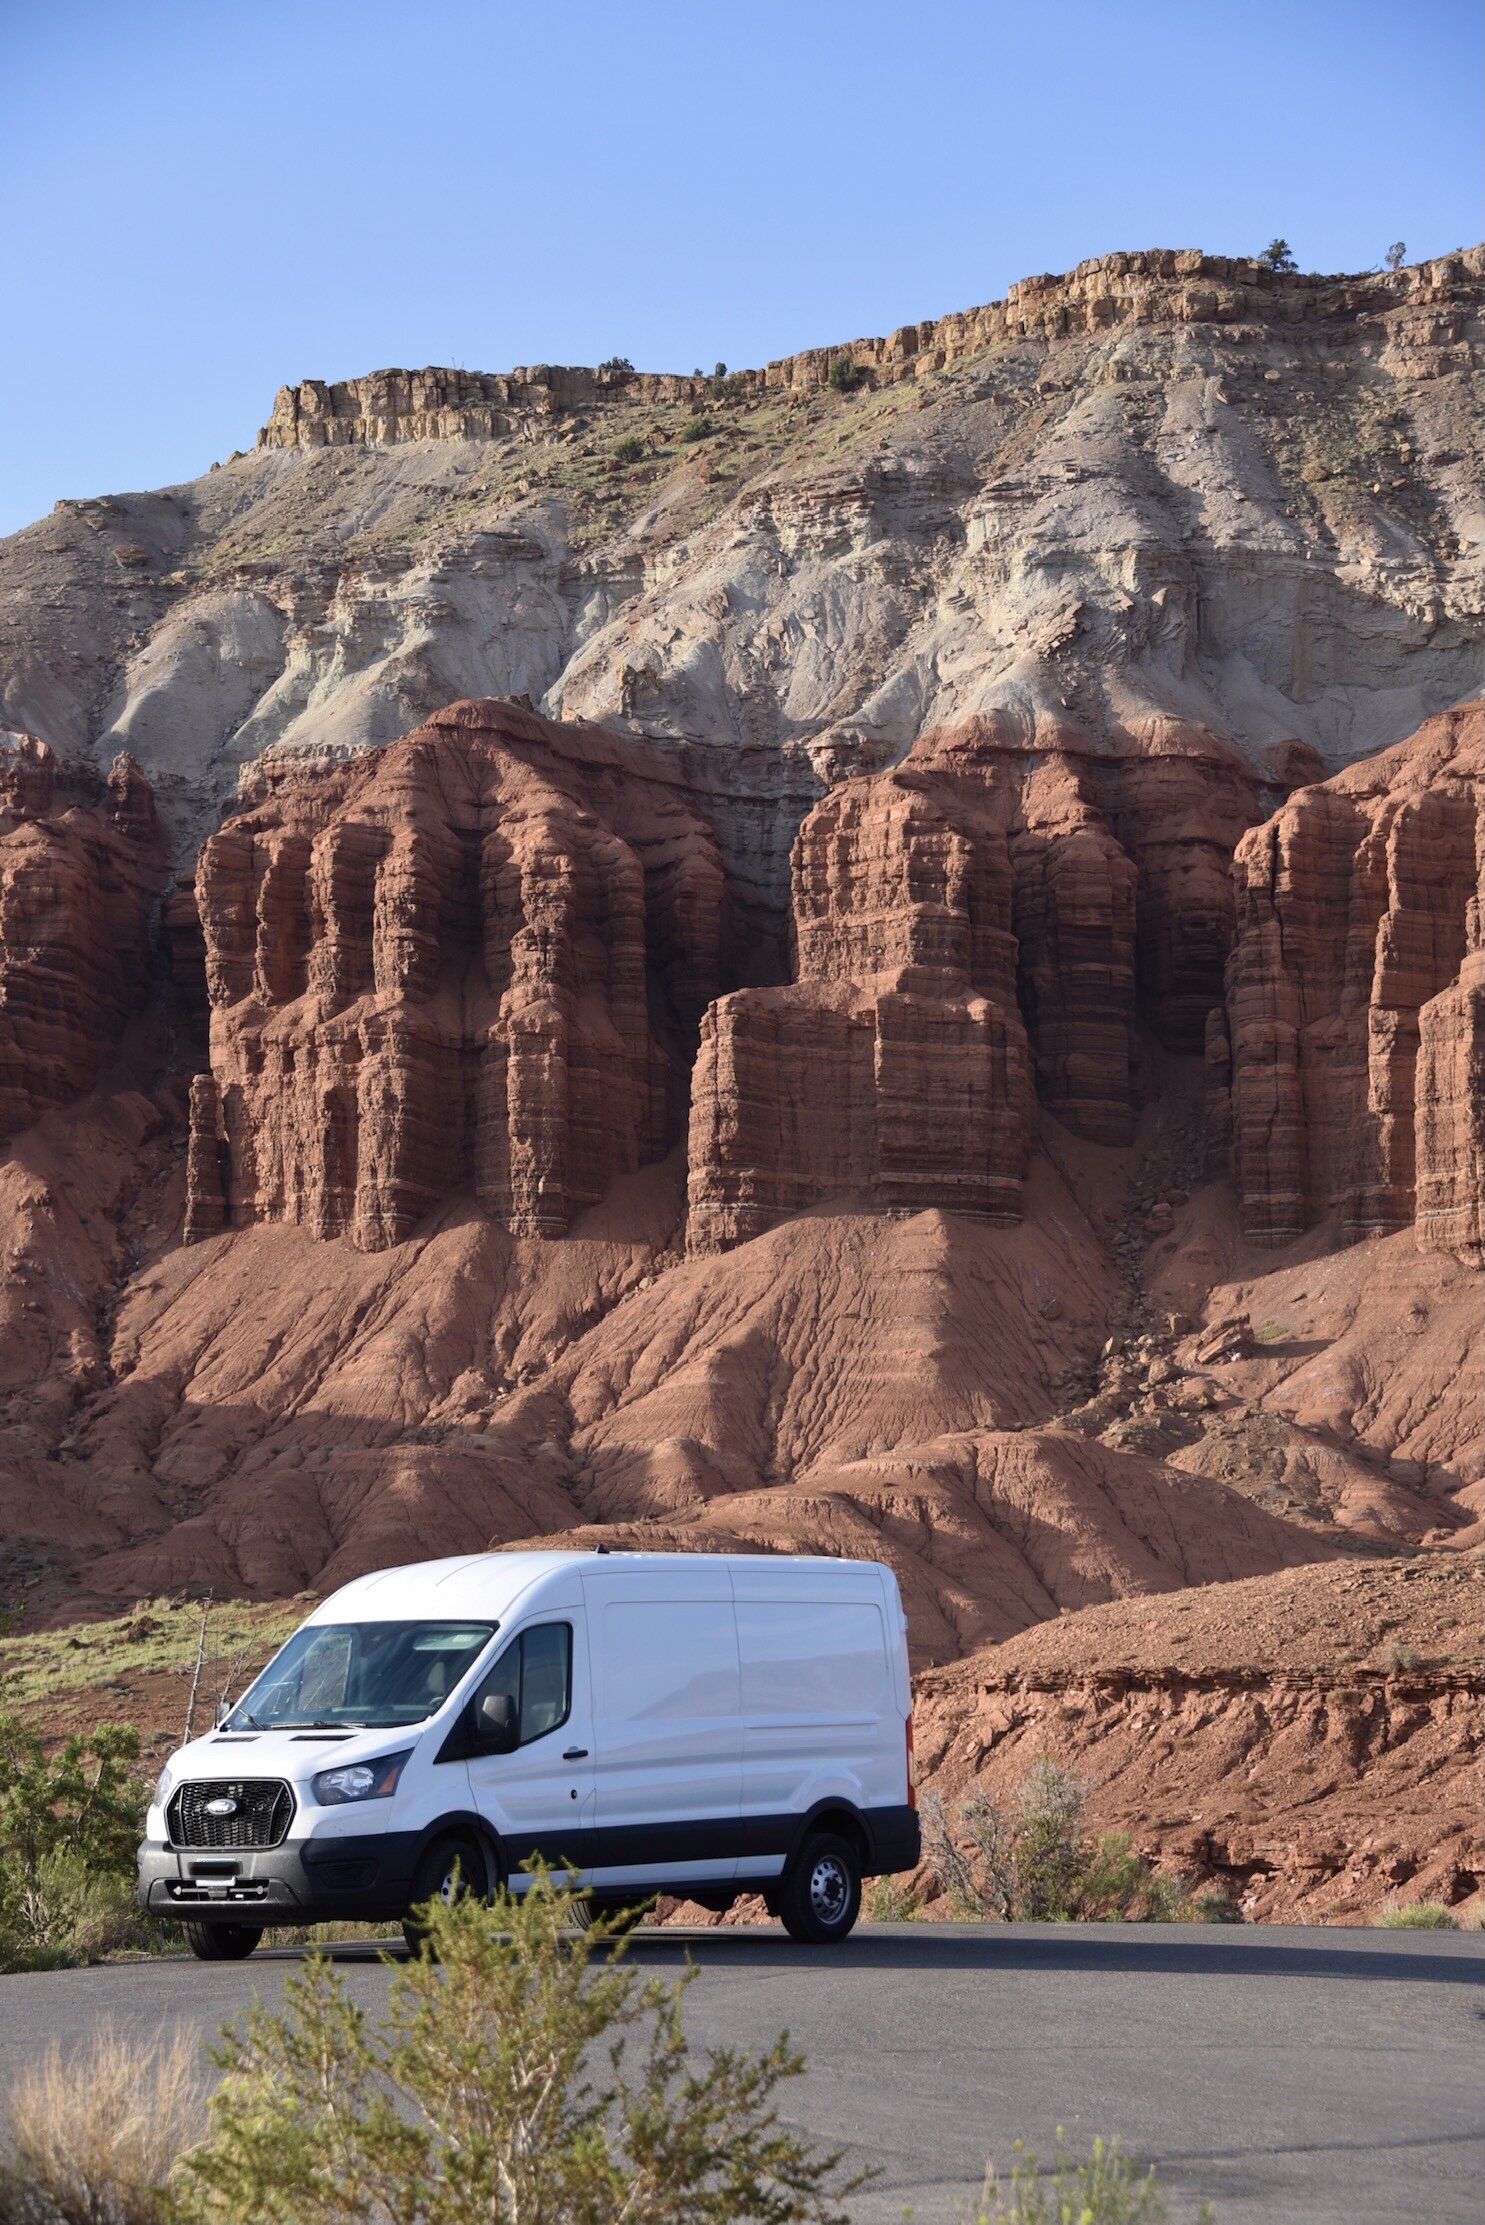
The van’s traveled to some neat places so far like the Black Canyon of the Gunnison National Park in Colorado.
And thus, the road trip idea took a different turn. I used Priceline this time around to book a rental car. When selecting an option (I usually get an SUV to fit all of our camping necessities), I came across a cargo van option. I may be late to the game (or never really had to move things around), but cargo vans are an option? And cost less than an SUV? Not sure where I’ve been this entire time, but I’m glad I came across it.
Making our way through the Southeastern corner of Utah.
The total cost for a two-week rental was $612, but we added in an extra day for $60. The taxes and fees came out to $110, so the total cost for renting a cargo van in Western Massachusetts was $785. We split up travel costs, so my half came out to slightly under $400.
If you’ve read my previous post, 7 Lessons I’ve Learned Road-Tripping Across the U.S., you’ll know I never skimp out on rental car insurance. Of course it’s up to you, but it did add $500 to the total trip. Again, $250 on my end.
Where to Stay
Now that transportation was secured, we needed a place to stay everywhere we traveled. At first, as I mentioned, we looked at transportation that included a stay (i.e. an RV or van). When we threw that out the window and added in the cargo van, we considered Airbnbs. We love a good Airbnb, but for 14 nights, the cost would add up swiftly. So that was out.
With the cargo van, we knew we had two seats in the front and a large space for our needs in the back. The idea for a DIY renovated van was born. We borrowed two air mattresses and an air pump, so the sleeping aspect was covered.
Sure a renovated van with a built in bed, along with ventilation and a heating system would be ideal, but it’s very expensive. Almost anyone can rent a cargo van, throw a mattress in the back, and travel the U.S. with a little planning.
With our bed arrangement figured out, next up was deciphering places to sleep. My favorite option is Kampgrounds of America, or KOA. They are affordable (if you join their membership, you receive 10% off each time – it pays off if you utilize them!) and are all over the U.S. I’ve stayed in cabins and tent sites from the Adirondack mountains in New York to the suburbs of Ohio, to the Badlands in South Dakota. They are everywhere!
The tent sites range based on location. In Moab, Utah, for a tent site with electric plugs and water, it’s $50 a night. You do get a safe location to park, along with wi-fi, showers, and coin laundry at every KOA. For the peace of mind and convenience, it’s worth the price for me! Other not as popular locations, or tent sites without electric can be as low as $30 a night.
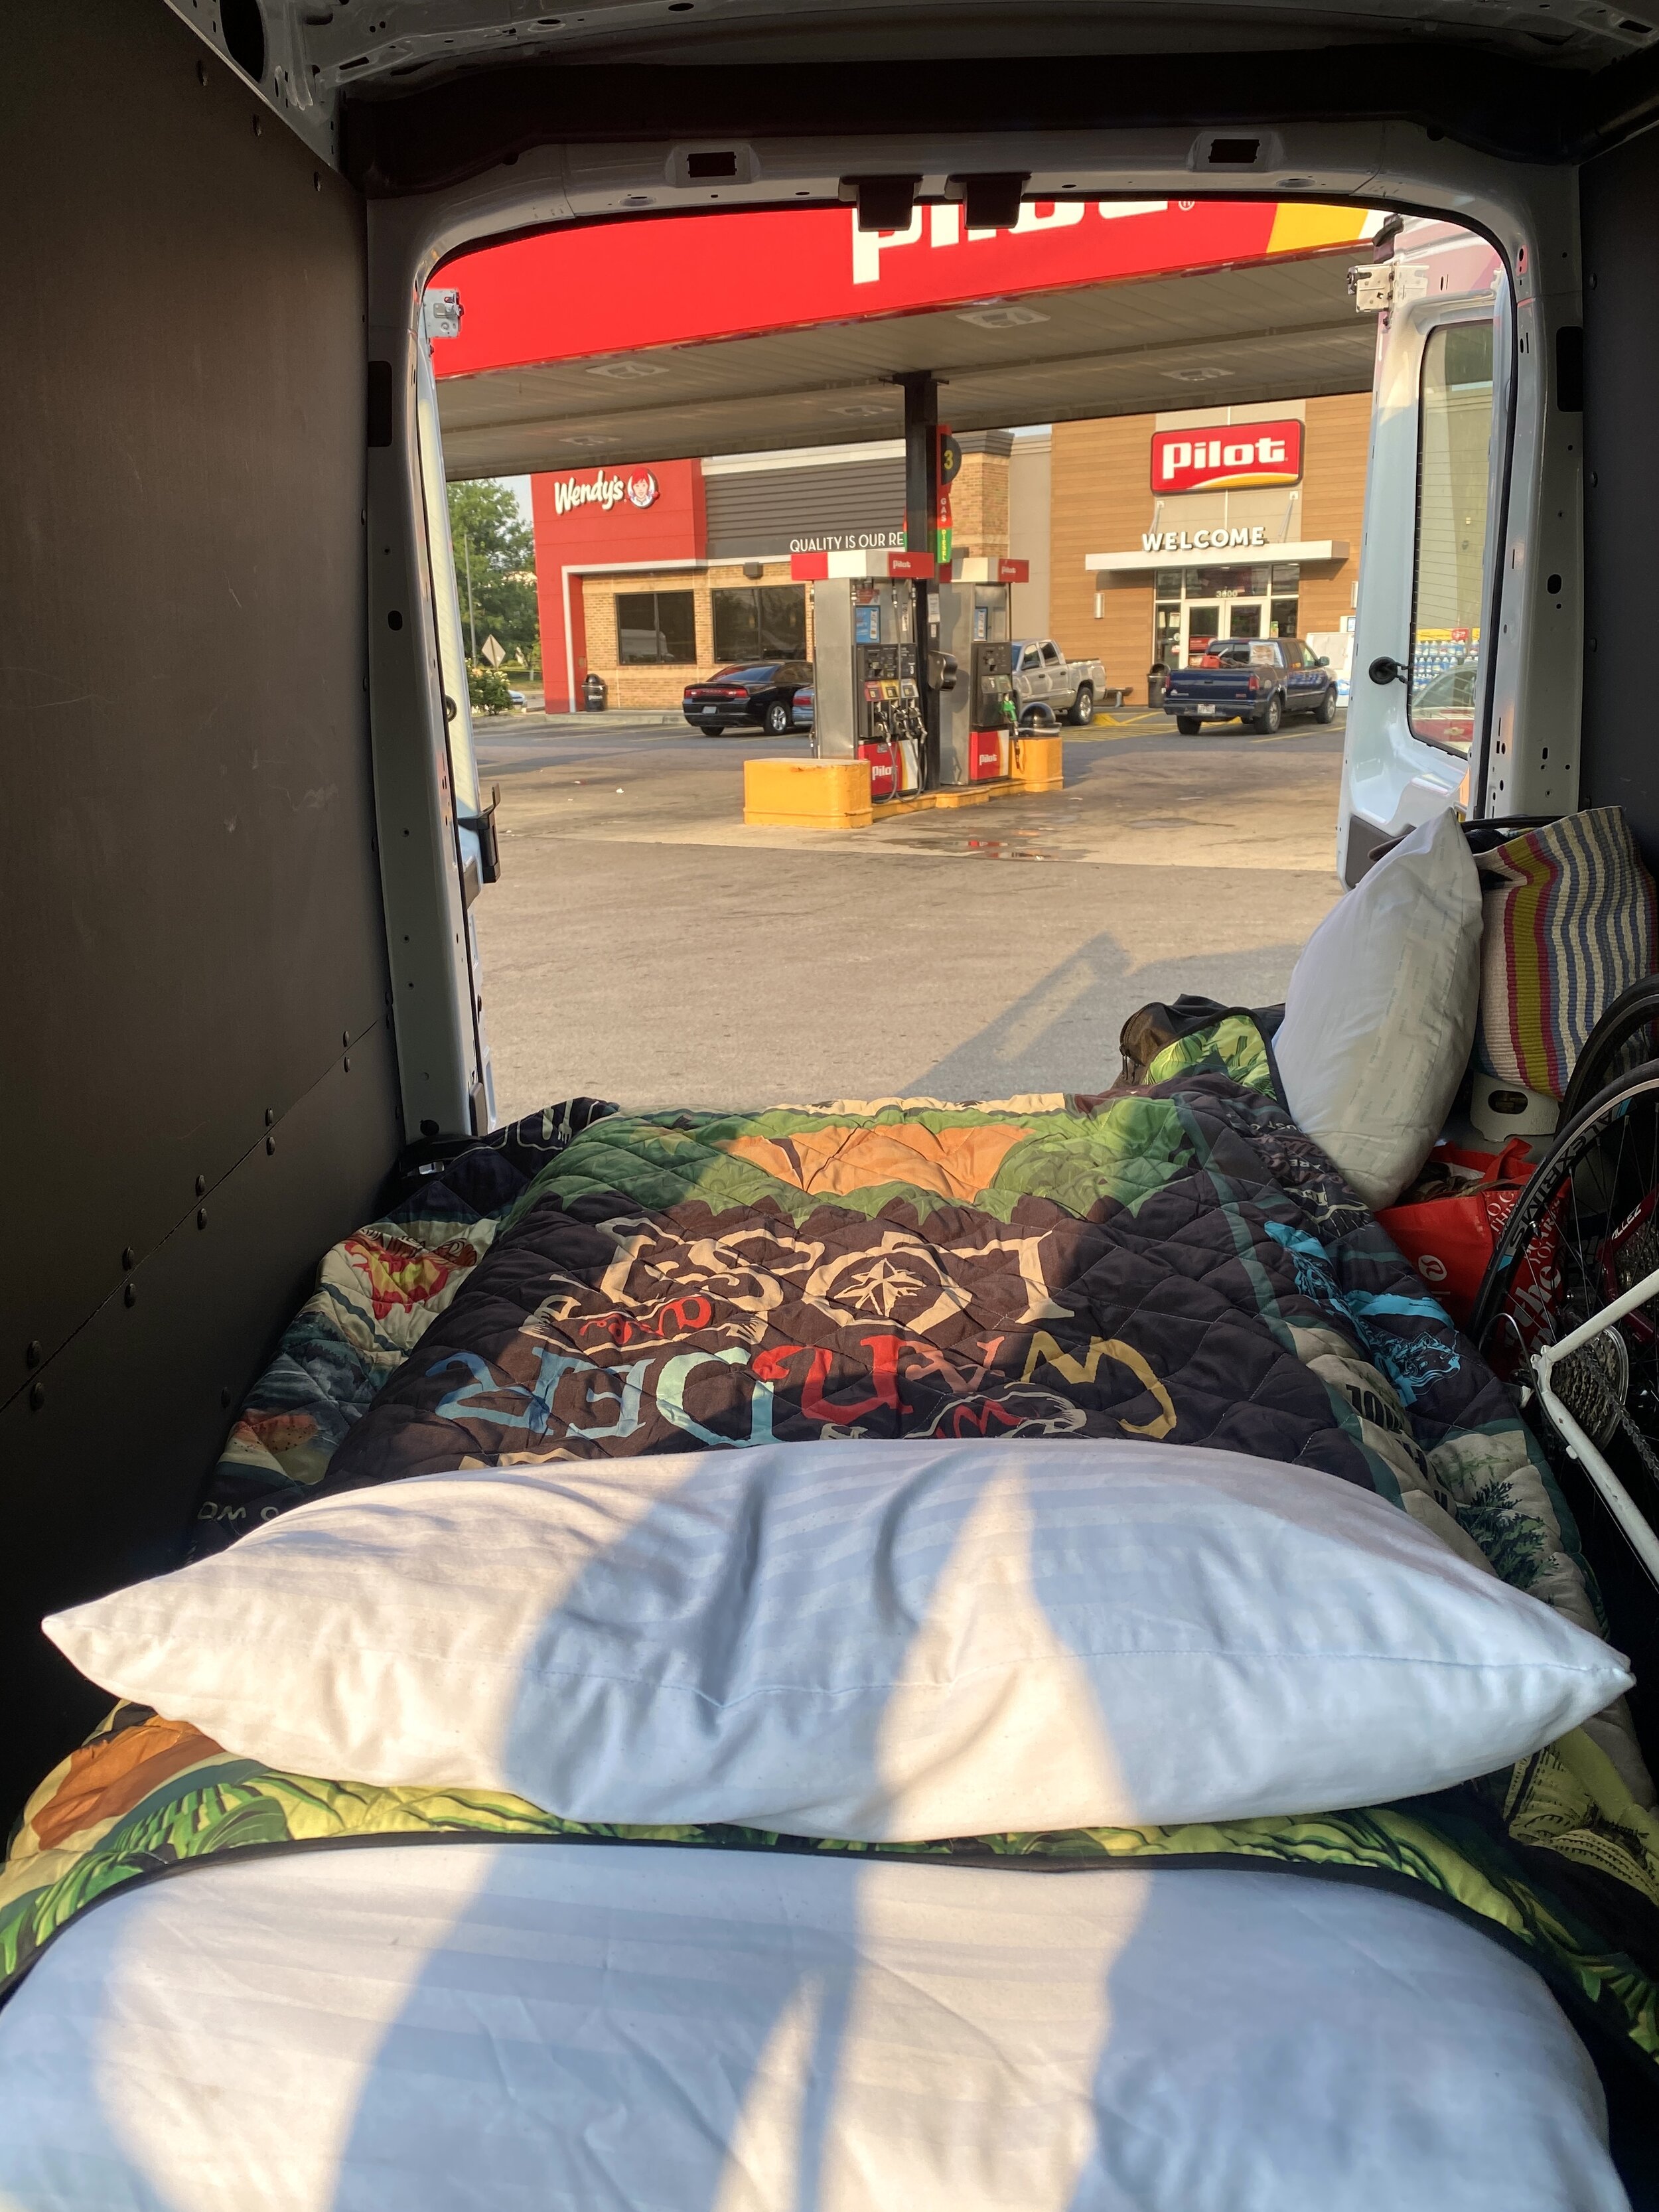
If you are budget-conscious as we are, we researched another option. Sure KOAs are great, but we wanted to see how affordable we could go. And that’s when we came across Pilot/Traveling J and Love’s.
Like I mentioned, van life isn’t always Instagram-worthy, but it sure is great being on the go and saving money. Here’s one of the Pilots we stayed at.
Showers on the Road
Most people know van lifers park in Walmart parking lots overnight for a free stay, but the real gem is a Pilot, Traveling J, or Love’s traveling center. As much as I can go without a shower when on the road or on a camping trip, two weeks might be pushing my limit.
These three companies are all essentially the same: a 24-hour gas station for truckers that provides free restrooms, showers for $13-$15, and overnight parking.
The showers are extremely clean and private. One of the best parts is that it isn’t timed, and they even provide towels (though we used our own). To save even more, you can share a shower if you’re traveling with someone. One person hops in, then on the way out, you can pop in. It’s an easy way to turn a $13 shower into $6.50!
Pro tip: Download the Pilot/Traveling J app for rewards.
Costs not included: Food and Gas
The only costs not included above were food and gas. Gas prices vary based on your trip and time of year. For example, our two-week road trip to Montana last summer included wildly lower gas prices than this trip. In several places along the way we paid $4/gallon. Food can be done in a budget-friendly manner and can look like peanut butter and jelly sandwiches everyday for lunch.
We knew we’d be moving quickly between national parks in Colorado and Utah, so we didn’t always cook our own food. Food is where we splurged to try new coffee shops or the local eateries. A big money-saver is a quick Walmart trip for basics. We bring our own kitchenware, grill, and propane tank, which helps too!
The van life isn’t always glamorous, but with our budget-friendly tips, hopefully it can be accessible for everyone who wants to give it a go. Would you try it out? Do you have any questions on how to start traveling in a van?
7 Lessons I’ve Learned Road-Tripping Across the U.S.
Here’s what I’ve learned from road-tripping across the U.S.
1. Things will go wrong with…
I absolutely love travel. Maybe it’s because my parents prioritized it when I was a kid –whether it was a trip to Disney World or my dad taking us through the woods off the sidewalk path in local parks. Regardless, I love exploring new places.
I especially love being in a foreign place. A language I don’t understand, food I don’t know how to pinpoint the ingredients for, and people who look differently than I do. When it came to traveling, I often flew to new places that were walkable because I didn’t have a car myself. When I purchased my first car after graduating college, I packed up my belongings and set off on a drive from Dallas to Massachusetts with my dad.
My dad and I’s first stop on our road trip up to MA: Hot Springs National Park in Arkansas. This overlook hike is a must on your visit!
The drive itself takes a little over a day, but we split it up over a few days, staying in national parks along the way. Since then, I’ve ridden an Amtrak train from Denver back to Massachusetts, driven all around New England, and made my way around the U.S. on three longer road trips (to Missouri, Georgia, and Montana).
In all those hours spent in the car and the days spent on the road, I’ve learned a lot about preparing for a trip.
A trail view from Voyageurs National Park in Minnesota on the return home from our road trip last summer.
Here’s what I’ve learned from road-tripping across the U.S.
1. Things will go wrong with the perfect itinerary.
Anyone who knows me knows I’m a big planner. I use a color-coded Google sheet with multiple tabs varying from transportation, to housing addresses to packing lists, and sights to see. I love knowing I’ll see most of what a place has to offer by planning in advance.
However, there are things you can’t plan for. You can’t plan for forest fires to bring smoke to mountain ranges from the state over. You can’t plan for your pre-made food to go bad because the outside heat melted your ice sooner than expected. Since then I’ve learned to not pre-make several servings of mac and cheese to save time later since we ended up throwing it away.
Tip: Make a list of your non-negotiables, meaning the things you must do or places you absolutely must see. If you want to see the Mesa Arch in Canyonlands at sunrise and it’s an absolute dream of yours, then make that a priority. Maybe skip another attraction, or grab breakfast instead of cooking it if you’re short on time. Take out something in your “nice to do” bucket to ensure you fill up your “must do” bucket.
A year and a half ago, our flights to Kansas City were canceled due to the weather in Boston. We rented a car and turned the Conference Championship game into a road trip. A perfect example of how we couldn’t stick to the itinerary, yet it turned out to be an amazing weekend. We were even able to make it to Cuyahoga Falls in Ohio and the Gateway Arch in St. Louis since we drove!
2. Always add two hours to your estimated time of arrival on your GPS.
You can’t plan for NY/NJ traffic to add two hours to your drive. Okay, maybe you can because it always feels like driving through this area adds so much time.
This is just one example of something that’s gone “wrong” on my trips in the past, or not according to plan. I’ve learned to add about two hours to the GPS. You don’t realize how much time you actually spend getting gas, buying an extra snack, and using the restroom even though you thought it’d be a quick minute to use the bathroom.
3. When planning, add in filler time. Or be okay with taking a detour.
Since we’re on the topic of time and planning, it’s important to add in time for the unexpected. On one of our trips, we were driving through South Dakota and saw sign after sign for a place called Wall Drug. The signs were such a hoot, we detoured and stopped by this tiny little western town. It ended up being one of the highlights of our drive through South Dakota! Had we not planned for additional time to get to the Badlands, we would’ve felt a need to stick to the road. Thus, missing this cool little spot.
When we made it to the Gateway Arch, our only plan was to view it from the exterior, take a few pictures, and continue our drive to Kansas City. We decided to take a detour, head inside, and book the last tour of the night. The tour took us up to the top of the Gateway Arch for this incredible view for sunset and back down in forty-five minutes. Totally worth it.
4. Double check your bookings a week before your trip. Or at the very least, the night before.
You may have planned to hit the road at 10 AM as soon as you pick up the rental car. That’s part of your itinerary, so it only makes sense. That is, until, you arrive at the rental company and they tell you you booked your car for the day before and since you didn’t pick it up, they rented it out to someone else.
Turns out, you aren’t leaving at 10 AM as you planned. This could have been easily avoided if I checked with the rental company a few days earlier to confirm the dates, or reviewed the booking email confirmation. This also goes for any boat tours or planned excursions you have, along with any campgrounds you reserved. Last summer I mixed up the dates more than once, which left us car camping under the stars in the Tetons (not mad about it), but it meant our KOA campsite in Yellowstone was given to someone else so we didn’t have a home base in Yellowstone.
Here’s the view from our campsite in Yellowstone, overlooking Yellowstone Lake. Not the worst way for plans to go when you mess up reservations.
5. If you’re using a rental car, get the insurance.
Everyone tells you this and you never listen. And when I mean you, I mean me. Almost everyone I have talked to about road trips says nine times out of ten, their rental car was fine. However, there’s always that one time. Ask anyone who travels on the road and they’ll tell you the trouble they had with their car or the animal encounter they had that no one wished for.
This goes back to earlier where I mentioned you probably won’t remember paying for things you forgot to bring. You won’t look back on your road trip thinking how much money you wasted on insurance. I add in the insurance when budgeting so that I don’t get overwhelmed when it comes to the total cost of a rental.
Tip: Book your rental in advance. If possible, pay upfront so your rental is reserved if you’re late and the cost is often cheaper. I use websites like Priceline to find the cheapest option. I also always double check for two things: 1) unlimited mileage (almost all rentals are, but vans/RVs often charge over 100 miles/day) and 2) restrictions.
More on restrictions - In Maui, most rental car companies don’t cover you if you drive a specific part of the Road to Hana. On a map, that part of the road looks like it saves you a great deal of time, but the conditions aren’t ideally suitable for driving.
On the Big Island, companies also don’t cover your drive to the summit of Mauna Kea. Always read the fine print or simply ask the representative which roads or attractions may be off limits to not lead to financial issues later.
6. You will forget things. Just buy it along the way!
I used to get so stressed about forgetting something, as if there wasn’t a store along the way at some point to pick it up. In the grand scheme of your road trip, one purchase of q-tips won’t break your budget, and you surely won’t remember spending the money on it in the long run.
My very first road trip with my dad across Texas heading toward Big Bend National Park back in 2016. It’s safe to say I’ve been enjoying these drives for quite some time.
7. Embrace life on the road.
What initially was frustrating about mixing up dates and losing out on a campground in Yellowstone led to us finding out that each day Yellowstone offers first come first serve campsites. Had we had our original campground, we never would have landed a campsite directly across Yellowstone Lake, waking up to neighbors like elk casually walking past our tent.
Tip: Talk to locals or park rangers when visiting somewhere new. We pulled over to ask a ranger about campsites to snag the one I mentioned above.
These are just a handful of the lessons I’ve picked up driving across this beautiful country, and I’m sure there are plenty more for me to learn.
What lessons have you learned while traveling? Would you add any to this list?


