
Hike the Vermont 5 4,000 Footers Challenge
New England hikers love a good list. Check out Vermont’s 5 highest peaks:

New England hikers love a good list. There’s the 48 in New Hampshire, the 14 in Maine, and the 5 in Vermont. If you’re extra adventurous, there’s the 46 in the Adirondacks in New York to complete for the Northeast list.
After finishing my 48 in the White Mountains in New Hampshire in 2020, I focused my efforts on smaller mountains in Lake Placid with the Lake Placid 9. In 2022, I reset my focus on 4,000 footers.
I decided to tackle the Vermont 5.
I actually hiked one of the Vermont 4,000 footers back in 2016 and then never hiked in Vermont again, despite several visits to the state’s charming towns. I ran races around hilly Stowe and set my eyes on Mt. Mansfield, but hadn’t hiked it yet.
At the start of 2022, I realized I could easily hike the four remaining 4,000 footers. Here’s how I took on the Vermont 5 in winter:
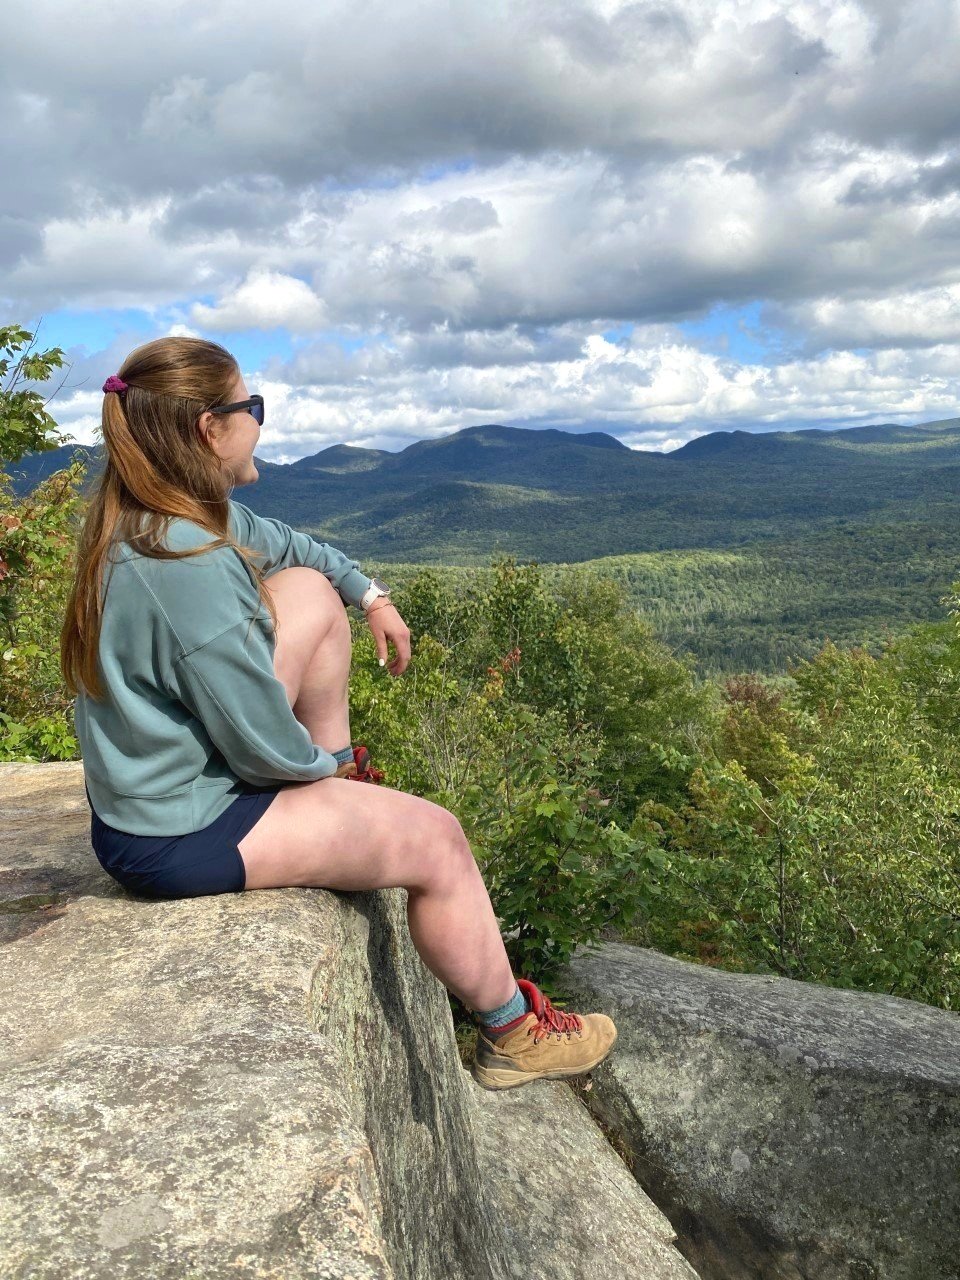
1. Camel’s Hump (4,083 ft)

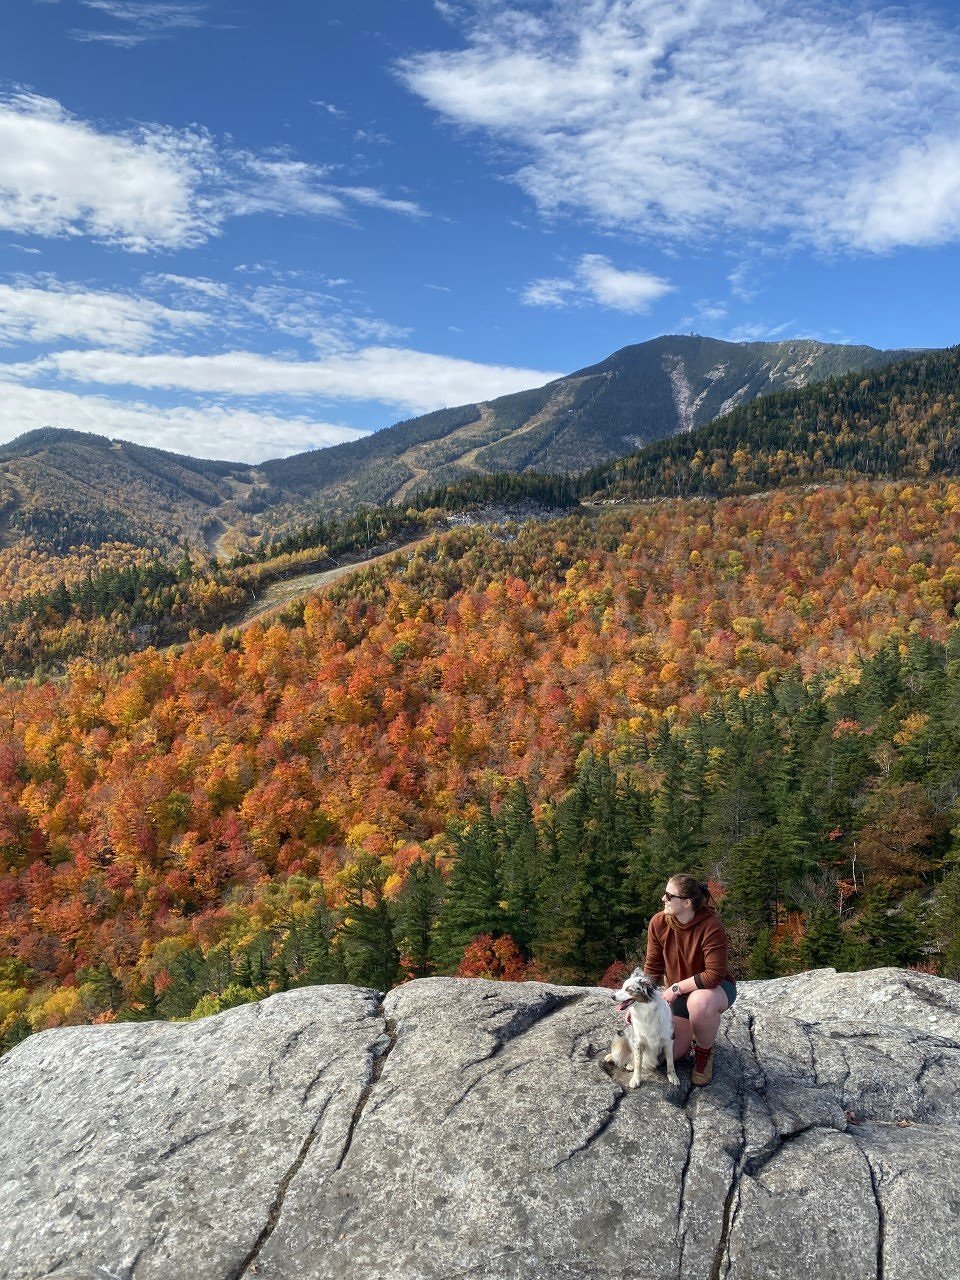
I technically hiked this one in November before the official winter season, but let me tell you it sure felt like winter! My first year in New England, my friend invited me to Burlington, VT for the weekend and told me to pack hiking gear. This looked like my thickest cotton and basic hiking boots. I’m serious. Check out the pictures in this post if you don’t believe me.
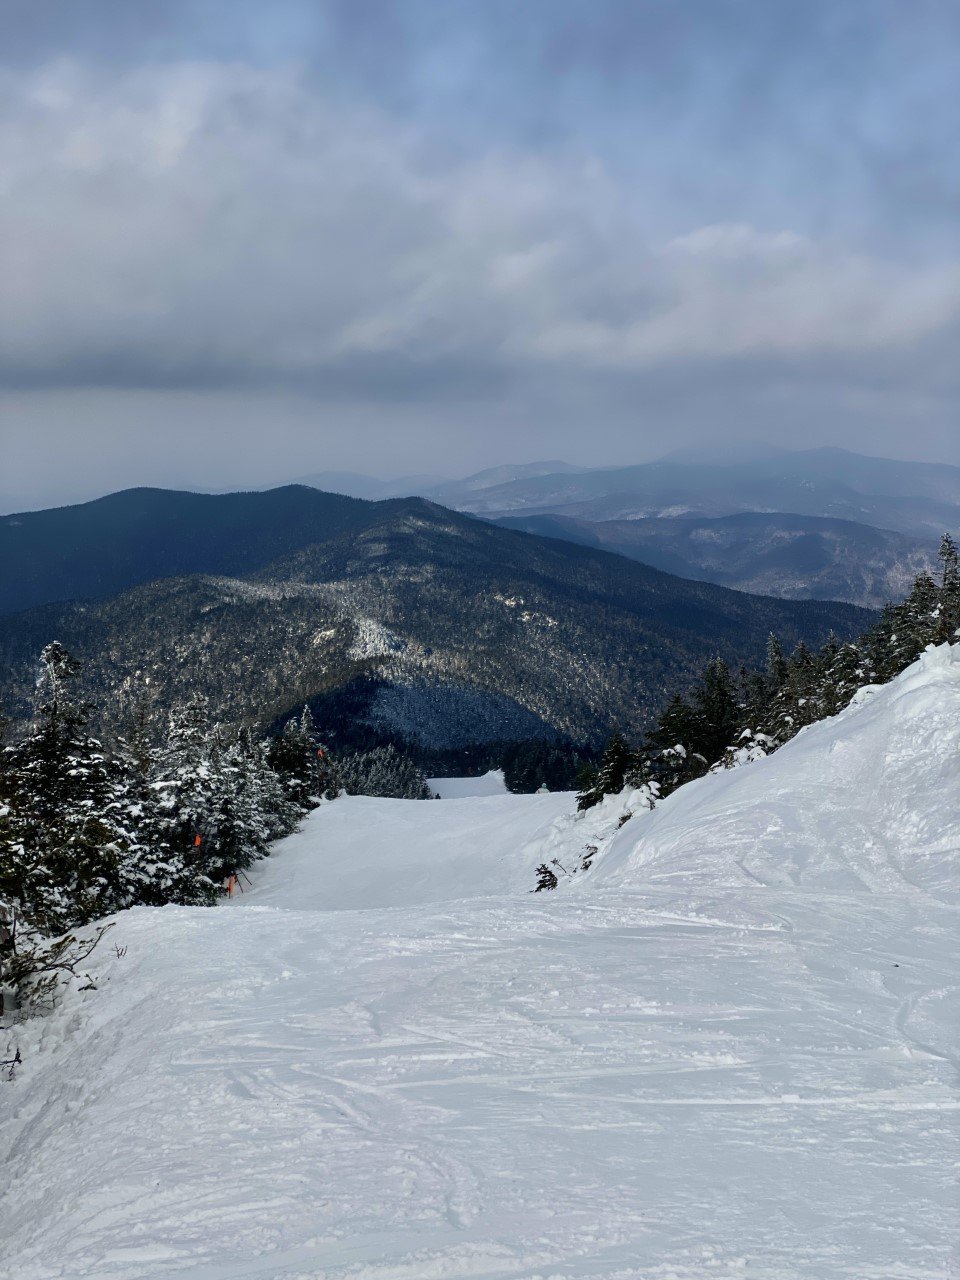
We took the Monroe Trail out-and-back for six miles and around 2,500 ft gain. The views were absolutely breathtaking (could’ve also been the wild winds that took my breath away). I was hooked on winter hiking after this one. 360-degree views of the Green Mountains with a nice decent.

2. Killington Peak (4,235 ft)
This peak may have a reputation for incredible skiing and stunning views, but I couldn’t tell you if either are true after my hike. I was the only hiker on New Year’s Day at the parking lot. Excited to spend the start of the year outside, but nervous about the conditions.
As I embarked on the Bucklin trail, my worries dissipated. The trail was a moderate climb. Slowly and steadily, I ascended. Surprised by the sweat dripping down in the crevices of my arm as I gripped my backpack straps on my way up. Equally surprising? The hail that began to hit me like Monday morning’s alarm. I reminded myself that this was what winter was in the mountains of New England: a three-course meal ensuring your tongue had a little taste of everything. And I sure was hungry for it.
I spent very little time at the summit considering the hail, along with the incoming text informing me of the weather advisory in the area. It was also a complete wash, so that didn’t quite entice me to stay for the view. The way down was a speedy one. I ended with 6.85 miles logged and 2,559 ft of elevation gain on the out-and-back trail.
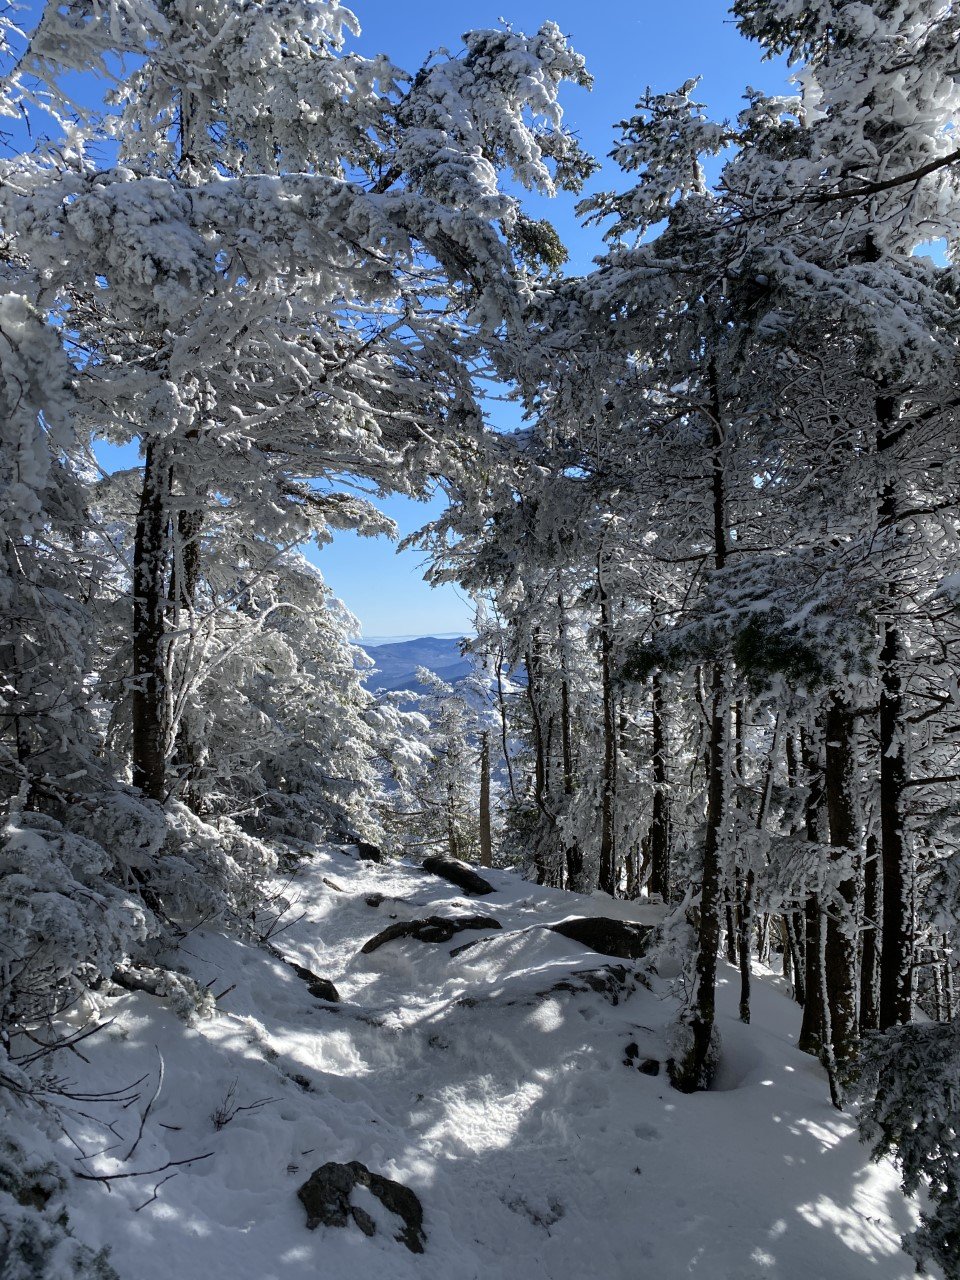
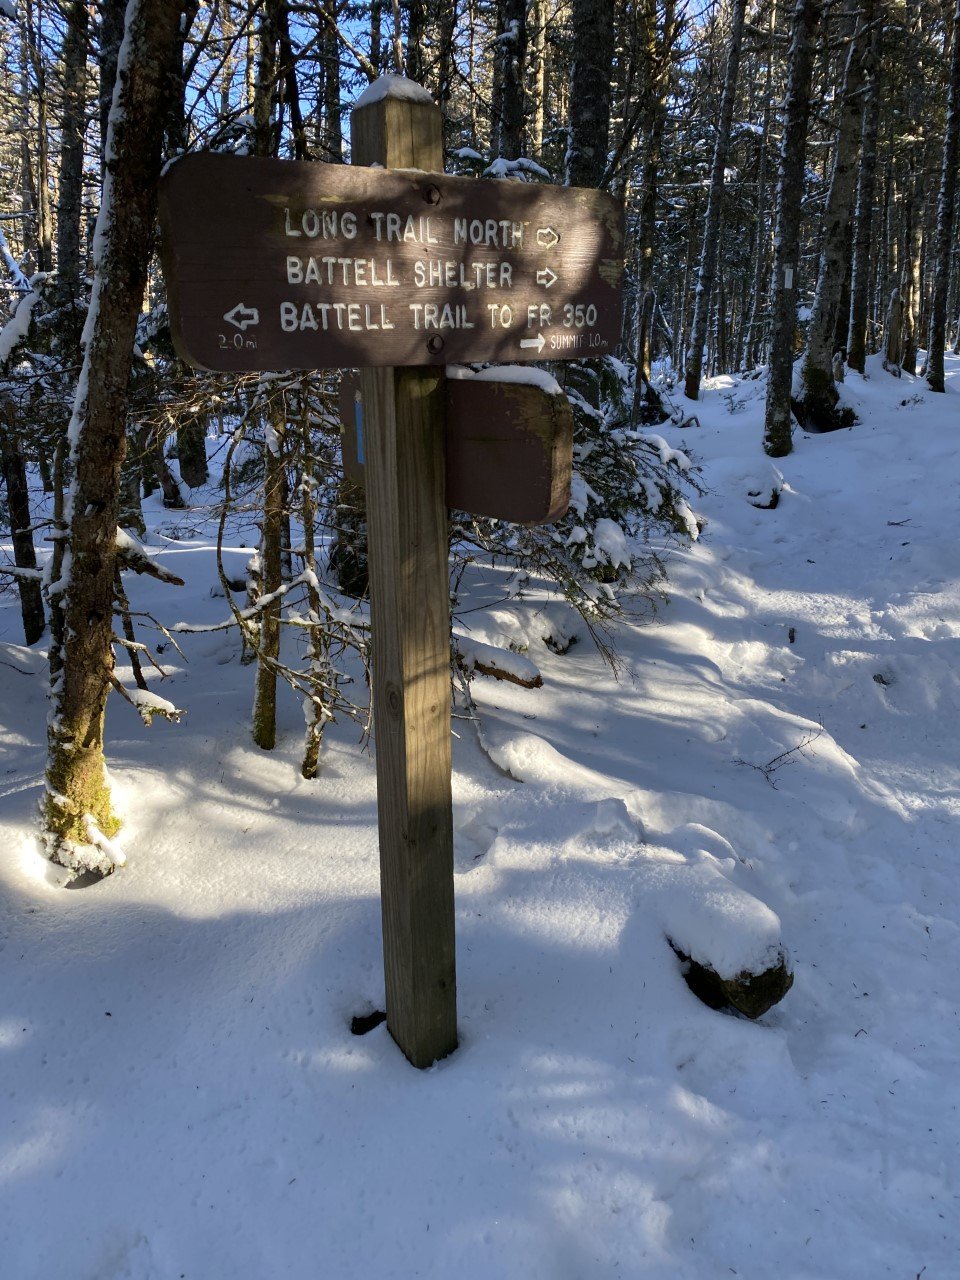
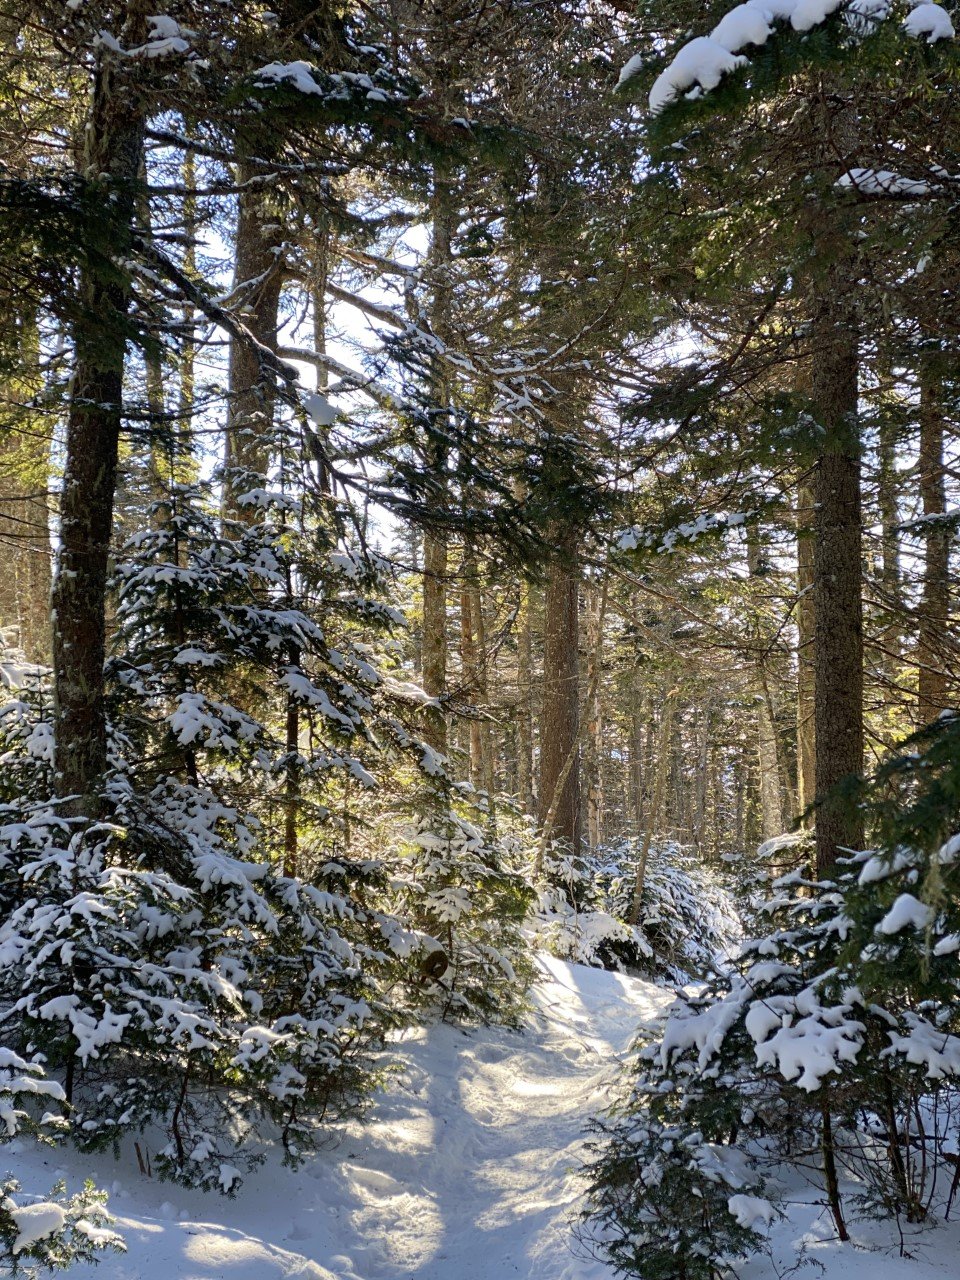
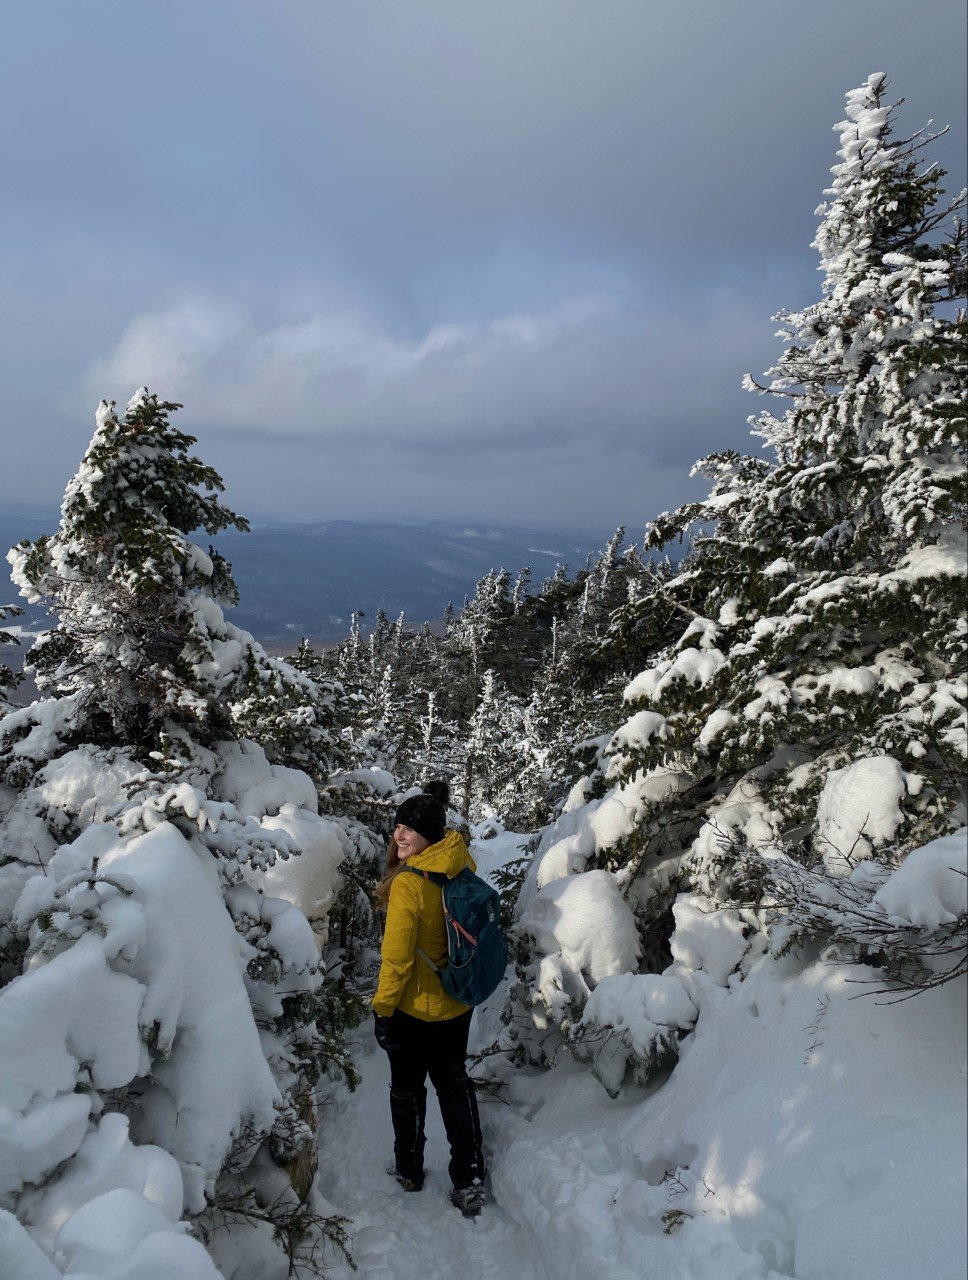
3. Mt. Abraham (4,006 ft)
I spent this winter eyeing the forecast like it was another one of my part-time jobs. With full-time teaching and marathon training on my schedule, there were only a handful of days that even allowed for a Vermont day trip. Let alone a day where the winds weren’t treacherous. Pro tip: I use Mountain Forecast to plan out my hikes. On the website, type the mountain you’re hoping to climb, and it gives you everything you need to know to make a smart decision: temperature, wind chill, wind miles per hour. All of it for the summit. I can’t tell you the number of times I went hiking when I was a beginner that I’d rely on my iPhone’s weather app and solely look up the small New Hampshire mountain town my hike started in.
I learned pretty quickly that the weather in town isn’t necessarily on the same communication channel. While it’s sunny and warm in town, it can easily be the complete opposite atop the summit.
I found easy parking along Elder Hill Road, but I assume it was due to winter dissuading the average hiker from weekend adventuring. From Elder Hill Road, the Battell trail is quick to spot. Another speedy one thanks to packed down snow, I took Battell to the end when it formed into the Long Trail.
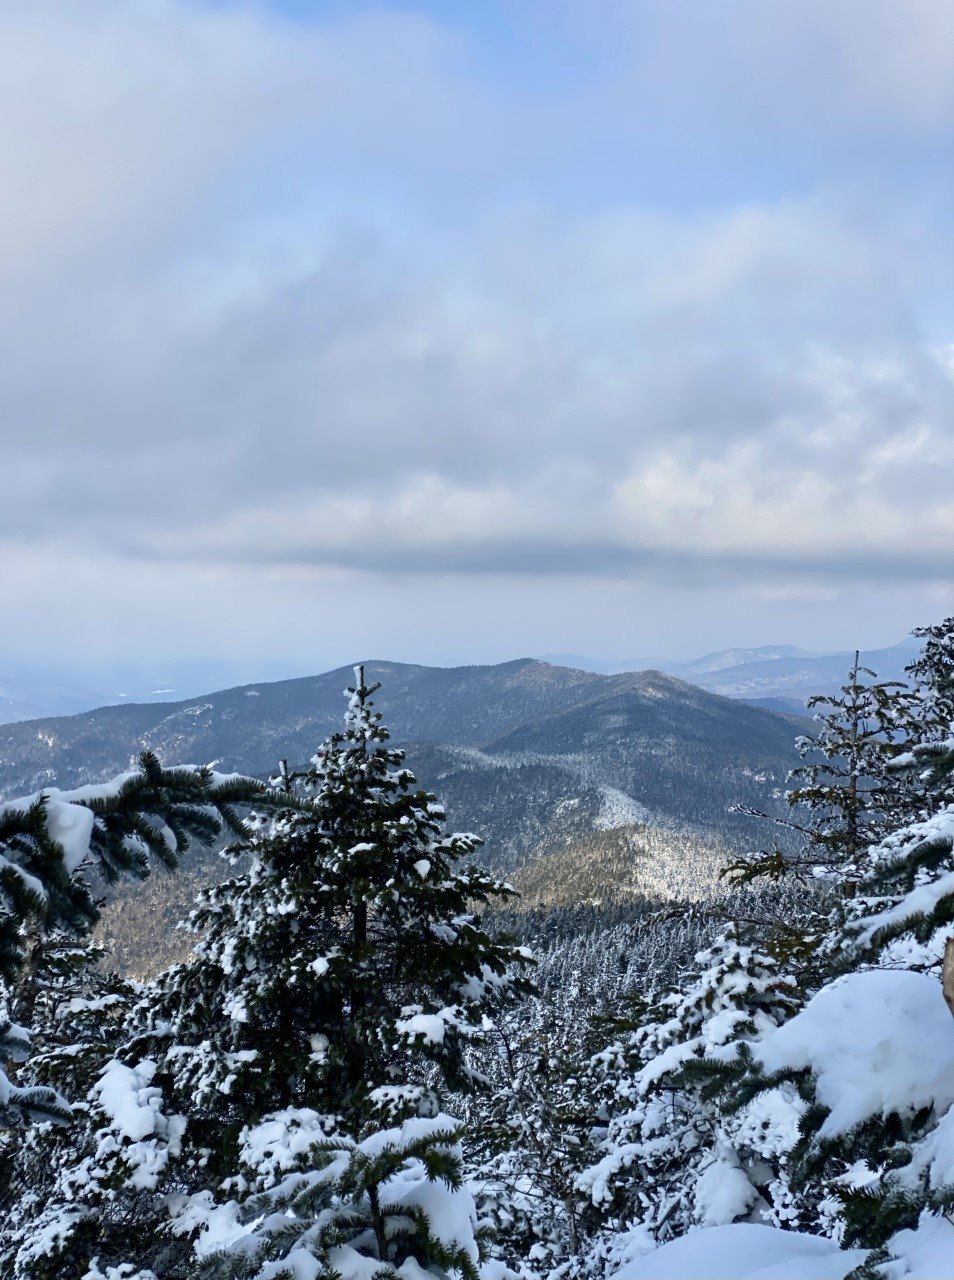
Lincoln Gap Road has a shorter distance hike to the summit, but in winter this road is closed. Regardless, Battell is roughly a six mile out-and-back. The summit offers scaping views of the Green Mountains. There is an old airplane (remnants of a crash) along the summit ridgeline, but with all the snow at the time, I didn’t come across it. Always need to leave a reason to revisit though, right?

Summit views from Abraham.
With the parking lot in sight, I logged 5.84 miles and 2,700 ft of climbing total.
4. Mt. Ellen (4,083 ft)
When I parked on Jim Dwire Road, I thought I would be the only one out on the trail today. I almost missed the trail sign because it blended in so well. There were a few cars parked on the side of the road that indicated I was indeed, in the right place. A small dirt road on a residential street, why would I find anything strange with that?
As I made my way to the tiny sliver of trail from the trail sign, I thought about the week before when I was on the opposite side of these mountains. After such a great day meeting Abraham, I could hardly wait to meet Ellen. However, Abraham didn’t relay the memo to Ellen to pack down the fresh, fluffy powder for me.
It took me quite some time to make my way to the summit as I didn’t have snowshoes. I called Ellen just about every name other than her own as I struggled to the summit. The sun was setting soon and the temperature was dropping. I made it to the summit, only to be met with skiers swiftly speeding past me.
After a moment to enjoy the view, I raced against the daylight (usually a losing battle in winter) to return to my car before the sun called it a night. At 7.11 miles roundtrip and 2,700 ft ascended, I can confidently say I met Ellen, but she wasn’t my favorite.
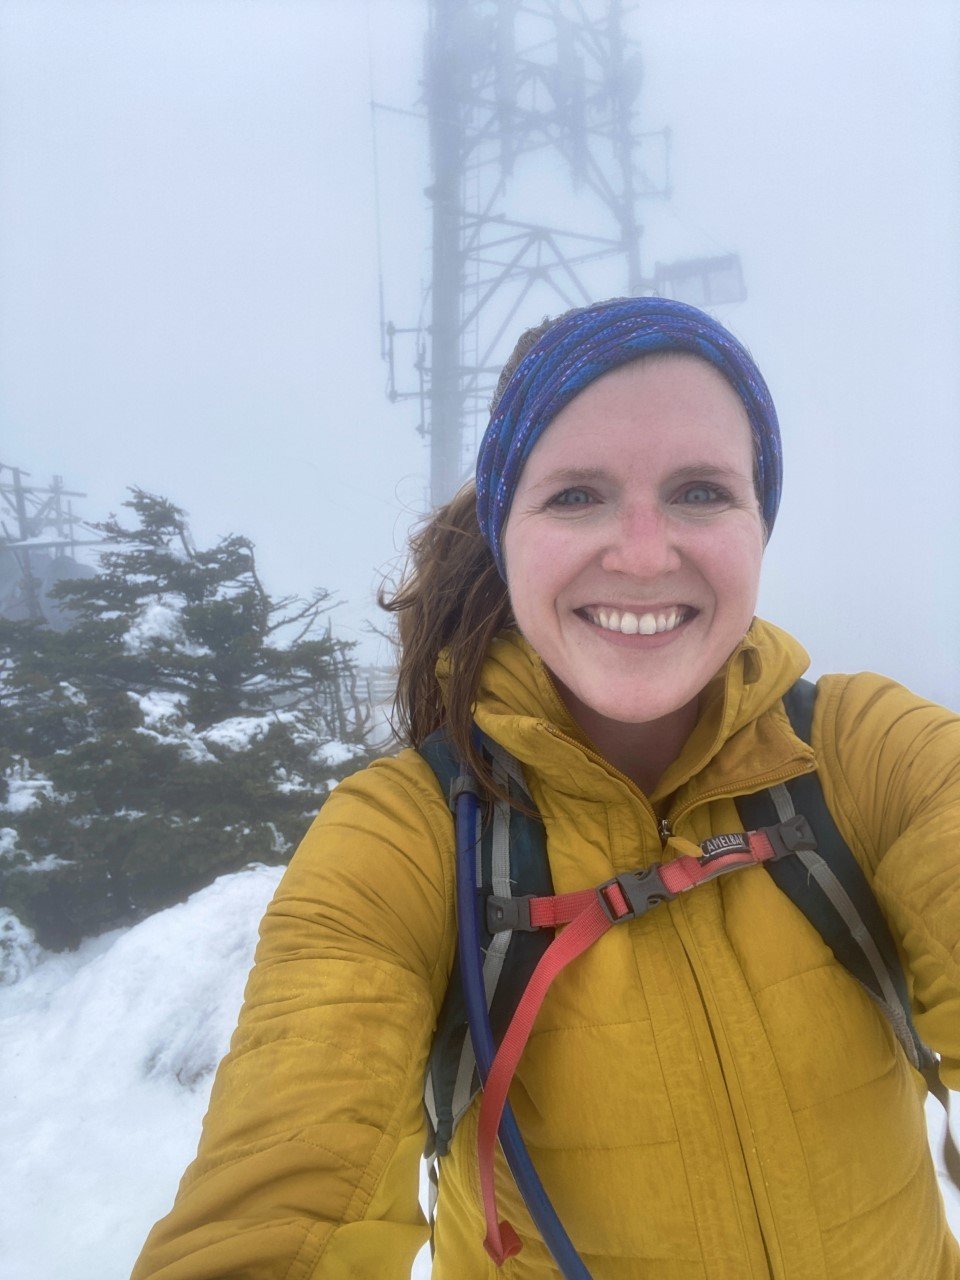
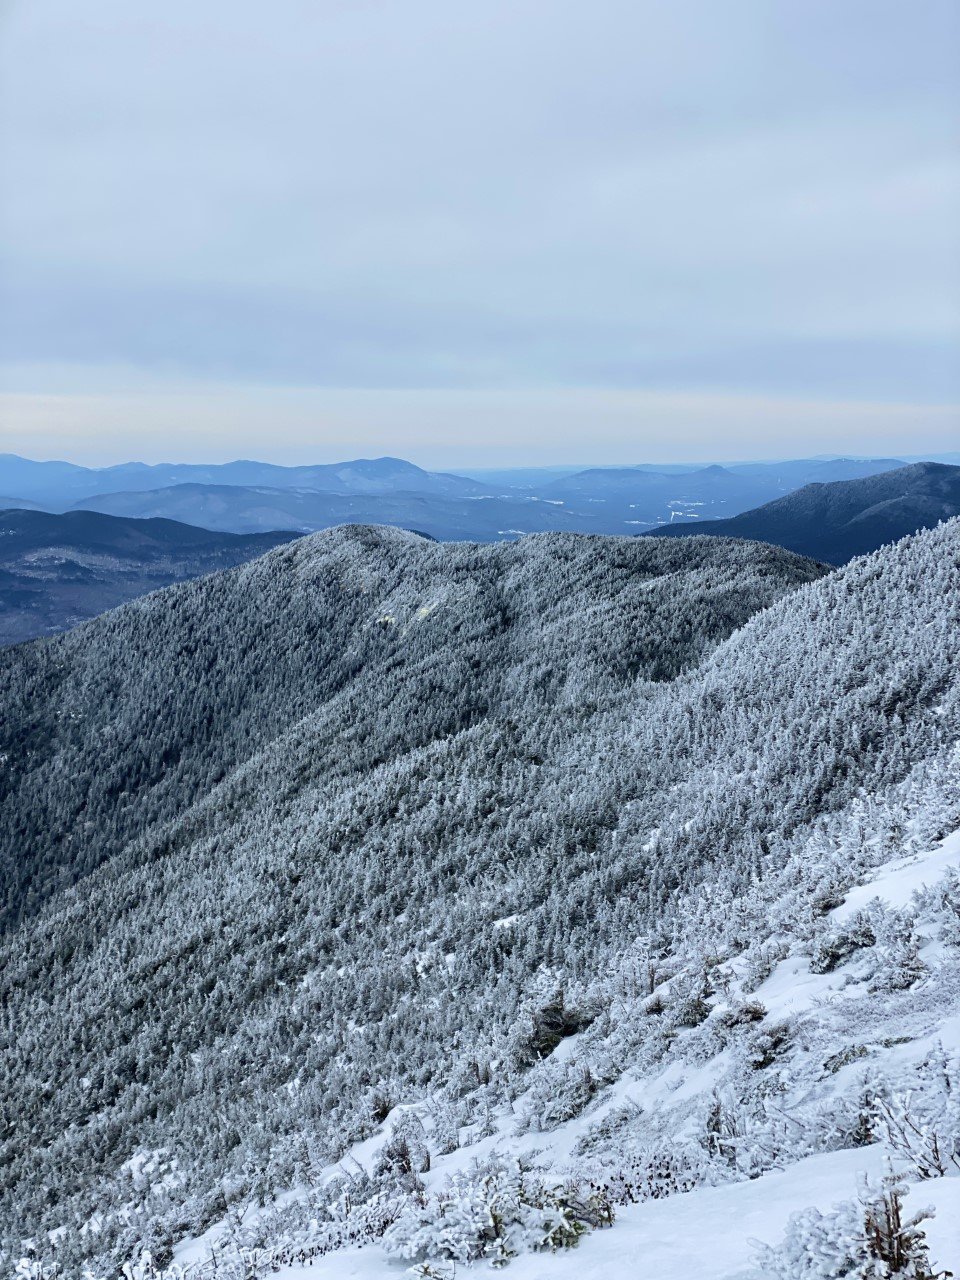
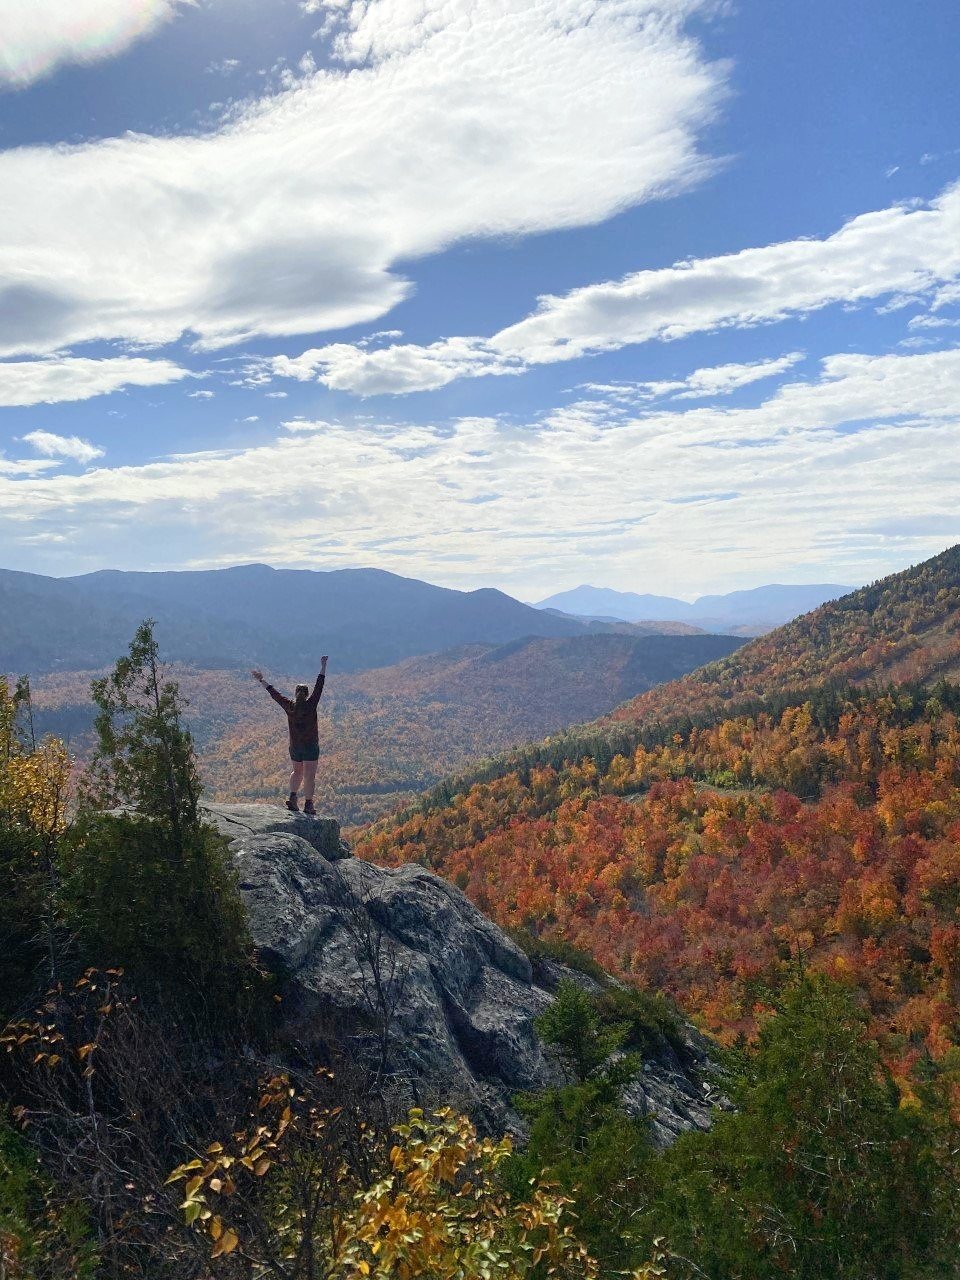
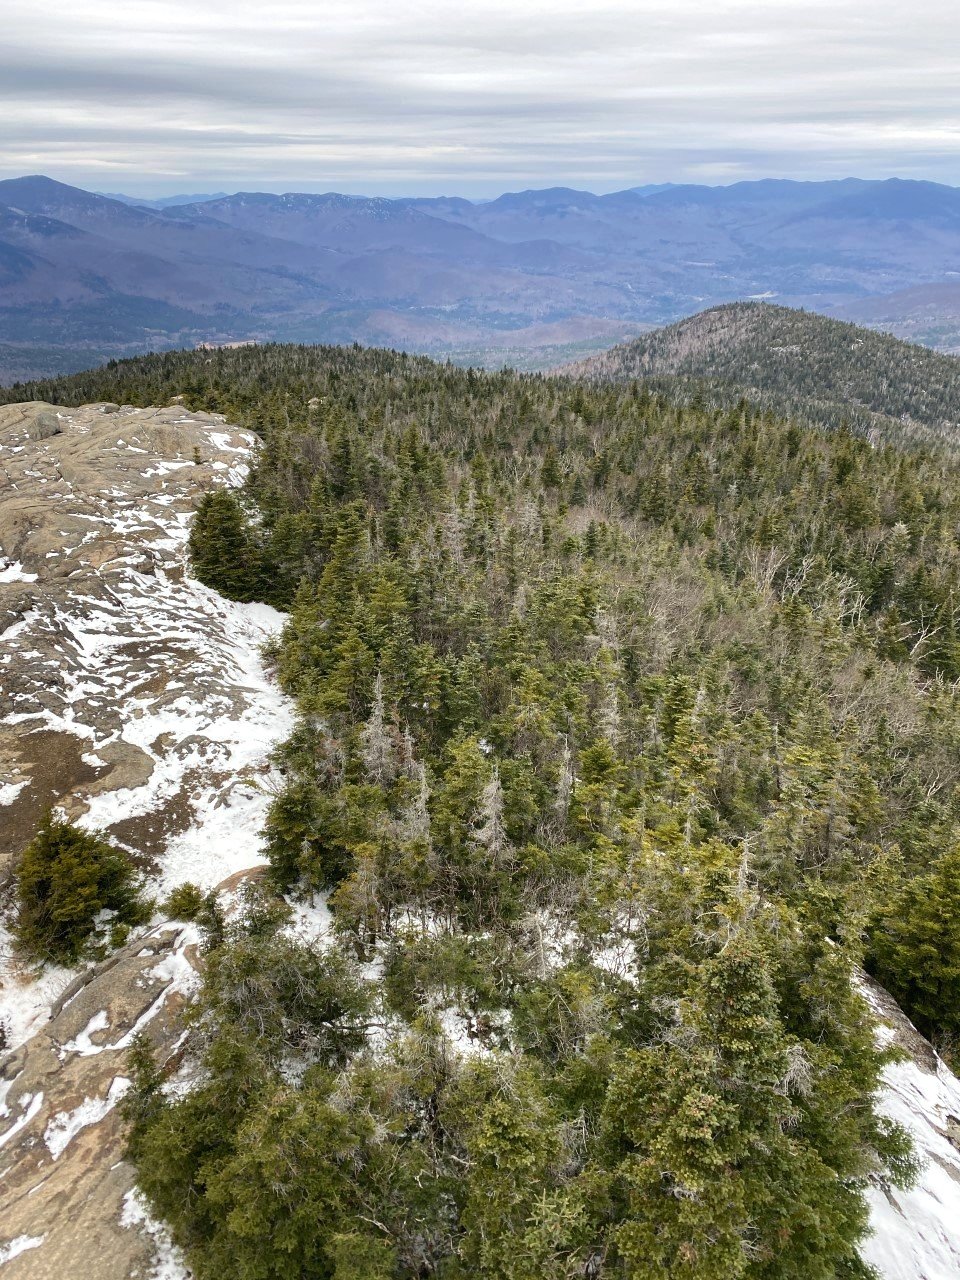
5. Mt. Mansfield (4,393 ft)

Mt. Mansfield for the big finale felt fitting. As the tallest peak in the tiny state of Vermont, I wanted a clear day at the summit. I watched the forecasts and my training plan schedule, and finally found an opening in March that let me head up Mansfield.
I parked on Mountain Road in Underhill State Park and began my steady climb along another road that isn’t maintained in winter. The road was a decent climb, but quiet. I took the CCC road with a quick shortcut thanks to the Eagles Cut trail to get me onto the trail I set out for: Sunset Ridge.
Sunset Ridge is definitely a gem of a trail. There is plenty of exposure on the trail with a little rock scrambling. Normally I love that, but with some wild winds, I was nervous about taking this trail down. Sunset Ridge joins with the Long Trail near the summit for a totally exposed view of the Green Mountains, including a nearby ski lift. I had the trail that day (and the summit) to myself, and it felt like such a great way to finish off hiking the highest peaks in Vermont.

When it came to descending, my heart sank contemplating returning Sunset Ridge with how windy and exposed it was. However out of the two trails (Sunset Ridge and Laura Cowles) from Underhill State Park, Sunset was less steep.
A seasoned hiker told me to take Laura Cowles (the steeper, tougher trail) down and I’m so glad I listened! I was originally worried of exposure descending Laura Cowles, but that trail, from the summit, quickly turns forested. Before I realized, I made my way down to the road and logged 6.6 miles and 3,130 ft of climbing.
Have you hiked any of Vermont’s highest peaks? Would you take on the VT 5?

Lake Placid 9er Hiking Challenge
Over the span of 31.31 miles, I climbed 10,388 ft along these 9 summits. Here’s how I broke down the Lake Placid 9er hiking challenge:

I never grow tired of the beauty of these majestic mountains.
If I’m being honest, the Lake Placid 9 originally didn’t appeal to me. I love the brutal nature of a long day hike. Of miles and hours spent climbing a couple thousand feet for the triumphant feeling at the summit. Even if the view isn’t there.
I first heard about the Lake Placid 9 after hiking a couple of the ADK 46. I thought, why spend my limited time in these gorgeous mountains on very short hikes? Well it turns out, these short hikes sure know how to hold their own.
When mapping out my fall foliage adventures, I usually spend one weekend in the Adirondacks and the rest chasing the colors in New Hampshire. This year, after spending an early September weekend in the Adirondacks showing my parents the beauty New York has to offer, I decided to spend more time in upstate NY. Instead of New Hampshire. I know, I hardly recognized myself too.
My parents were up for a short hike, so I picked the shortest one of the Lake Placid 9: Cobble Hill. After this hike, I had an idea.
What if I combine my fall foliage chasing adventures with this short hiking challenge? It’d motivate me to get out there, and I’d gain more experience up in these rugged mountains. Plus, I’m a sucker for the foliage photos.
And thus began my multiple trips to Keene and Lake Placid, NY in September to October, with one final lap in November.
Over the span of 31.31 miles, I climbed 10,388 ft along these 9 summits. Here’s how I broke down the challenge:
1. Cobble Hill
Distance: 2.89 mi
Elevation Gain: 610 ft
Location: Lake Placid, NY
With my parents visiting for a short weekend, I wanted them to experience an ADK hike without too much exhaustion. Since we were staying in Lake Placid, I figured why not finally check out Cobble Hill.
We hiked the steep, shorter way up, and took the longer, gradual way down. I highly recommend this route because you get a bit of rock climbing with a rope ascending, but descend on a lovely trail walk next to a private pond. It’s a great way to get your feet wet starting out on this challenge!

My route to Cobble Hill is above.
2. Mt. Jo

Third trek up this mountain gave way to a new view!
Distance: 1.94 mi
Elevation Gain: 761 ft
Location: North Elba, NY
Technically this was my third time hiking up this mountain. Every time I hit the trail, my hope to find the iconic view is strong. This hope slowly withers away as I simply couldn’t find the lookout point.
After two failed attempts, I wasn’t leaving the summit this time around without seeing the heart-shaped lake in its entirety. Aptly named, Heart Lake. You’re in luck, because my determined self found it this time so you won’t have to hike up multiple times (unless you choose to!).
Mt. Jo is an extremely popular mountain because of the trails, location, and views. When you arrive at the ADK Mountain Club Loj, you’ll pay $15 as a non-member for a full day or $7 for a half day. Depending on the weekend, you may get lucky with an afternoon. If it’s peak foliage season on a late September or early October weekend, you may way to
After parking, you embark on a short traverse before finding two roads diverged in the woods. You can take the short way, or the long way. I’ve never taken the long way, but be prepared for some stairclimbing if you take the short route.
The trail is a swift one mile up, and I took the same route back. Stay cautious heading down on the rocks, especially if you’re taking this on in the fall where often times rocks are wet due to those rainy autumn forecasts.

Tip: The view at the summit isn’t the best view. The best view is easy to miss. When you’re near the ladders, there’s a trail a few steps away that is sure to give you a reason to love Mt. Jo.
My route is on the left.
3. Mt. Van Hoevenberg

Distance: 4.7 mi
Elevation Gain: 1,047 ft
Location: Lake Placid, NY
Mt. Van Hoevenberg has two trails to the summit: a newly constructed one, and the old one. I was already familiar with the ADK Loj area, so I chose the older path. The parking here is extremely limited – maybe less than ten cars can fit. I went at a less popular time of day, so it worked in my favor.
The distance of this hike is longer than Mt. Jo, but the first mile is a simple walk in the woods. It’s quite lovely! After climbing 1,000 feet in roughly a mile, expansive views of the valley open up. This hike is a true gem!
It’s definitely one I’d love to revisit in winter when the peaks are snow-capped. The trails are an out-and-back, unless you have another car to park on the ski area side where the new trail begins.
Here’s my route:

The trail to Mt. Van Hoevenberg.
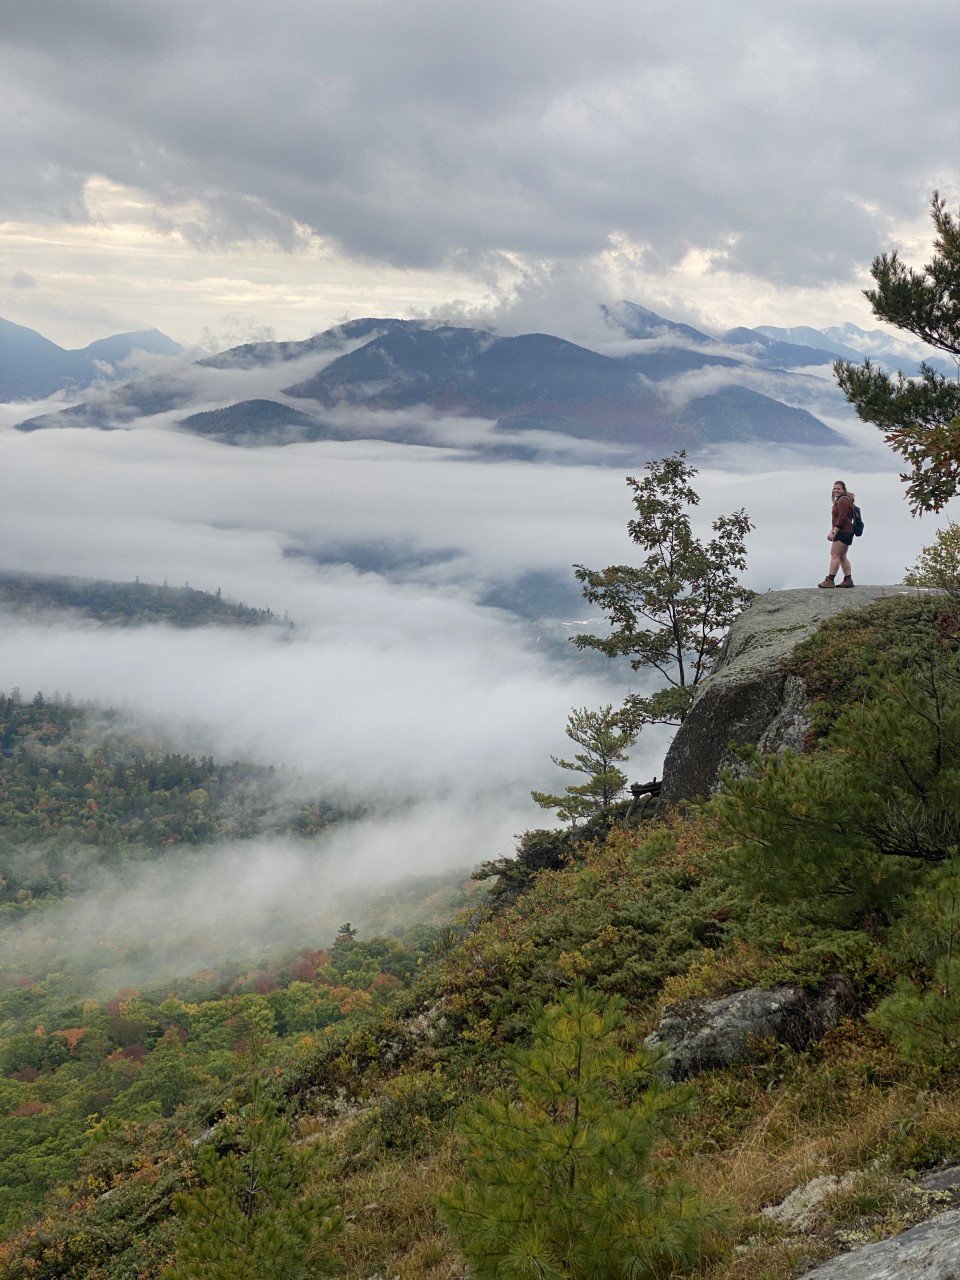
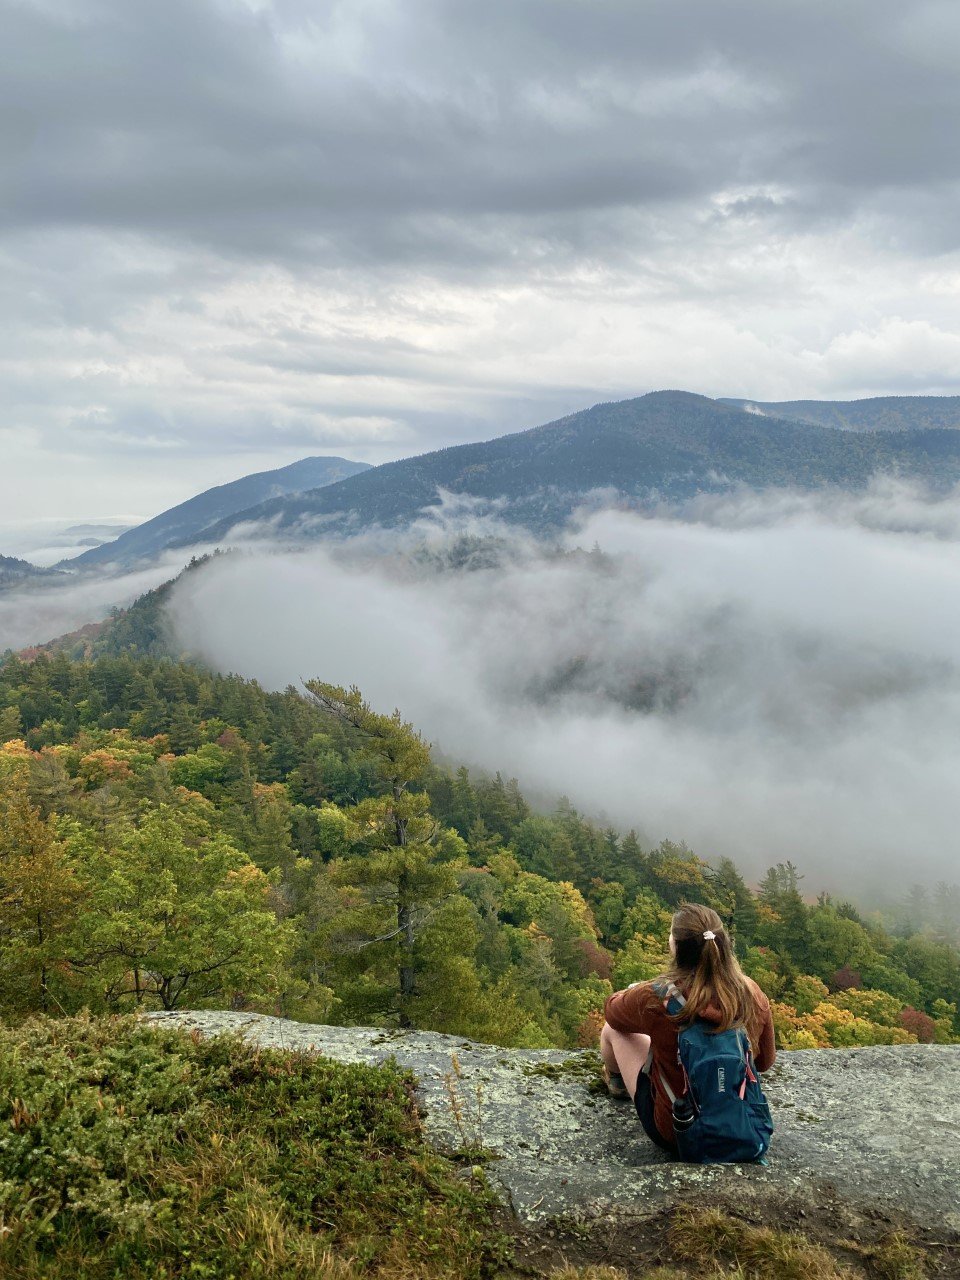
4. Big Crow Mountain

A solo summit on a moody evening.
Distance: 1.34 mi
Elevation Gain: 610 ft
Location: Keene, NY
When I entered Keene for this hike, the clouds decided to join me. I knew it was a short distance, so I thought I’d knock it out and if I got a view, I’d be two for two. The parking lot for Big Crow is also the lot for one of the routes up Hurricane. An AWD vehicle would be best as the last mile felt a little sketchy in my RAV4, but still doable. This road isn’t maintained in the winter months, so get this hike in in the summer or fall from this trailhead.
A speedy, consistent climb of 600 feet in under three-quarters of a mile again opened to wide-scaping views of these mountains that are slowly feeling like home to me. I set up my tripod as the clouds rolled in, took a few pictures at the top, and headed back down.
I made a mental note to come back to hike Hurricane from this parking lot since I was now familiar with the drive up.
Here’s my route:
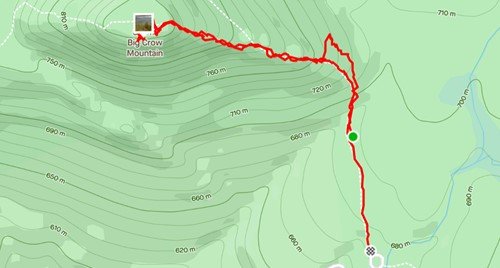
Route map above to Big Crow Mountain.
5. Baxter Mountain
Distance: 3 mi
Elevation Gain: 869 ft
Location: Keene, NY
After the stormy wonder of Big Crow, I knew I had to try out Baxter on this trip up to Lake Placid despite the rainy forecast. I woke up to the steady pitter-patter of raindrops. Contemplating just driving back home, I thought, why not just get out for a three miler?
I made my way over to Keene and parked along the road for this trailhead. The sprinkles fell from the sky and with each step, my disappointment of seeing a view grew. On the way to the summit, there are great viewpoints (arguably better than the summit!). For the fifth time on my Lake Placid 9er journey, I lucked out with the views.

Tip: Always go for it when there’s light rain and you don’t think you’ll get a view. You may just end up with this.
My route is on the right. The photos are where the viewpoints are.
If you’re tackling the challenge, head to the summit to say hello, then stop for the views on the way back.
6. Bear Den Mountain
Distance: 3.82 mi
Elevation Gain: 1,542 ft
Location: Wilmington, NY
The day I embarked up Bear Den was a toasty one. A crisp marshmallow in the campfire on a summer night. Quite the opposite of my previous visit to the mountains with the rainy hike up Baxter. Park at the Whiteface Mountain Ski Center and you’re right at the trailhead. The first mile of this hike doubles as a mountain biking route, so be aware if you have a furry friend with you. The trail’s switchbacks keep things interesting as you make your way up. Just tell yourself you’re almost there, trust me, it helps.
It doesn’t help, but every step is a step closer to the summit! I was in absolute awe atop the summit. The foliage, in unison with the summery weather, lit Whiteface Mountain on fire. It was incredible to gaze my eyes upon.
After awhile of solitude on the summit, I realized the group I passed quite some time ago never summited. As my mind pondered, my eyes wandered. A couple odd colors caught my eye. Those little dots were the other hikers! They had made their way to a rocky surface across the way.
I was curious where they had turned for that added bit of solitude (plus a different angle!). When I headed down, I realized this was another case of the Mt. Jo hidden treasure.

The view of Bear Den’s summit.
As you approach the Bear Den summit, you turn left. Instead, turn right at this sign. There is a very well-trodden trail that leads to that open-rock summit with these views of Bear Den’s summit.

Here’s my route, including the totally-worth-it right turn detour.
7. Pitchoff Mountain

The famous Balanced Rocks!
Distance: 4.15 mi
Elevation Gain: 1,744 ft
Location: Lake Placid, NY
I was saving Pitchoff for a perfect day. The summit itself is hardly impressive, but a steady climb leads you there with views to the right of Cascade and Porter. It’s neat to see where you’ve hiked before.
After the summit, I returned back to finally see Balanced Rocks. It doesn’t look like much on the trail, but it’s another iconic view like Heart Lake from Mt. Jo. I’ve seen it from the road more times than I can count. Two rocks sit on a very open summit looking as if you could just flick them and they’d fall off. Almost like the Glen Boulder trail in the White Mountains.

Truly the perfect sunset hike in the Adirondacks.
You’ll have incredible water views from here, as well as a great shot of the Olympic jumping complex. It’s a phenomenal sunset spot if you decide to take this mountain on later in the day. The trail is easy to follow with a headlamp at night afterwards.

Here’s my route to both Pitchoff Mountain and Balanced Rocks.

8. Catamount Mountain
Distance: 4 mi
Elevation Gain: 1,624 ft
Location: Wilmington, NY
Oh, Catamount. When researching the Lake Placid 9, this hike was advertised as fun with a side of scary. I took this trail on thinking I’d get Catamount done by the early afternoon with enough time to also trek up Hurricane in the same day. This hike didn’t go as planned at all!
The elevation gain was serious and the hike feels very isolated on a weekday. The trail itself is well-marked and easy to follow. The “fun” comes into play when you’re closer to the summit and features all sorts of rocks to climb. Everyone’s favorite is this little sliver to climb up and through in order to continue the hike.
If I was alone, I think it would’ve felt more enjoyable, but when I hike with my dog, she occupies my mind. I worry about her moves and how she’s going to climb up. The drop is a little steep. After this point, the rest of the trail is smooth sailing.
I would advise against hiking this one on a rainy day, which the summit for me ended up being a little rainy. After eight summits out of nine, I was bound to have a clouded summit. It was fitting it was the toughest one for me! I was able to sneak a peek of what some of the summit views might’ve looked like on my descent.

My route to Catamount Mountain.
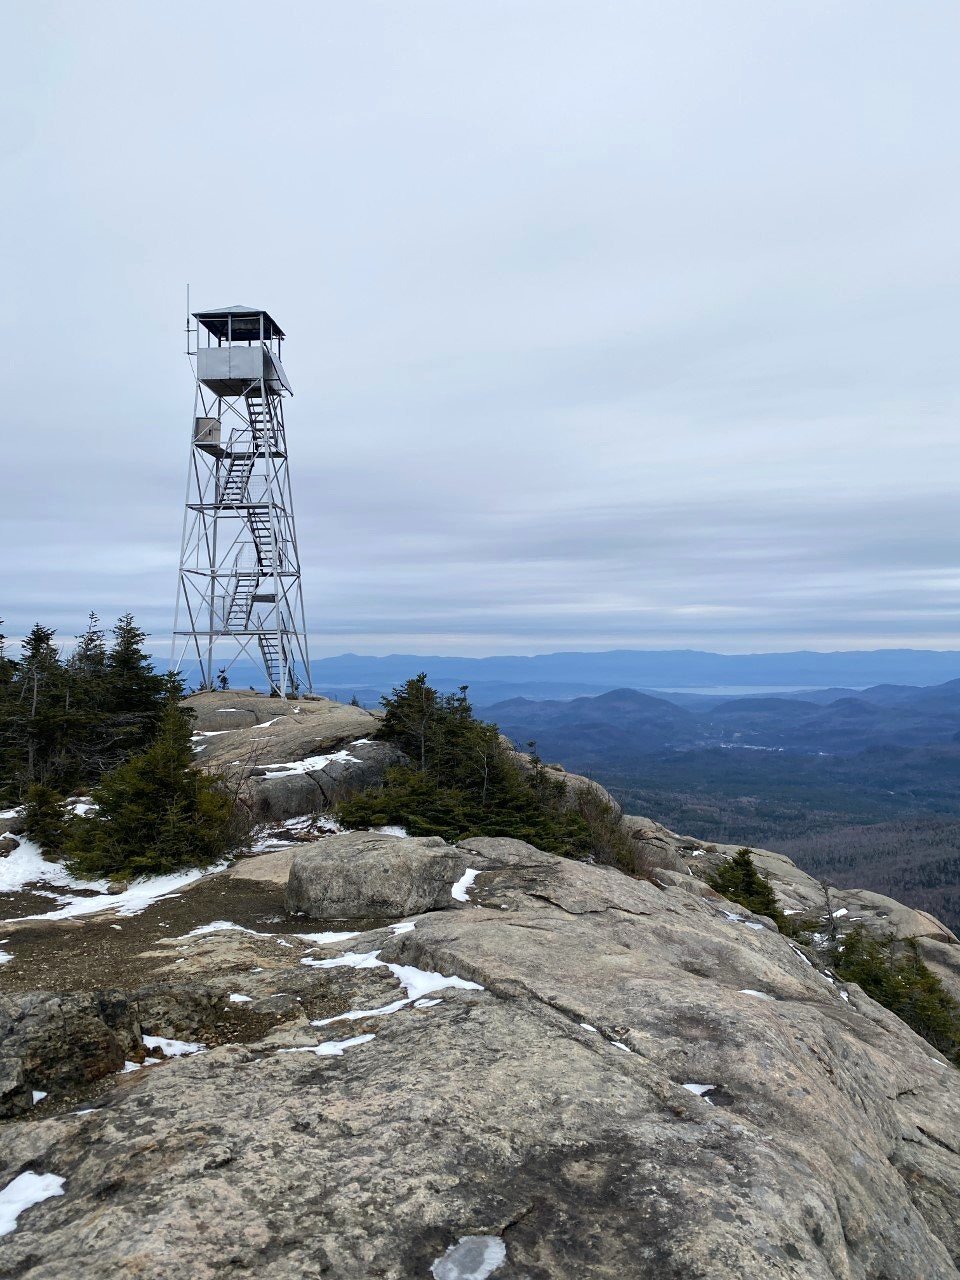
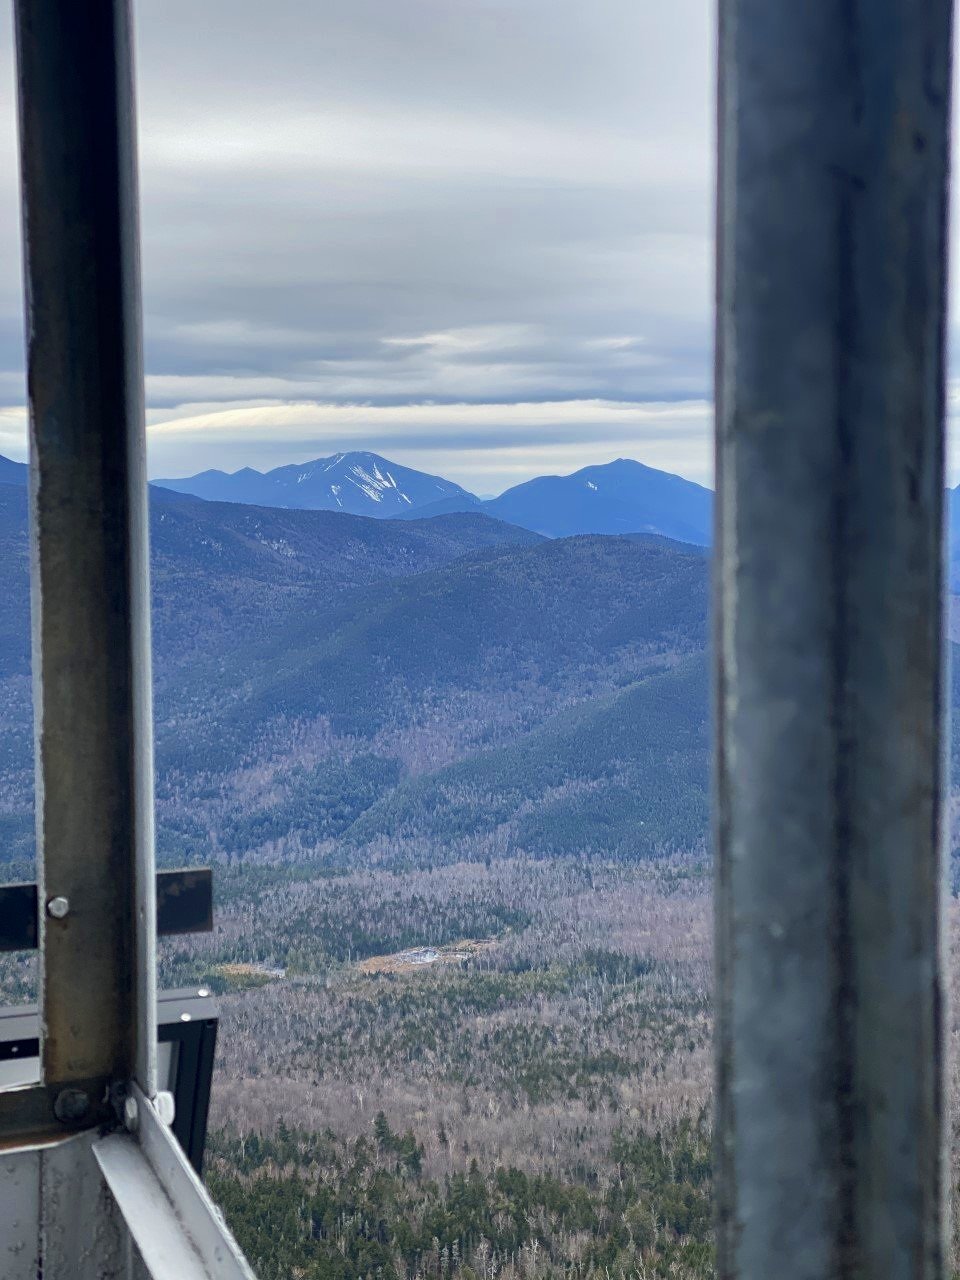
9. Hurricane Mountain
Incredible views all around atop Hurricane.
Distance: 5.47 mi
Elevation Gain: 1,581 ft
Location: Keene, NY
The final peak for me was Hurricane Mountain, and as I told myself a month earlier, I was going to park where I did for Big Crow. This trailhead is a popular summer one as it’s the shortest ascent to the famous Hurricane Mountain fire tower.
I made it just in time before winter entered the mountains and the road would have to be maintained (which it isn’t). At the end of November, I lucked out with a beautiful day to myself on this summit. I summitted swiftly, to my surprise. This hike turned out to be one of my favorites. Catamount for me came in as one with the most elevation gain, but Hurricane is the longest distance-wise. Though after hiking the NH 48 and a few of the ADK 46, a 5.5 mile hike feels light in my mind.
Maybe it was the solitude, or the fire tower, or even the fact that it was shoulder season, so all the foliage chasers sat this one out that day. Whatever it was, it sure felt good to end in this moment.

The hike up Hurricane Mountain offers incredible views from the summit, as well as from the fire tower.
My very straightforward route is on the left.
Are you ready for a winter challenge? Take on the Lake Placid 9 in the winter months to earn a special patch for the added difficulty of navigating winter.
Would you hike these nine mountains? Let me know!