
3 Hours in Kentucky’s Best-Kept Secret: Mammoth Cave National Park
I really had to dig deep to fathom what people saw in Kentucky. Here’s what I uncovered…

When I embarked on my goal to visit all fifty states, I really had to dig deep to fathom what people saw in Kentucky. It’s inconveniently located in the U.S. It’s not close to the attractions of the western U.S., and it’s too far from Ohio and New York—what I consider to be the gatekeepers of the east for road trip lovers. Once I hit Ohio, I feel like I’m truly on a road trip.
Once I realized the state of Kentucky’s best-kept secrets lay under its surface, I knew I had to visit. Kentucky is home to the world’s longest cave system. That’s right. Little ol’ Kentucky holds the world record in cave system length. Next time you attend a trivia night, you can bet you’ll remember the name of this one.
Mammoth Cave feels suitable for the home of this world record holder. Exploring caves was never at the top of my to-do list until an unexpected trip to Carlsbad Caverns. A group of friends and I aimed to hike Guadalupe Peak down in Texas a few summers ago, and in the planning stages, we realized how close Carlsbad Caverns in New Mexico was to where we would be. Naturally we had to visit two parks in one trip. Who wouldn’t?
Slightly kicking myself for not squeezing in White Sands while I was down there, but I will gladly take another excuse to visit New Mexico again because the caverns in Carlsbad blew me away. Here I thought I was just crossing another park off my list, but the caves were stunning. The tour I went on took me through multiple football field length rooms of open space underground. It was breathtaking.
When we were road tripping down to Florida and back to Massachusetts, Kentucky didn’t look too far off on the map. What’s an extra few hours when you’re already driving over thirty hours total, right?
Kentucky is one of three states I had never visited. I truly only knew it was home to the Bourbon Trail and the Kentucky Derby. Turns out, it has a bit more to offer than that. There are countless caves to explore and outdoor things to do. We only spent a half day in the state before venturing off to one of my favorite places in the U.S. (the alluring West Virginia), but that was plenty of time to discover Kentucky’s best kept secret: Mammoth Cave National Park.

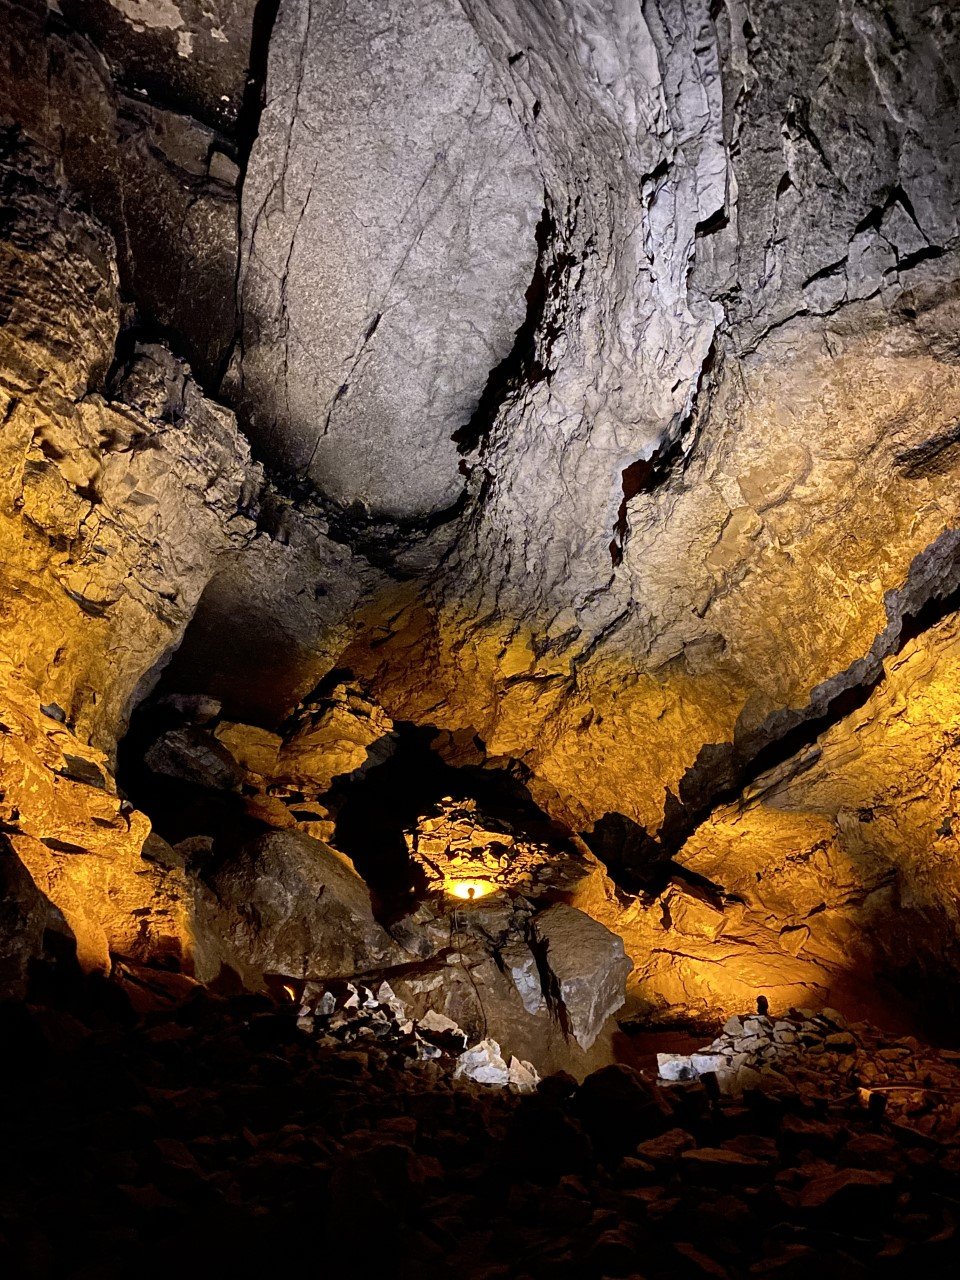
Given the poor lighting inside a cave, there is little opportunity for photos. Had to get the classic national park sign shot at the entrance of the park! This also marked park #40 out of 63 for me!
Mammoth Cave National Park became a national park in 1941 and a World Heritage Site in 1981, and it’s no surprise why. Here’s the best way to explore this gem:
Take a tour with a park ranger. The park itself has more than 400 miles of mapped out passageways underground, but only about ten miles of those are available to explore through a tour. Visitors are in luck though because there are countless tours available and they are offered year round! Explore tour options here and book a guided cave tour here. You will need to make an account with www.recreation.gov to book.
Tip: There was some service in the parking lot of the visitor center, but absolutely none inside the center. All tours begin and end at the center, so I highly encourage you screenshot your ticket confirmation to ensure a smooth tour entry.
Another tip: For those of you like me who always invest in a National Park Pass (the interagency one), unfortunately it’s not accepted here.
We signed up 3 weeks in advance for the 12:15pm Historic Tour. It’s a two-hour tour that I felt would be the best bang for our buck (and we also only had a few hours to spend in the park before departing to our next destination). As of April 2022, this tour was $20 per person.
Lucky us, we ended up on tour with an entire sixth-grade class. Nothing more relaxing for two teachers on spring break than being part of a tour of students… Thankfully the park ranger could see our enthusiasm about this, and informed the group that anyone not part of the school group would be at the front. This was ideal!
Our tour guide took us through the historic entrance and told us all about . There are still plenty of miles waiting to be discovered—eight new miles were discovered as recently as the fall of 2021!
The Historic Tour is about two miles long at a slow pace. There are plenty of stopping points, but also fun sections that aren’t for the claustrophobic adventurers out there.

The paved path thinned significantly moments after this sign and caved in vertically as well. An appropriate caution sign for what was to come.
What I found most fascinating was the story of tour guide turned explorer Stephen Bishop, who we have to thank for a great deal of the discoveries in Mammoth Cave.

This tour gave a great taste of the treat that is Mammoth Cave. Like I said before, I’m not a big cave girl, but won’t turn down an opportunity to explore one either after Carlsbad. Mammoth Cave in a few hours felt like just the right amount of time spent to not get bored or tired. There are plenty of other tours to learn more or explore further, as well as trails to walk or bike on above ground.

At the end of the tour, you exit up these stairs. Before returning to the visitor center, you are required to walk across bio-security mats to prevent a fungal disease (white-nose syndrome) from negatively impacting the caves’ bat population.
For me, three hours was just enough time to enjoy the beauty that is Mammoth Cave National Park.
Would you travel to Kentucky for this national park?
If you enjoyed this post, check out others on national parks:
Everything You Need to See in Acadia National Park, Maine
Two Best Ways to Experience Haleakalā National Park
Two Must-Do Experiences in Florida (That Aren’t Disney)

Two Must-Do Experiences in Florida (No, Not Disney)
I’m the first to admit I did not see Florida’s potential. As I researched, I realized…
I’m the first to admit I did not see Florida’s potential. After a family road trip to Disney as a kid, I crossed this state off my checklist and called it a day.
Little did I realize that the National Park Service designated three parts of southern Florida as national parks, which meant I needed to make another trip (or two) down to explore. As I researched, I realized what a beautiful area southern Florida is. And how underrated it is considering Miami and Orlando get all the attention.
Florida is home to Biscayne National Park, Everglades National Park, and Dry Tortugas National Park. These three parks are almost entirely on water. Biscayne National Park is comprised of 95% water, while the Everglades is actually the slowest moving river in the United States. Just one search of Dry Tortugas will show you Fort Jefferson – and the other six islands that make up this incredibly unique park.
Needless to say, I had my planning cut out for me. I drove down to Florida with the sole purpose of crossing two parks off my list, but it turns out, Florida has more to offer than theme park rides and Disney characters. I didn’t fit Dry Tortugas in this trip because despite being one of the most remote U.S. national parks, there is a convenient way to access the park. The mode of transportation is a ferry that costs $190 per adult and is sold out one to two months in advance. When I researched other options, I only came up with chartering my own seaplane. As cool as this would have been, my wallet was not prepared to take that kind of heat.
Dry Tortugas was out, for now. Here’s what I explored with my time in Florida on a budget:

Our sailboat guided by the wonderful Byron with the Biscayne National Park Institute.
1. Sail around Key Biscayne National Park (and kayak and snorkel too!)
What I did love about Dry Tortugas is that the ferry works with the National Park Service. Sure there is only one way to get there, but it’s safe and maintained. Key Biscayne is similar! You can either hop on your own boat (which I do not have) or take a tour with the Biscayne National Park Institute, an organization that gives back to the very waters they sail on. Can you figure out which route I decided to take?
I opted for the latter. I booked the Sail, Paddle, Snorkel, and Island Visit tour and can’t recommend it enough. The tour is $189 a person, but for an all-day excursion in a national park that’s almost entirely on water, I found it exceptionally valuable. The tour has a maximum of six people, and with our luck, we booked a day where we were two of five.

Our instructor was extremely experienced and let me try out steering the boat a bit, while he taught others how to let down the sails. As we sailed, he told us historic tidbits about these majestic waters. From fascinating tales of the inhabitants on the very thin stretch of land I could hardly make out if I squinted enough, to all the critters that live beneath the water.
Once we docked, the tour continued via kayaks. We paddled our way through parts of the water the boat couldn’t navigate to and were able to get a closer look at what lived in the water. As we neared very shallow waters, our guide told us to gaze on the spots on the water’s ground.
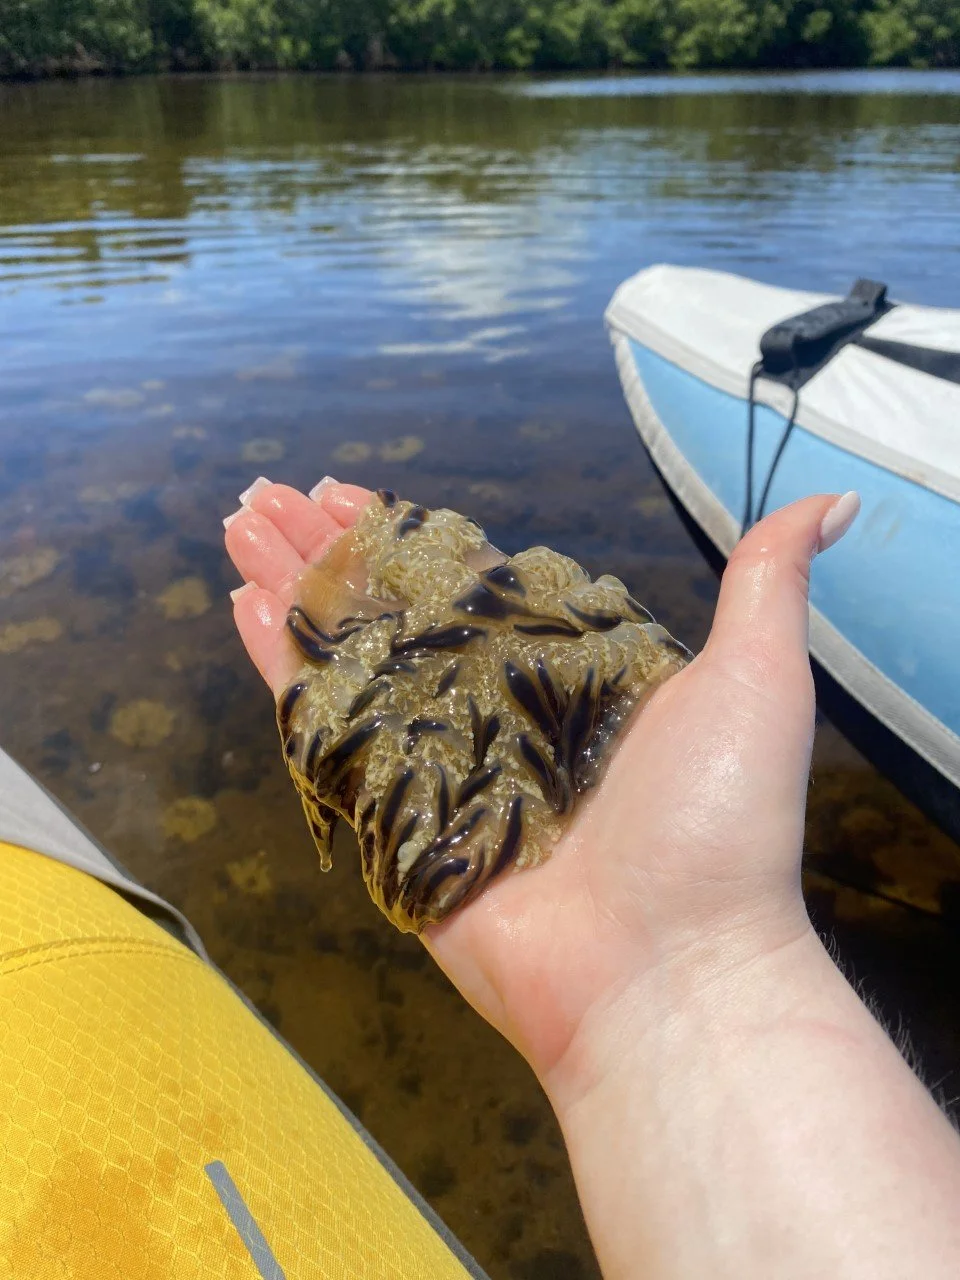
Fascinating Wildlife
Turns out those “spots” were jellyfish! He picked one up and let us touch the gooeyness. It reminded me of the middle school slime my students were obsessed with making a few years ago.

The Biscayne National Park Institute’s tour features kayaking or stand-up paddleboarding (SUP) and they supply all the necessary equipment.
When kayaking ended, we hopped (more so wobbled with flippers on) into the water for the snorkeling portion of the tour. I saw a multitude of fish that our guide had introduced to me in the stories along the morning’s ride, including gnarly-looking crustaceans if you peered into the crevices of stone and searched for daddy-long-leg-like claws. The return ride was soothingly smooth as our crew chatted about places we’ve been and places we’re hoping to venture to while laying out on the front of the boat.

Other Tours
The Biscayne National Park Institute also offers a handful of other tours, including one to a Key Biscayne lighthouse (another historic gem) that parks along the water and lets you head up the top of the lighthouse. As a lighthouse lover, this tour was next on my list if I had another day here.
2. Ride an Airboat through Everglades National Park

After Key Biscayne, I noticed geographically how easily it would be to explore the Everglades. Despite never having a desire to travel to Florida again, at the very least the state was cognizant of placing its attractions in close proximity to each other. With my homebase in Homestead, Florida, the Everglades were a short drive away.
The one thing I knew I had to experience in the Everglades was an airboat tour. Like its two sister parks in the state, majority of this park is on the water. It’s also the third largest national park in the lower forty-eight states.
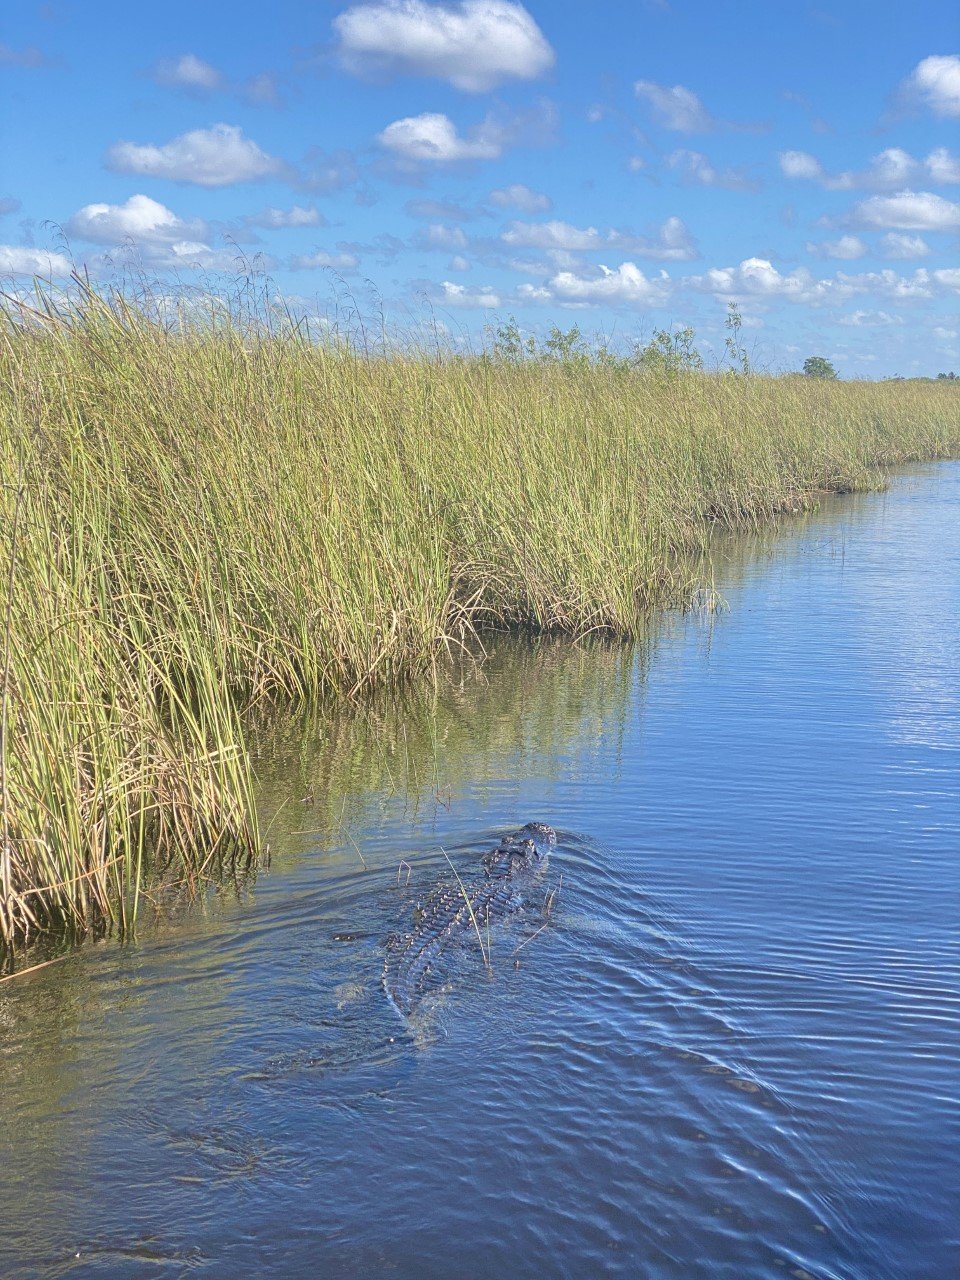
Airboats aren’t your typical boats. They’re iconic for their large fan in the rear of the boat that propels them forward. Riders feel a rush as the captain steers, making sharp lefts and hard rights. Tall, thin grass briefly slides against your arm as the boat speeds past miles and miles of the stretched sawgrass.
Along the way, the guide points out gators both in the thick of the grass and in the boat’s clearcut path. I saw about ten alligators total during the thirty-minute tour.
Like the other parks, there are designated companies that gained the seal of approval from the National Park Service to operate within the park. As you drive around the area, you’ll inevitable pass by countless companies offering airboat tours, but only the national park designated ones take you through national park waters. The authorized airboat businesses inside Everglades National Park include: Coopertown Airboats, Everglades Safari Park, and Gator Park. You can find more on these three companies here. I went with Everglades Safari Park and wasn’t too impressed with the guide, so definitely check out the other options! I wish we learned more about the history of the park as we were on the boat navigating the waters.
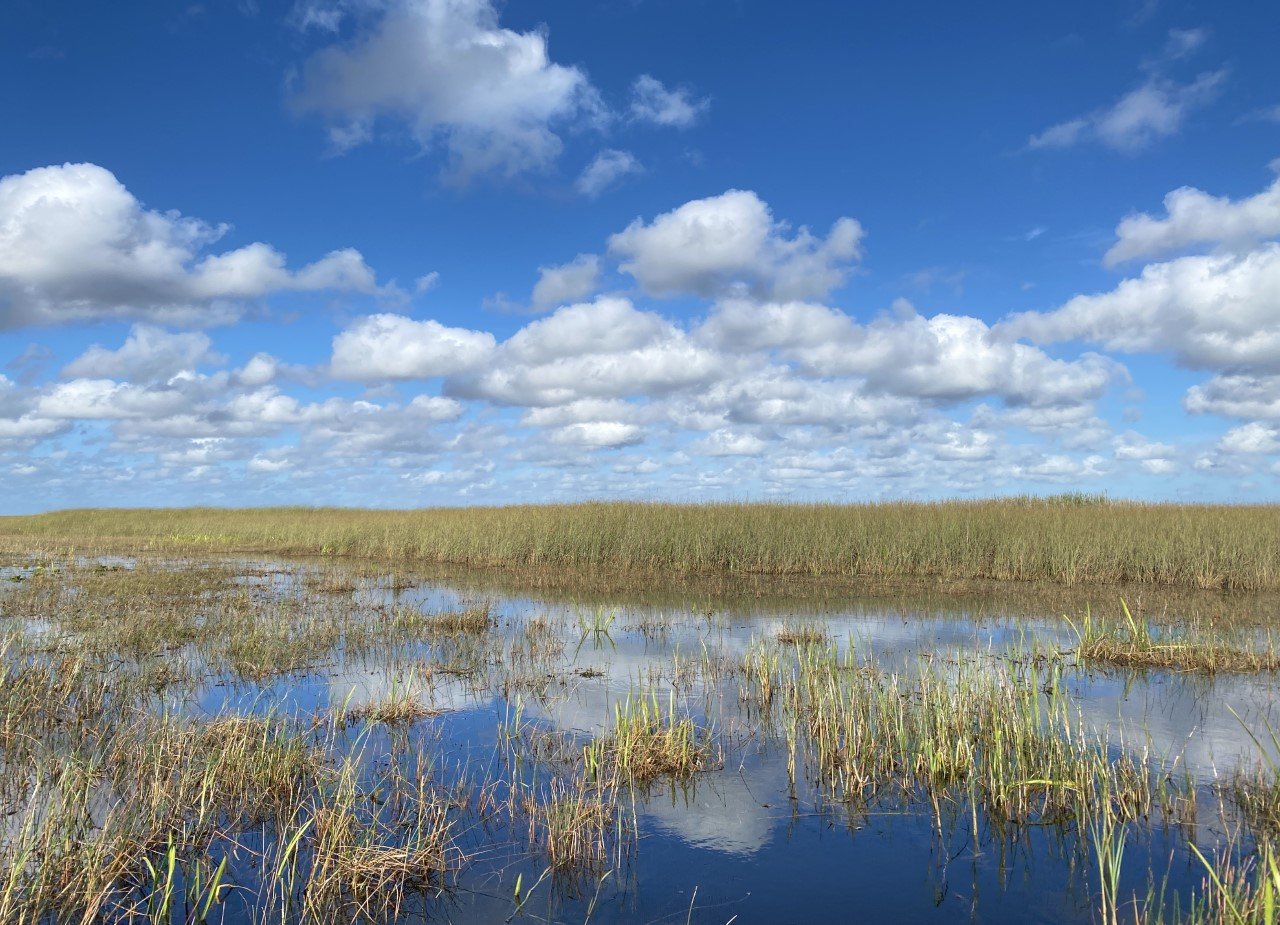
A beautiful day for an airboat ride through the Everglades.
Which of these experiences are you adding to your bucket list, or have already crossed off?

Have You Visited This Off-the-Beaten-Path Gem in Massachusetts?
When you think of outdoors adventures in Massachusetts, your mind may wander to the Cape, or hikes in the Berkshires. But have you ever heard of the…
When you think of outdoors adventures in Massachusetts, your mind may wander to the Cape, or hikes in the Berkshires. But have you ever heard of the Quabbin Reservoir?

Although the boats are intended for fishing, they also serve the purpose of pure relaxation.
I visited this reservoir my first year in Massachusetts and wasn’t too impressed. I drove about an hour northeast from Springfield, Massachusetts, to find the Quabbin Reservoir. I parked in the Visitor Center parking lot and got out of my car, eager to hike. Clearly, I didn’t do my research.
As I walked, I realized there wasn’t much hiking at the reservoir. I gazed out at the reservoir, took a few pictures, and left. It wasn’t until last weekend that I realized that the Quabbin Reservoir has way more to offer than I ever thought. And it’s an affordable adventure!
The Quabbin is actually manmade and serves as drinking water for over 3 million people. Boston friends - here’s where your water comes from!
The disheartening part of this park is that in the 1920s, Boston looked westward for a water source, and dis-established four towns in these valleys to create their water source. 2,500 residents in this part of Massachusetts lost their homes as a result.
Since millions utilize the Quabbin Reservoir as their drinking water, there are several restrictions on activity: Dogs, grilling, and swimming aren’t allowed. You might wonder what there is to do at the Quabbin then. What I didn’t know about the Quabbin Reservoir is that the Department of Conservation and Recreation (DCR) provides boat rentals (and kayaks!) for fishing. Now I’m not an avid fisherman, but after trying out my hand at flyfishing in Idaho, I thought I’d give it a try.
I headed out to the Fishing Area 1 parking. If you visit the Quabbin after 12:30 PM, boat rentals are $36 (including a $6 parking fee).

A view of the Quabbin Reservoir once you jet off in your motorboat.
You need a flotation device, but they provide one if you forget yours or don’t have one.
The beauty of the Quabbin is that it’s untouched since you can’t swim in it and there aren’t many hiking opportunities. There is a walking path around the Visitor Center, as well as two viewpoints at the Enfield Look Out and the Quabbin Tower. Otherwise, the Quabbin is really known amongst fishermen.
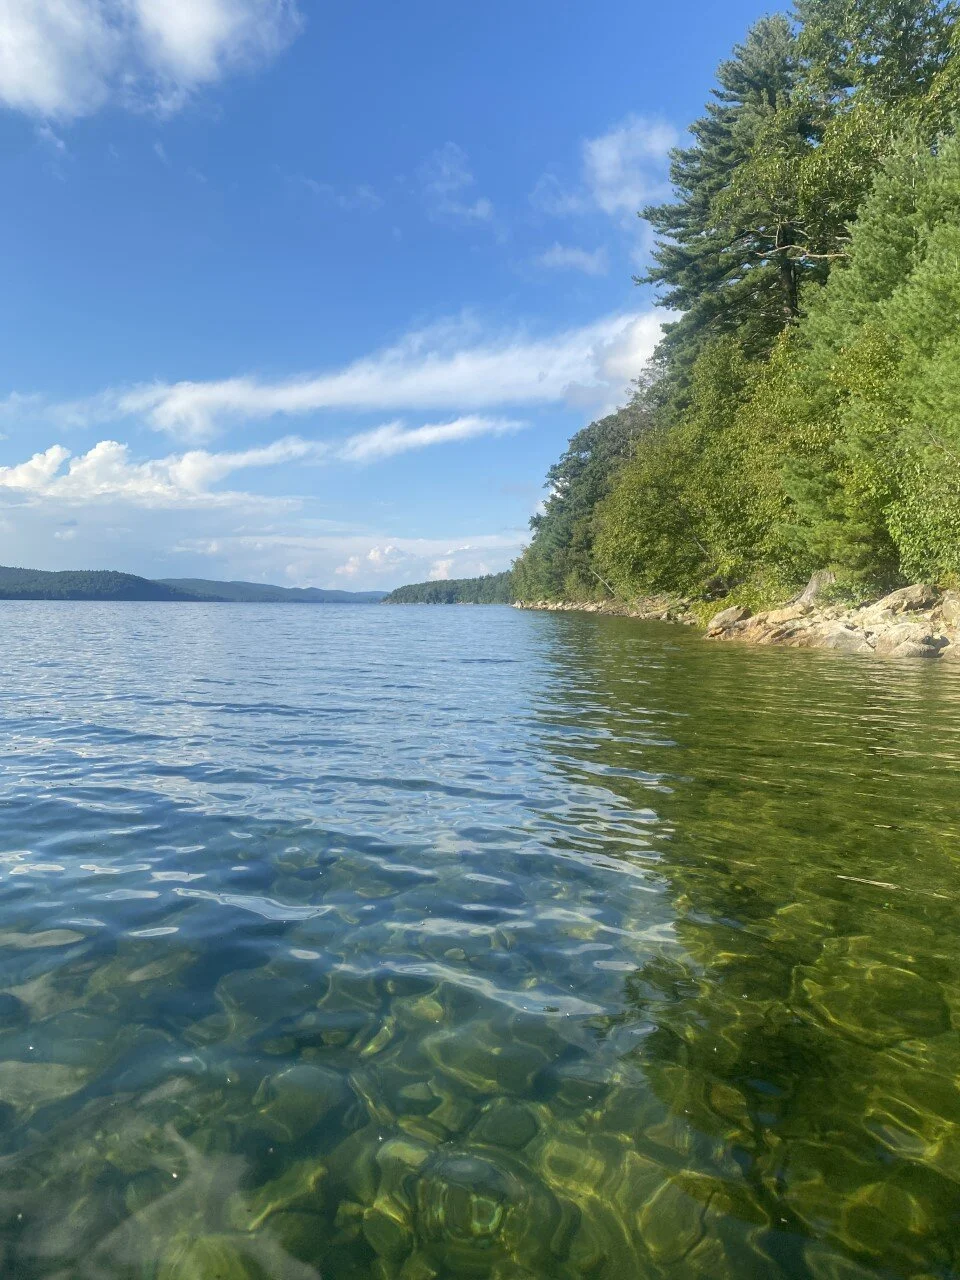
The motorboat fits three adults or two adults and two children. I hopped into one and set off deep into the Quabbin on a gorgeous, bluebird day. The only other boat I encountered was the DCR reminding me to return the boat an hour and a half before close.
Where else will you find pristine, clear blue water like this without a soul in sight? It felt like I was back in the alpine lakes of Idaho or Montana. The best part was I was only a half hour drive from home and spent $36 for a new afternoon adventure.

Clear water and views for miles with no boat in sight.
Boats are available to rent during the Quabbin Fishing Season, which this year is from Saturday, April 17th to Saturday, October 16th. Can you just imagine the foliage colors in a couple weeks contrasting with this water? I may need to go back sooner than I planned.
Have you ever considered visiting a reservoir for a day trip? Is the Quabbin Reservoir on your list of places to visit in Massachusetts now?

How I Traveled Across the U.S. for Less Than $1,000
Almost anyone can rent a cargo van, throw a mattress in the back, and travel the U.S. with a little planning…

A few days into van life and still smiling!
When planning our summer road trip, we set our eyes on what we believe to be a hidden gem in this country: the Sawtooths mountain range. One glance at these peaks will leave you mesmerized. And so began our planning phase. The trip was originally going to start with a flight from Boston to Boise and back. Below is how we brainstormed from there, while remaining budget-conscious.
Our final trip took us from Western Massachusetts to Idaho and back home. Here are all the places we explored or stayed in:

Columbus, Ohio > St. Louis & Kansas City, MO > Southern Colorado > Southeastern Utah > Twin Falls, Boise, and Sawtooth Mountains, ID
How to Start Planning Your Trip
We initially wanted to fly out to Boise and try out the RV or van life via renting. Flights from Boston to Boise hovered around $500. We were going to bite the bullet: purchase the flights to Boise and rent a renovated van or small RV for around $140-$200 a day. As I started to get to the final page of payment for the van, the numbers added up. Big time.
Not only is there a charge each day of renting, there is an additional required insurance (understandable of course), as well as a hefty fee for driving more than 100 miles per day. Crunching those numbers led to a few thousands of dollars spent on housing, transportation, and flight for a two-week trip. One website we researched was Wander Vans, which for a two-person van for 14 days totaled to $2,200. Additional mileage over 125 (for this specific company) was 35 cents per mile. That total doesn’t include insurance, which was an extra requirement. These vans were sold out for the dates we wanted, but was one of the cheapest options we found. Others grew exponentially from there.
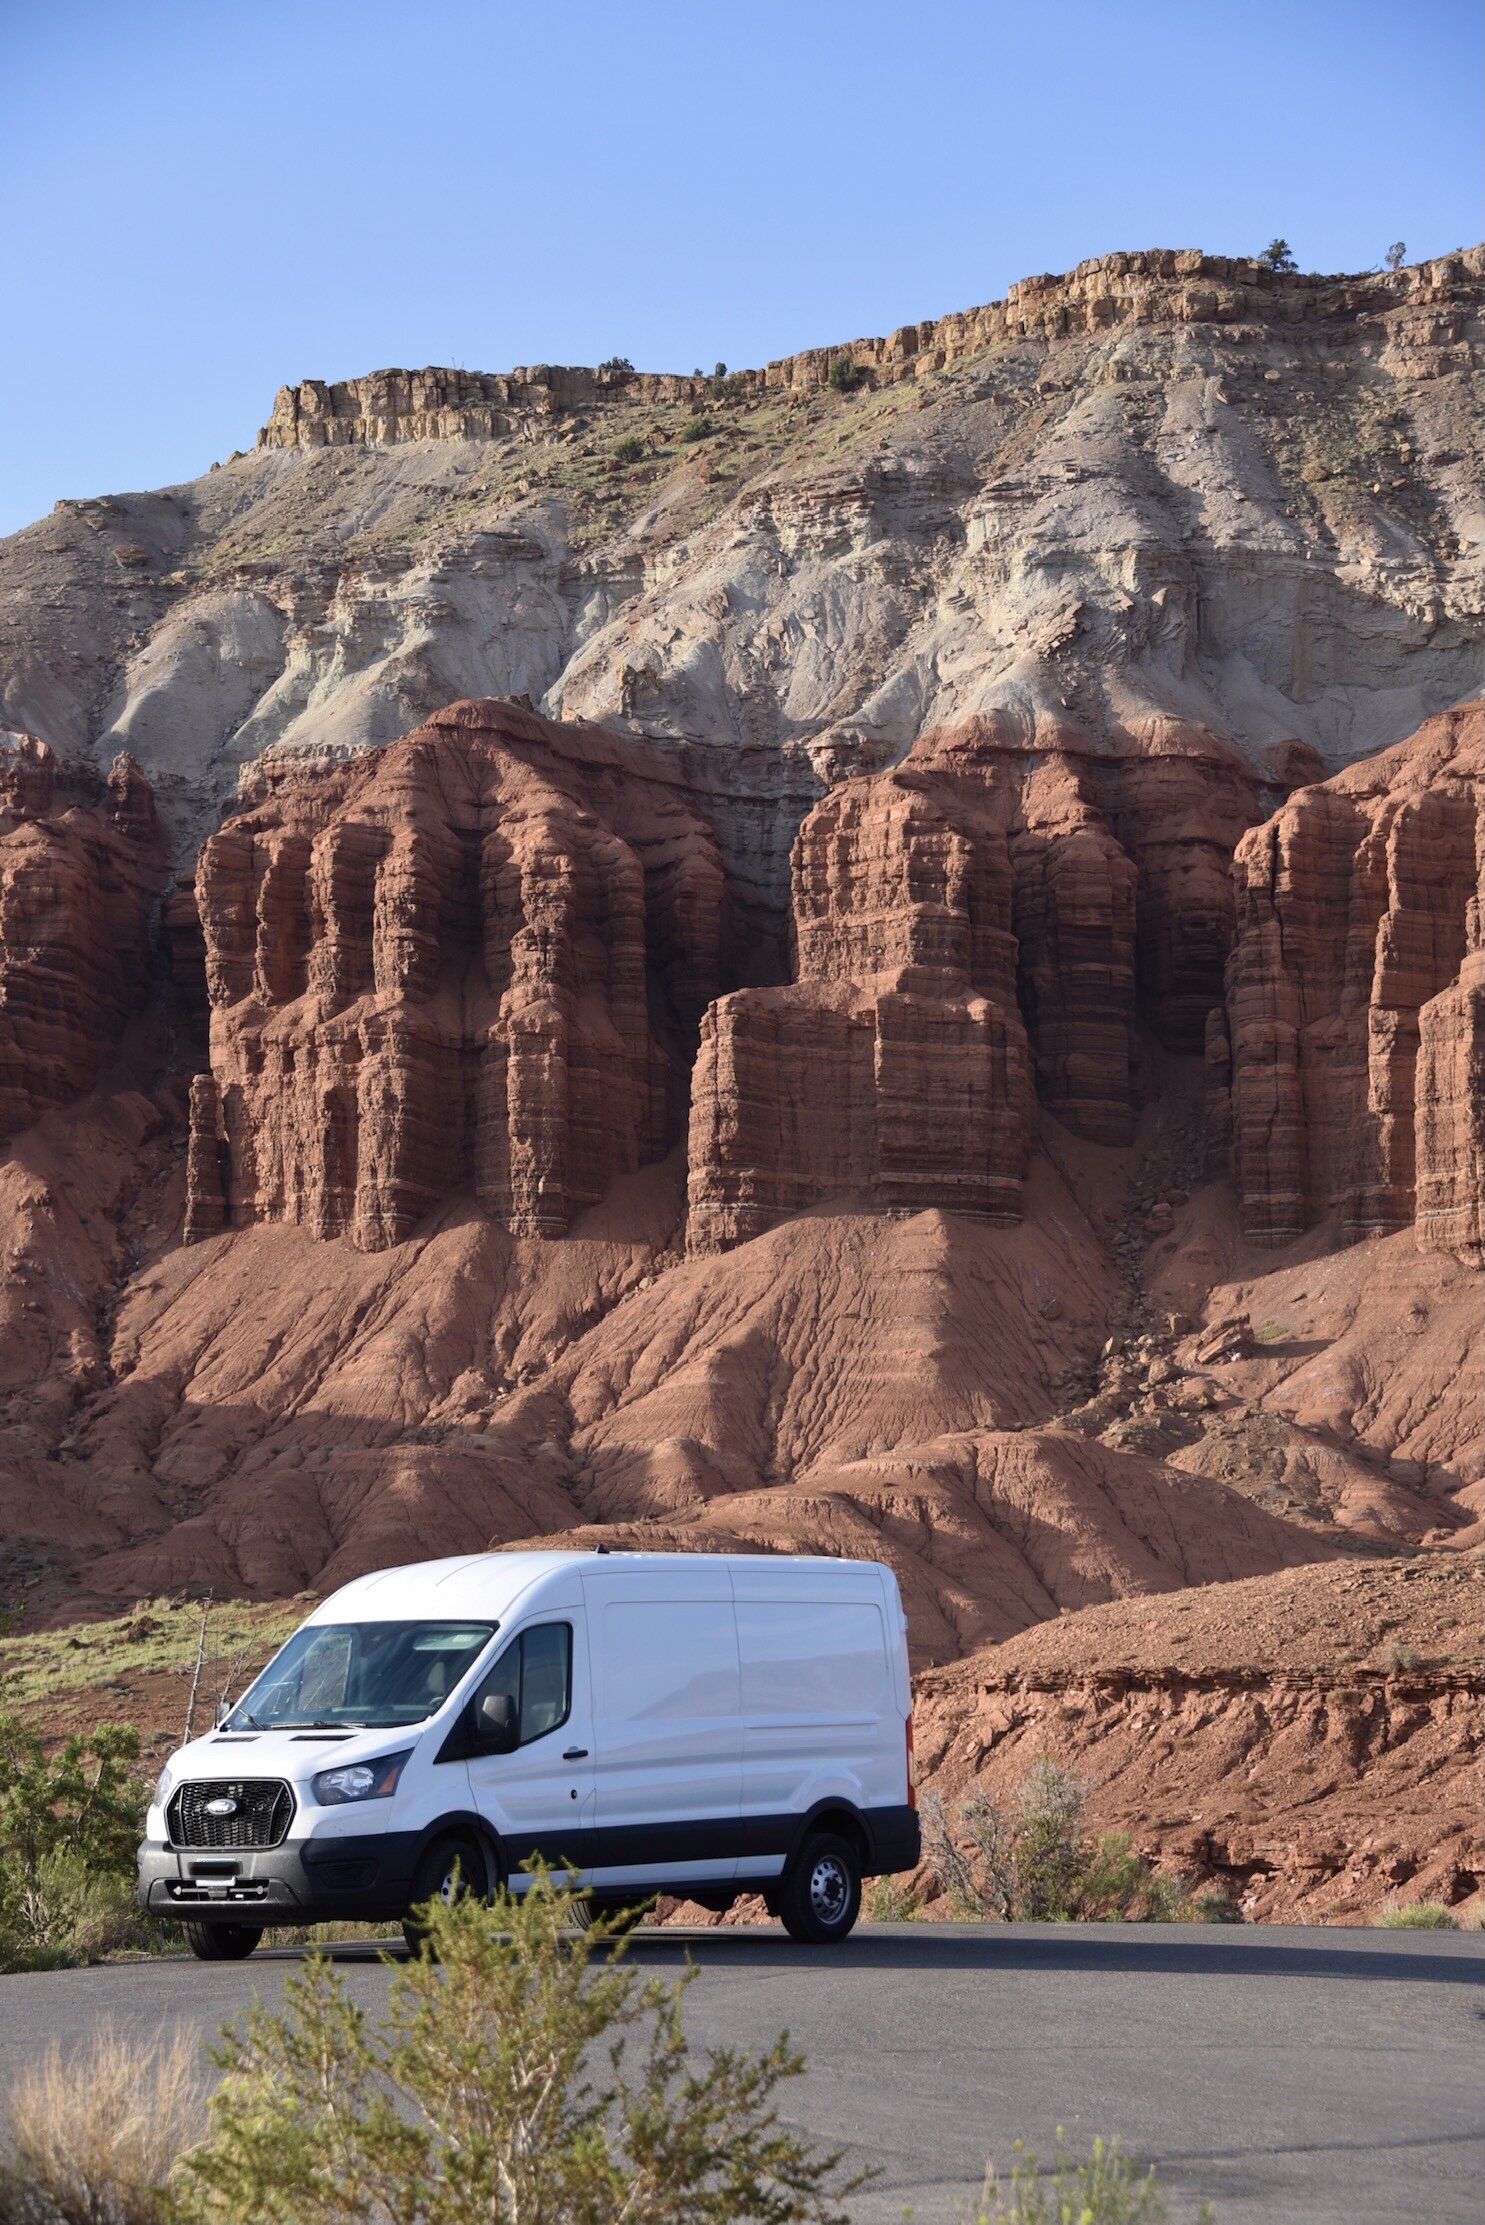
Not a bad spot to enjoy the sunset in Capitol Reef National Park, Utah.
We loved the idea of having a car and housing in one, and of course insurance and cleaning fees are part of that when renting. We tried to justify the expenses by pointing out the van is both the mode of transportation and place to crash each night, but ultimately decided there had to be a cheaper way.

The van’s traveled to some neat places so far like the Black Canyon of the Gunnison National Park in Colorado.
And thus, the road trip idea took a different turn. I used Priceline this time around to book a rental car. When selecting an option (I usually get an SUV to fit all of our camping necessities), I came across a cargo van option. I may be late to the game (or never really had to move things around), but cargo vans are an option? And cost less than an SUV? Not sure where I’ve been this entire time, but I’m glad I came across it.

Making our way through the Southeastern corner of Utah.
The total cost for a two-week rental was $612, but we added in an extra day for $60. The taxes and fees came out to $110, so the total cost for renting a cargo van in Western Massachusetts was $785. We split up travel costs, so my half came out to slightly under $400.
If you’ve read my previous post, 7 Lessons I’ve Learned Road-Tripping Across the U.S., you’ll know I never skimp out on rental car insurance. Of course it’s up to you, but it did add $500 to the total trip. Again, $250 on my end.
Where to Stay
Now that transportation was secured, we needed a place to stay everywhere we traveled. At first, as I mentioned, we looked at transportation that included a stay (i.e. an RV or van). When we threw that out the window and added in the cargo van, we considered Airbnbs. We love a good Airbnb, but for 14 nights, the cost would add up swiftly. So that was out.
With the cargo van, we knew we had two seats in the front and a large space for our needs in the back. The idea for a DIY renovated van was born. We borrowed two air mattresses and an air pump, so the sleeping aspect was covered.
Sure a renovated van with a built in bed, along with ventilation and a heating system would be ideal, but it’s very expensive. Almost anyone can rent a cargo van, throw a mattress in the back, and travel the U.S. with a little planning.
With our bed arrangement figured out, next up was deciphering places to sleep. My favorite option is Kampgrounds of America, or KOA. They are affordable (if you join their membership, you receive 10% off each time – it pays off if you utilize them!) and are all over the U.S. I’ve stayed in cabins and tent sites from the Adirondack mountains in New York to the suburbs of Ohio, to the Badlands in South Dakota. They are everywhere!
The tent sites range based on location. In Moab, Utah, for a tent site with electric plugs and water, it’s $50 a night. You do get a safe location to park, along with wi-fi, showers, and coin laundry at every KOA. For the peace of mind and convenience, it’s worth the price for me! Other not as popular locations, or tent sites without electric can be as low as $30 a night.
If you are budget-conscious as we are, we researched another option. Sure KOAs are great, but we wanted to see how affordable we could go. And that’s when we came across Pilot/Traveling J and Love’s.
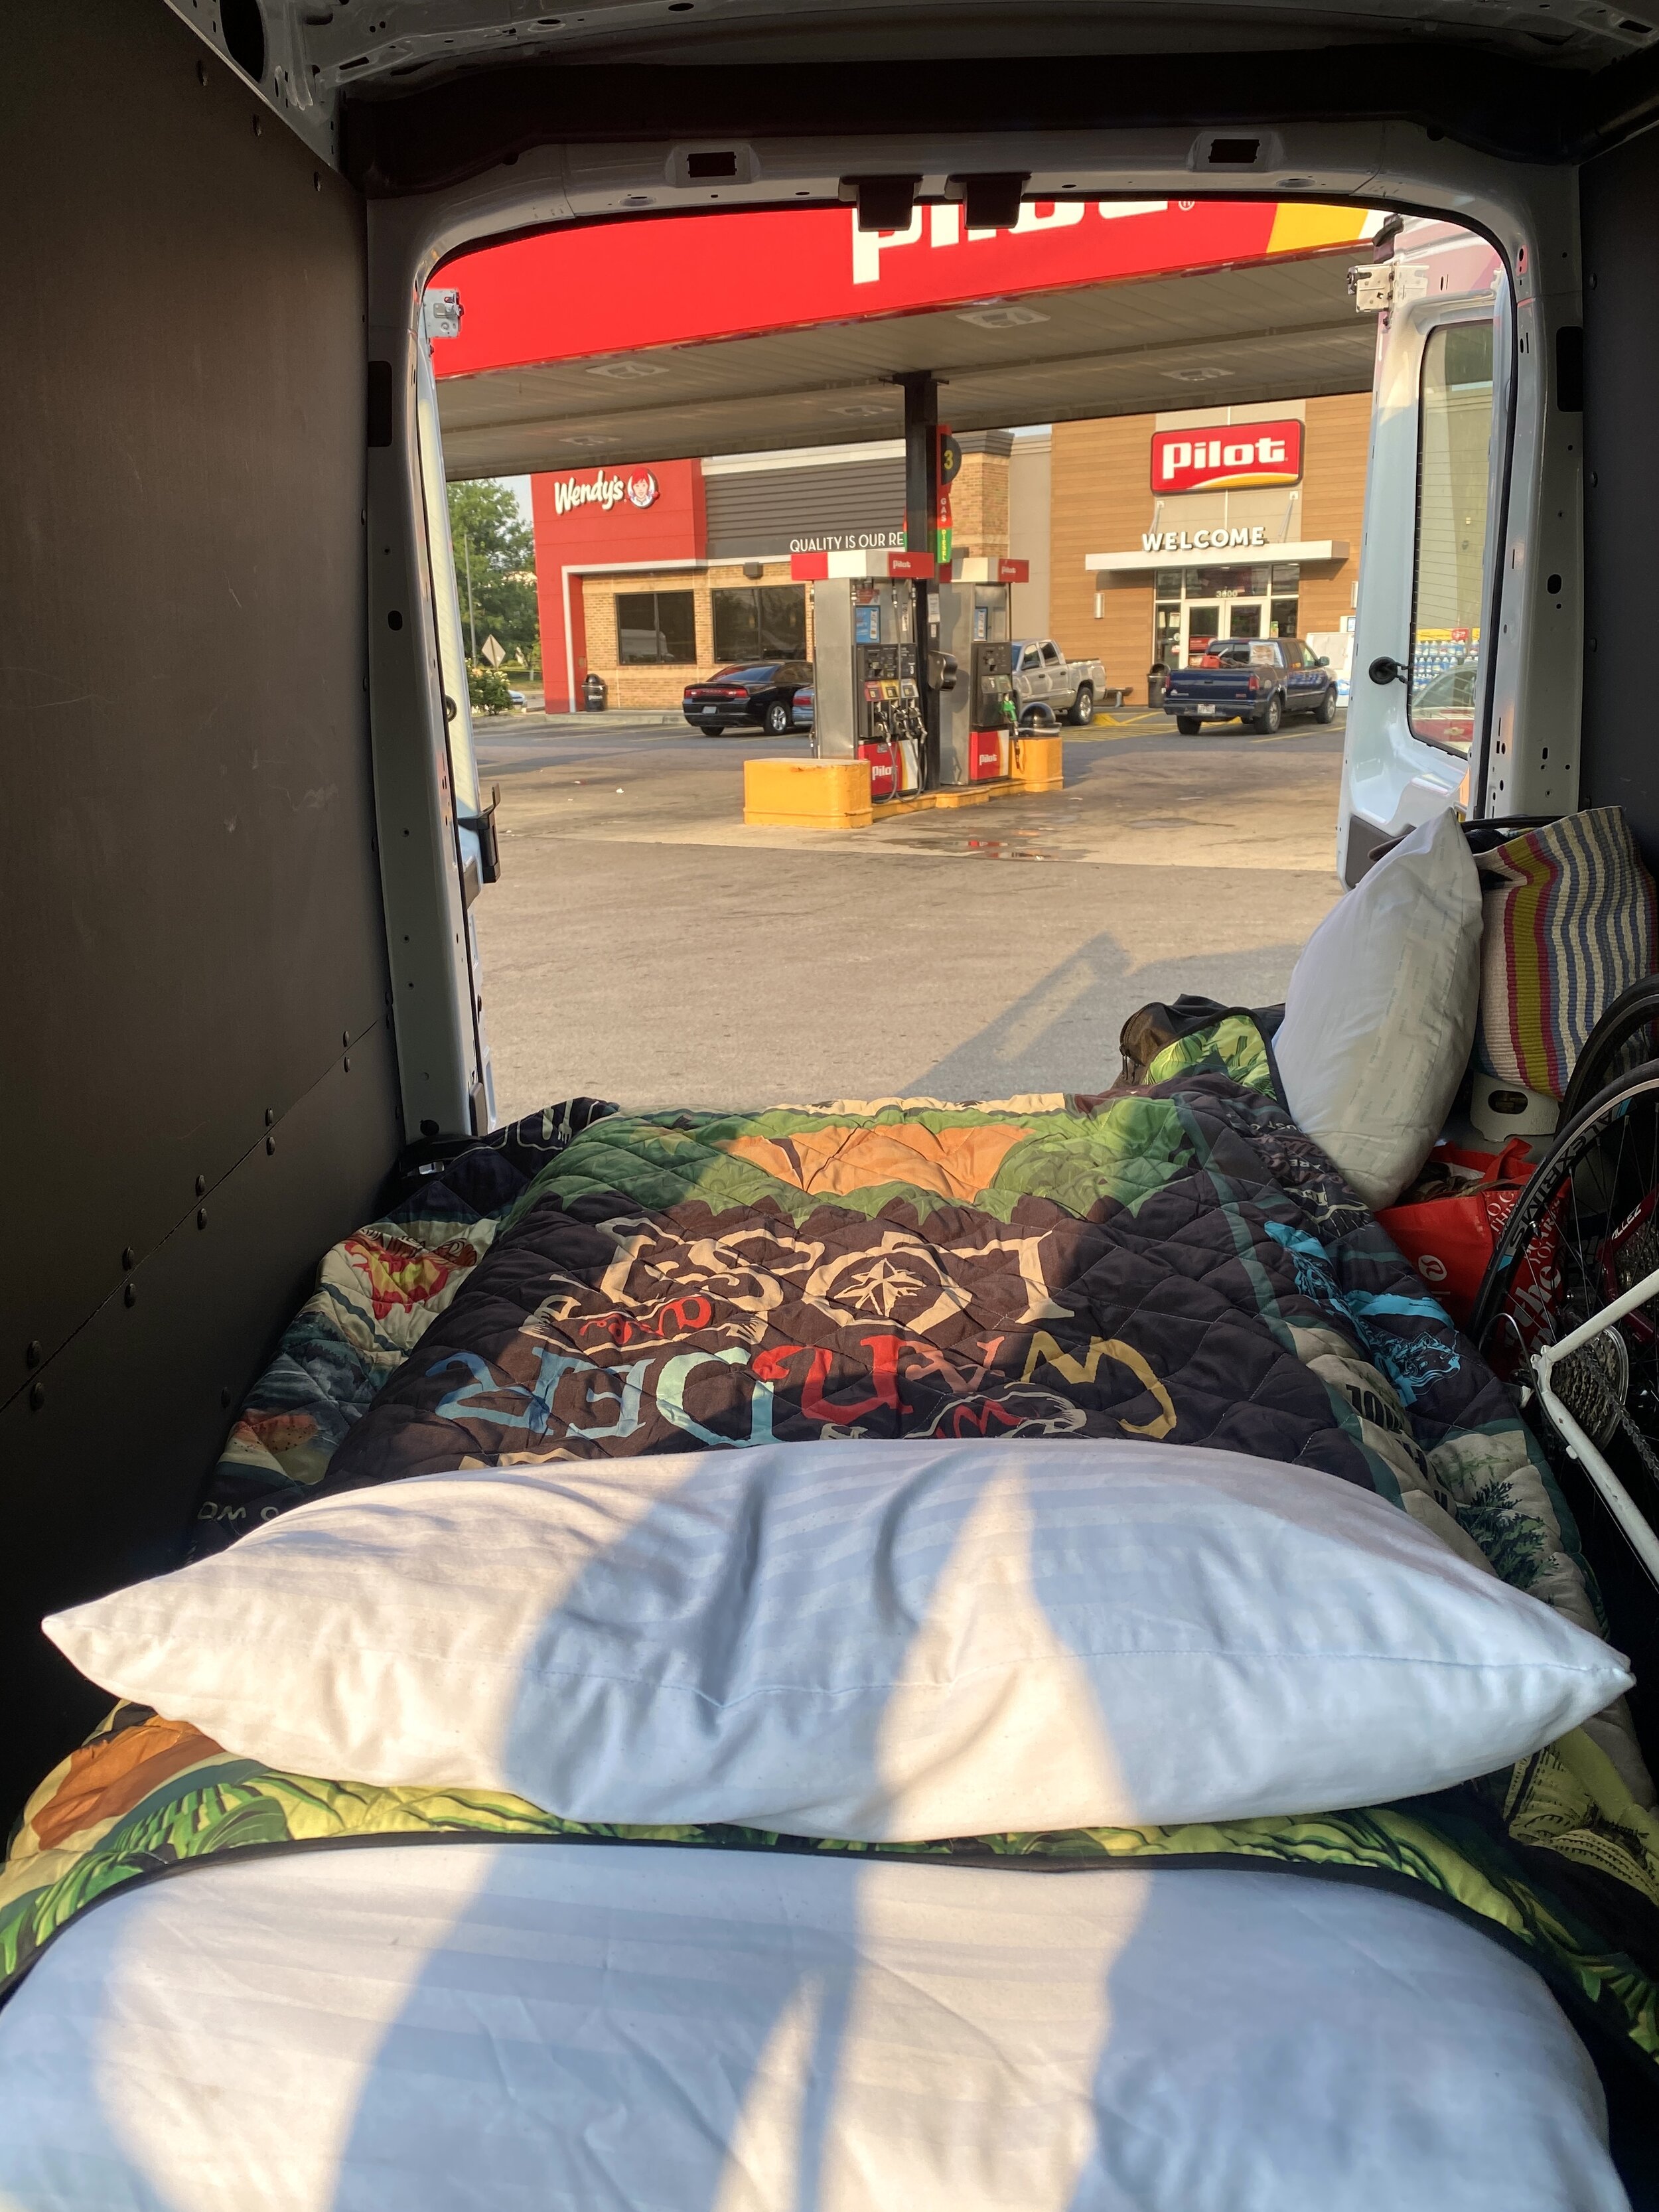
Like I mentioned, van life isn’t always Instagram-worthy, but it sure is great being on the go and saving money. Here’s one of the Pilots we stayed at.
Showers on the Road
Most people know van lifers park in Walmart parking lots overnight for a free stay, but the real gem is a Pilot, Traveling J, or Love’s traveling center. As much as I can go without a shower when on the road or on a camping trip, two weeks might be pushing my limit.
These three companies are all essentially the same: a 24-hour gas station for truckers that provides free restrooms, showers for $13-$15, and overnight parking.
The showers are extremely clean and private. One of the best parts is that it isn’t timed, and they even provide towels (though we used our own). To save even more, you can share a shower if you’re traveling with someone. One person hops in, then on the way out, you can pop in. It’s an easy way to turn a $13 shower into $6.50!
Pro tip: Download the Pilot/Traveling J app for rewards.
Costs not included: Food and Gas
The only costs not included above were food and gas. Gas prices vary based on your trip and time of year. For example, our two-week road trip to Montana last summer included wildly lower gas prices than this trip. In several places along the way we paid $4/gallon. Food can be done in a budget-friendly manner and can look like peanut butter and jelly sandwiches everyday for lunch.
We knew we’d be moving quickly between national parks in Colorado and Utah, so we didn’t always cook our own food. Food is where we splurged to try new coffee shops or the local eateries. A big money-saver is a quick Walmart trip for basics. We bring our own kitchenware, grill, and propane tank, which helps too!
The van life isn’t always glamorous, but with our budget-friendly tips, hopefully it can be accessible for everyone who wants to give it a go. Would you try it out? Do you have any questions on how to start traveling in a van?